Welcome to Frugal with a Flourish!

Enjoy your time here! Don't miss a post by getting email updates any time there is something new. You can also get updates through Google Friend Connect or follow me on Facebook or Twitter to get the latest info and see all the things that inspire me!

[ | Posted in | Add Comment | ]

Trellis patterns are all over!  The pattern of overlapping lines can be as simple as just diamonds and as complicated as the imperial pattern.  How can you use this classic pattern in your home?  Well, I have come up with seven ways to incorporate it into your decor below!  Enjoy! 

1. Overlay it on a Mirror

The contrast of trim over a mirror is a great way to feature the pattern and can really add some great layered texture in a room.

Photo via HGTV

2. Frame Fabric and Hang on Walls

This is a quick and easy way to incorporate different trellis patterns into your decor.  Bonus points if you get your fabric from the remnant bin at your fabric store.

Photo via Pinterest

3.  Use it to Tie Together Accent Pieces

The use of the imperial trellis pattern on the pillows and the ottoman is a great way to add in a vivid pattern and tie the accent pieces in the room together. 

Photo via Decor Pad

4.  Alter an Basic Accessory

This simple DIY lamp makeover is a great way to add a little trellis pattern into your room.  You could also extend this idea to other accessories like a tray, the top of a table or a vase. 

Photo via Caitlin Wilson Design

5.  Use it in your Window Treatments

If busy patterns make you a little nervous – contain them to just your window treatments and leave the rest of your room fairly neutral like the photo below. 

Photo via Decor Pad

6.  Accent the Back of a Bookcase

Love this idea!  Again this is a great way to add a little punch of pattern into a room and create a visual focal point.  

Martha OHara Interiors Showroom  home office

7. Stencil it on a Wall

I think everyone was in love with this stenciled wall that Kate @ The Centsational Girl did in her Master Bedroom.  It was even shown when she was on the Nate Berkus Show!  Stenciling can be subtle – like Kate’s – or more dramatic.  All you have to do is adjust the contrast of your stencil color from your background color!

Photo via Centsational Girl

So there you go!  Seven great ways to add a beautiful and classic trellis pattern into your decor.  So I wanna know, do you like this pattern?  Have any in your home?  Any of these ideas inspire you to add some? 

Linking this up to

Weekend Bloggy Reading with Amanda @ Serenity Now

Pinning and Singing Party with Natasha @ Five Minutes for Me

[ | Posted in | Add Comment | ]

Have you guys missed me?  Sorry for my extended absence – but there has been a lot going on in my world!  :)  I know I owe an update on the Lil Man and then I will be getting back into the routine of regular blogging! 

The lil guy is doing fantastic and is 8 weeks old today!  He is growing like a weed and learning new things everyday!  We have a great time playing and giggling!  I can’t believe how much I love him. 

I made a quick little slideshow of the first 8 weeks of his life to share – I get a little misty each time I watch it!  I hope you enjoy it! 

Click to play this Smilebox slideshow
Create your own slideshow - Powered by Smilebox
Free picture slideshow personalized with Smilebox

I will be back later this week with some more posts and updates on the things I have been up to!  Looking forward to getting back into the blogging world and seeing what all you have been up to as well!!

[ | Posted in | Add Comment | ]

Hey guys – back with another guest post for you guys today and I think you are going to love it!  Today’s guest post is from Tammy @ Not Just Paper and Glue.  I love Tammy – she quickly became one of my favorite bloggy friends.

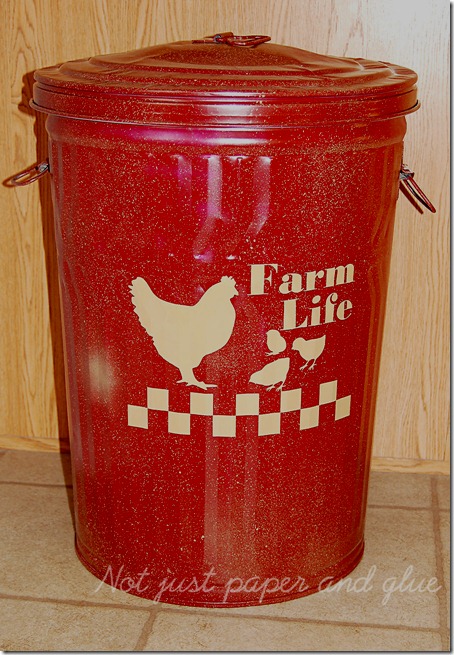
Tammy makes some of the most amazing scrapbook pages and cards, but like her blog says, she isn’t just about paper and glue.  She also does some fun DIY and thrifty projects like this galvanized trash can into dog food container!

Or this awesome lampshade to bucket tutorial!  I love this one!

And she also hosts a Pinterest Master List full of awesome people for you follow on Pinterest.  Make sure you go and add your profile and check out some other people to follow!

Now today – Tammy has another great tutorial to share with us!  I think all you animal lovers are going to love this one!  Enjoy!

~~~~~~~~~~~~~~~~~~~~~~~~~~~~~~~~~~~~~~~~~~~~~~~~~~~~

Hi everyone! Tammy here from Not Just Paper and Glue. I am very honored that Jess invited me to stop in today and share my latest project with all of you while she is on maternity leave.
I purchased an end table from the Salvation Army store for $10 for my little studio and I was going to refinish it. table-in-studio As it goes around here, I ended up not needing it and eventually my husband said he was going to throw it out but I had just found the most adorable idea!
courtesy LucyDesignsOnline.com
When I saw this cute dog bed from Lucy Designs, I knew this is what I wanted to make for my little dogs. My husband also agreed that it was a great idea so we took it into the living room; turned it upside down; and placed my little dogs favorite blanket in it to see if they would get into it.
Table-upside-down
As it turned out, they loved it and was frequently found napping in this upside down table. My husband cut the legs off for me and we used the ends of the legs for feet of the bed.
Table-with-legs-cut-off
Now was the scary part. You see, this would be the very first time that I had ever refinished a piece of furniture. I kept telling myself that it was “only a dog bed”, but still…. I wanted it to turn out pretty.
One evening I got brave and broke out the sander and began trying to rough up the slick finish of the table. When I was finished I wiped it down really well to remove any dust particles.
Sanding 
I wanted the basic color to be an antique white but envisioned some distressing of the original brown color but also some pink. To achieve this look, I gave the entire piece a random coat of Sweet Pea spray paint and let it dry overnight.
Table-in-Pink
The next morning I used my favorite spray paint color, Heirloom White. I wanted to make sure that I gave the entire piece a good smooth coverage of paint. When finished I realized that some of the pieces, especially on the posts, I noticed that it did not completely cover, but this was happy mishap. When the bed was dry I noticed that it gave a great worn and distressed look by allowing just some of the pink to show through – just the look I was trying to achieve!
Dog-Bed-in-White Distressed-post
It needed a bit more distressing so I used my sander to just “bump off” a few areas, and also along the edges of the bed.
It was now time for the fun part – decorating! I purchased some wood appliques from Hobby Lobby at 40% off ($2.40 total) along with a package of wooden balls ($1.79) and I spray painted them with the Heirloom White.
Decorative-Wood-Supplies  Decorative-Pieces-Painted
Once the wooden pieces were dry, I brushed Modge Podge over the top and lightly dusted some Light Pink Glitter Crystals over the top of each piece and set them aside to dry. You didn’t think I could do a project without adding a little “bling” now did ya? lol
You will notice I am using a make up sponge to apply the Modge Podge. I couldn’t find my sponge brushes and then I remembered… I donated them to our Children’s Church. In a pinch, a make up sponge will work – or at least it did in this case.
Adding-Modge-Podge  Adding-Glitter
Once the pieces were dry, I used Wood Glue to attach all of the pieces to my dog bed.
adding-glue-to-pieces  Decorative-Pieces-upclose
I couldn’t believe the bed was finally complete and I was completely satisfied with the end result. I don’t know why I was so scared to start this project – it was easy!
Dog-Bed-corner  Dog-Bed-Details-outside
And here is my “little princess” in her new bed. She knows that no one will say anything about her bad hair cut since she really is a “princess” and she is lounging in her adorable bed.
The-PrincessMidge is an overweight, elderly AKC Yorkie and this is not one her “better days”.
NOTE: We did not remove the screws that hold the table together which you may have noticed in earlier pictures. We put an oversized pillow in the bottom with a velour throw blanket over the top. Both dogs have been using this bed for some time now and it has not been an issue for us. If you decide to make one of these beds, you may want to use an alternative method to hold the table together.
Supplies: Table (Salvation Army) Sander Artistic Appliques: Floral Pair and Small Flower (Hobby Lobby) Spray Paint: Sweet Pea and Heirloom White (Rust-oleum) Glitter: Light Pink Crystals Glitter (P K Glitz)  Modge Podge (Satin) Wood Glue (Gorilla Glue) I want to thank Jess for allowing me to visit with all of you today. I hope you enjoyed my very first attempt at refinishing a piece of furniture. If you decide to attempt something like this, I would love take a peek!

~~~~~~~~~~~~~~~~~~~~~~~~~~~~~~~~~~~~~~~~~~~~~~~~~~~~~~~

Tammy – I think this is just too cute and creative!  And I am with you!  I would love to take a peek at something like this if someone takes a crack at it!  What about you?  Does this give you some ideas??  I wanna know!

[ | Posted in | Add Comment | ]

Hey guys!  Sorry for the extended absence – we have had a ton of family and friends rotating through and I haven’t had any time to hop on the computer.  I haven’t even been on Pinterest for weeks until today!  And I know I owe you guys some updated pics of the Lil Man – stay tuned for some of those soon!

However today I am back with one of my favorite bloggers – Leslie @ The Design File.

Leslie writes a fantastic blog all about design trends, ideas, and advice.  I love her blog because she writes about such great topics including DIY tips (check out her article on tips for choosing a chair to reupholster),

features fantastic home tours,

and great products and shopping advice

Last year she did a series on 30 days of design ideas for under $30 that you just have to read – I loved this one! 

Leslie also does great thoughtful commentaries on design trends – and she has been kind enough to share one of these with us today!  So with out further ado – here is Leslie!

~~~~~~~~~~~~~~~~~~~~~~~~~~~~~~~~~~~~~~~~~~~~~~~~~~~~~~~~~~~~~

Over at The Design File we’ve been talking recently about design trends and my favorite discussion has been about the use of little fur rugs on sofas, ottomans and other furniture pieces.

I love this trend and I remember that the first time I noticed it is when my mom threw a small IKEA sheepskin rug over an ottoman several years ago. It looked fantastic.

Now, I see them everywhere.

The photo at right is a pre-Design Star room from winner Emily Henderson.

Henderson, who now is the host of the show Secrets from a Stylist, loves doing this.

Below you’ll find two more of her rooms.

The one on the left is from Secrets from a Stylist and was from an early version of the room. I don’t think the final design included the fur. The one below right is another pre-Design Star room that Emily submitted as part of her application to be on the show. I like it better!

fur on chairs - Emily Henderson

But it’s not just Emily.

Sherry & John over at Young House Love have a little fur rug thrown over an ottoman in their living room. They’ve actually used these little pieces all over their old and new houses.

John & Sherry - Young House Love - sheepskin-1

I found the beautiful dining room below at Apartment Therapy from a 2010 post about how faux fur rugs are showing up all over dining room chairs.

I wonder what you have to do to get the cushy chair for dinner?

fur on dining chair - Apt Therapy

Raina of Alberta, who has a blog called Raining Sheep and posts photos on Flickr, has sheepskin over the sofa in her cool, modern living room, pictured below.

Raina has used the throw the look with a cow-hide rug too. That may be too much animal fur/print for me but it seems to work well here.

Raina living room raining sheep

What do you think of this trend? I love it but will it be over soon?

~~~~~~~~~~~~~~~~~~~~~~~~~~~~~~~~~~~~~~~~~~~~~~~~~~~~~~~~

Leslie – I think this is a trend that will keep making an appearance time and time again.  Furs have been around since the dark ages, and while then they were a necessity for warmth, they still provide the ascetic features of creating a cozy feeling.  I think this is one that we will see continue, especially as the weather turns cooler every year!  The size and shape may vary – but I think the fur look will always be with us!

So what about you?  Do you think fur as a design trend is one that will continue?  Leslie and I would love to know your opinion! 


Related Posts with Thumbnails