Hey guys – back with another guest post for you guys today and I think you are going to love it! Today’s guest post is from Tammy @ Not Just Paper and Glue. I love Tammy – she quickly became one of my favorite bloggy friends.

Tammy makes some of the most amazing scrapbook pages and cards, but like her blog says, she isn’t just about paper and glue. She also does some fun DIY and thrifty projects like this galvanized trash can into dog food container!

Or this awesome lampshade to bucket tutorial! I love this one!

And she also hosts a Pinterest Master List full of awesome people for you follow on Pinterest. Make sure you go and add your profile and check out some other people to follow!

Now today – Tammy has another great tutorial to share with us! I think all you animal lovers are going to love this one! Enjoy!
~~~~~~~~~~~~~~~~~~~~~~~~~~~~~~~~~~~~~~~~~~~~~~~~~~~~
 | Hi everyone! Tammy here from Not Just Paper and Glue. I am very honored that Jess invited me to stop in today and share my latest project with all of you while she is on maternity leave. |
I purchased an end table from the Salvation Army store for $10 for my little studio and I was going to refinish it.  As it goes around here, I ended up not needing it and eventually my husband said he was going to throw it out but I had just found the most adorable idea!
  courtesy LucyDesignsOnline.com
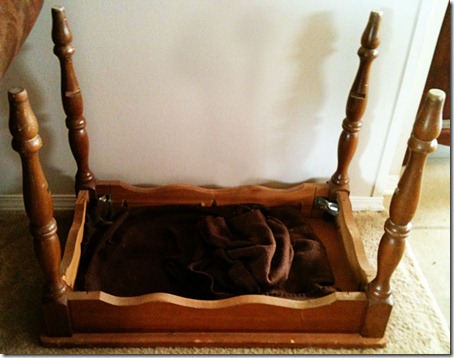
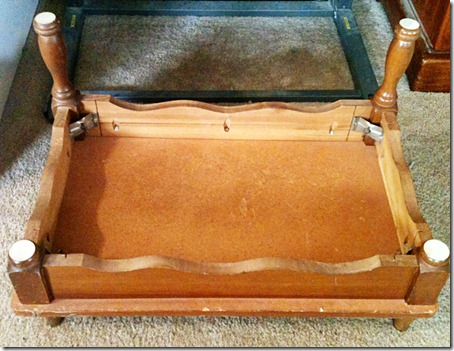
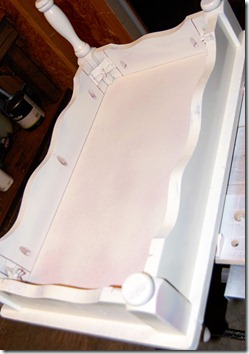
As it turned out, they loved it and was frequently found napping in this upside down table. My husband cut the legs off for me and we used the ends of the legs for feet of the bed.
Now was the scary part. You see, this would be the very first time that I had ever refinished a piece of furniture. I kept telling myself that it was “only a dog bed”, but still…. I wanted it to turn out pretty.
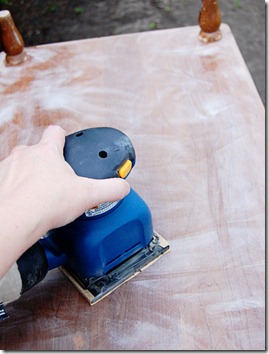
One evening I got brave and broke out the sander and began trying to rough up the slick finish of the table. When I was finished I wiped it down really well to remove any dust particles.
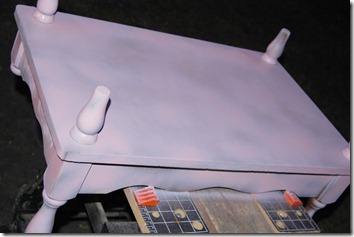
I wanted the basic color to be an antique white but envisioned some distressing of the original brown color but also some pink. To achieve this look, I gave the entire piece a random coat of Sweet Pea spray paint and let it dry overnight.
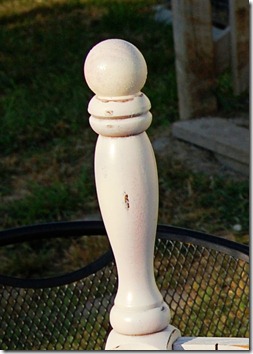
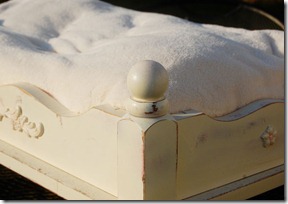
The next morning I used my favorite spray paint color, Heirloom White. I wanted to make sure that I gave the entire piece a good smooth coverage of paint. When finished I realized that some of the pieces, especially on the posts, I noticed that it did not completely cover, but this was happy mishap. When the bed was dry I noticed that it gave a great worn and distressed look by allowing just some of the pink to show through – just the look I was trying to achieve!
It needed a bit more distressing so I used my sander to just “bump off” a few areas, and also along the edges of the bed.
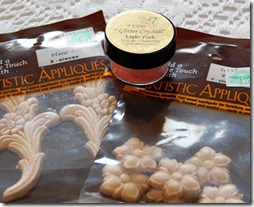
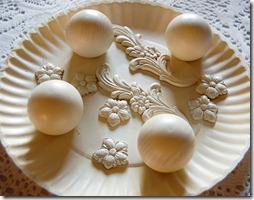
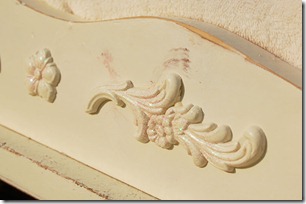
It was now time for the fun part – decorating! I purchased some wood appliques from Hobby Lobby at 40% off ($2.40 total) along with a package of wooden balls ($1.79) and I spray painted them with the Heirloom White.
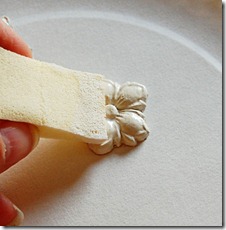
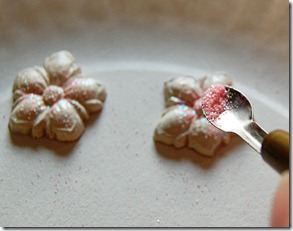
Once the wooden pieces were dry, I brushed Modge Podge over the top and lightly dusted some Light Pink Glitter Crystals over the top of each piece and set them aside to dry. You didn’t think I could do a project without adding a little “bling” now did ya? lol
You will notice I am using a make up sponge to apply the Modge Podge. I couldn’t find my sponge brushes and then I remembered… I donated them to our Children’s Church. In a pinch, a make up sponge will work – or at least it did in this case.
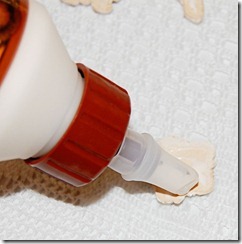
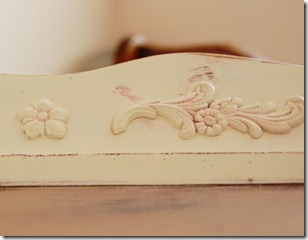
Once the pieces were dry, I used Wood Glue to attach all of the pieces to my dog bed.
I couldn’t believe the bed was finally complete and I was completely satisfied with the end result. I don’t know why I was so scared to start this project – it was easy!
And here is my “little princess” in her new bed. She knows that no one will say anything about her bad hair cut since she really is a “princess” and she is lounging in her adorable bed.
 Midge is an overweight, elderly AKC Yorkie and this is not one her “better days”.
NOTE: We did not remove the screws that hold the table together which you may have noticed in earlier pictures. We put an oversized pillow in the bottom with a velour throw blanket over the top. Both dogs have been using this bed for some time now and it has not been an issue for us. If you decide to make one of these beds, you may want to use an alternative method to hold the table together.
Supplies: Table (Salvation Army) Sander Artistic Appliques: Floral Pair and Small Flower (Hobby Lobby) Spray Paint: Sweet Pea and Heirloom White (Rust-oleum) Glitter: Light Pink Crystals Glitter (P K Glitz) Modge Podge (Satin) Wood Glue (Gorilla Glue) I want to thank Jess for allowing me to visit with all of you today. I hope you enjoyed my very first attempt at refinishing a piece of furniture. If you decide to attempt something like this, I would love take a peek! ~~~~~~~~~~~~~~~~~~~~~~~~~~~~~~~~~~~~~~~~~~~~~~~~~~~~~~~
Tammy – I think this is just too cute and creative! And I am with you! I would love to take a peek at something like this if someone takes a crack at it! What about you? Does this give you some ideas?? I wanna know!


 As it goes around here, I ended up not needing it and eventually my husband said he was going to throw it out but I had just found the most adorable idea! When I saw this cute dog bed from Lucy Designs, I knew this is what I wanted to make for my little dogs. My husband also agreed that it was a great idea so we took it into the living room; turned it upside down; and placed my little dogs favorite blanket in it to see if they would get into it.




28 frugal friends said ...
Adorable, Tammy! Seriously stunning for your first piece of refinished furniture. And it looks like your little princess loves it!
Thank you so much for having me over today! :)
Midge is a fabulous model. I prefer the "real" look, not airbrushed and over made up. It does look comfortable and there is no way you could buy a bed of this quality for such a great price.
Now that you've tackled furniture refinishing we will really see you go, I am sure.
Tammy did a terrific job! I have a cat, that thinks she's a dog, who would love something like this! Very nice!
What a great idea Tammy,and a great job for a first timer. The great thing about paint is you can always sand it off or paint over. It is very forgiving. I have two cats and a dog that think they are the rulers of the house. They would all love this.
I am a furniture re-doer who doesn't have enough room for a studio yet, and I love this! The flourishes you added, with the pink glitter are adorable. Fantastic ideas!
I have repainted thrift store and trash day finds, and it is a lot of fun and the results can be terrific! Keep going!
I love what you did with the table - and apparently so does your adorable Midge!! Great repurposing!!
Thanks very interesting blog!
Look into my homepage :: check this out
You have done a great job! I know this bed would be about 300.00 to 450.00 if you bought it. I LOVE YOUR BLOG.
What an inspirational project. So much so that I went yard saleing on the weekend and managed to pick up an old end table. This will be my very first project of this sort but I am excited to see what I can do. Thanks so much for the post and for the inspiration.
such kind of stuff leads towards the success. i am feeling awesome to see such kind of outstanding blog. just loving it.
Cheap king size bedroom sets
Looking for a fertility clinic in Delhi that offers IVF treatment? Look no further than our IIVF Centre in Delhi! Our state-of-the-art facility is staffed by experienced fertility specialists who are dedicated to helping couples achieve their dream of starting a family.
We offer a range of fertility treatments, including IVF, IUI, and more, and we use the latest technology and techniques to ensure the best possible outcomes for our patients.
I really appreciate the details you shared with me thanks for sharing!
I gotta favorite this site it seems extremely helpful very helpful
It absolutely helpful and it has aided me out loads.
I am hoping to give a contribution & assist other users like its helped me. Great job.
You should take part in a contest for one of the best blogs on the web.
I will recommend this site!
Sariska is home to a range of hotels that cater to the diverse needs and preferences of travelers. From budget-friendly guesthouses to luxurious resorts, there is something to suit every budget. The hotels in Sariska are known for their warm hospitality, comfortable rooms, and convenient amenities.
Whether you are looking for a peaceful retreat nature or a base to explore the wildlife sanctuary, Sariska has a hotel for you. Many hotels in the area offer stunning views of the surrounding Aravalli Hills, allowing guests to immerse themselves in the natural beauty of the region. Moreover, some hotels even provide guided nature walks or jeep safaris to enhance their guests' experience of the nearby Sariska National Park.
Really appreciate you sharing this article. Much thanks again.
Everything is very open with a really clear explanation of the challenges.
Really satisfied with all the information I have found in this article.
Excellent post. I was checking constantly this blog and I am impressed.
This is the kind of information that are meant to be shared around the net.D.
Disgrace on the search engines for not positioning this put up higher! D.
Come on over and discuss with my site . D. Thanks =)
This is really interesting, You are a very skilled blogger. D.
I've joined your feed and look forward to seeking more of your great post. D.
Post a Comment
Your comments mean the world to me - so please leave one! It makes my day! I read and try to respond to each one!
Didn't get a response? Check out my tips here to link your email and blog back to your profile.