Welcome to Frugal with a Flourish!

Enjoy your time here! Don't miss a post by getting email updates any time there is something new. You can also get updates through Google Friend Connect or follow me on Facebook or Twitter to get the latest info and see all the things that inspire me!

Showing posts with label Craft Ideas. Show all posts
[ | Posted in | Add Comment | ]

This Halloween, if you want to go beyond your standard Jack-o-Lantern carving on a pumpkin – have I got some ideas for you!  Below are some of the beautiful ideas for decorating pumpkins that I have been collecting on my Fall Inspiration board on Pinterest.  Here are nine different ways to purty up your pumpkin – enjoy!

1.  Paint Them with a Pattern

These painted patterned pumpkins (say that three times fast!) from Lolly Jane Boutique are so cute!  I think I may HAVE to do this! 

Photo via Lolly Jane Boutique

2.  Add a Band of Beans

These lentil studded candles and pumpkins would make such a great centerpiece. 

Photo via HGTV

3.  Stuff them with Christmas Lights

Create twinkling pumpkins with some white lights!  Magical aren’t they!
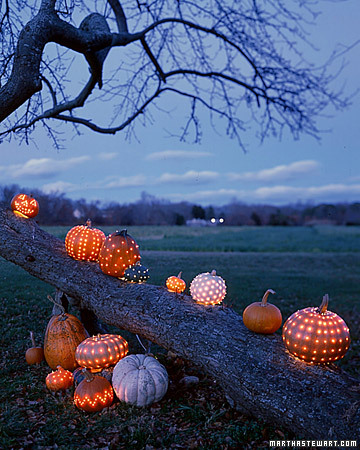
Photo via Martha Stewart

4.  Turn them into Planters

Use your pumpkin as a chic pot for your fall flowers!  Don’t these look cute lining the stairway?

Photo via Habitually Chic

5. Spell out a Message

These are so pretty and I love the lace details!  I can think of all kinds of cute sayings you could put on a set of Pumpkins!

Photo via Seeing Inkspots

6.  Gild them with Gold Paint

Shiny metallic paints can really make a statement on your gourds!

Photo via Country Living

7.  Put some Bling on it!

Get that Bedazzler out and stick some rhinestones on your pumpkin!  I love the spider web detail on this one!

Photo via BHG

8.  Carve out a Monogram

These are so classy!  I love the script initials.  Leave it to Martha to do something so elegant.
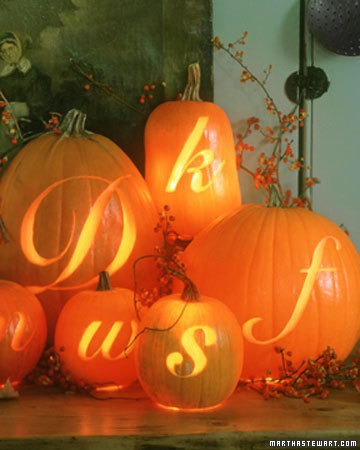
Photo via Martha Stewart

9.  Tattoo them with a Vintage Print

I freaking LOVE this idea that I first saw on Holly’s blog, 504 Main, last year.  Silhouette makes printable temporary tattoos and as Holly figured out – they affix to all kinds of skin, including the skin of pumpkins. 
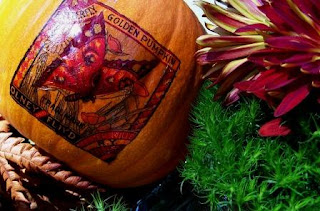
 Photo via 504 Main

So there you go!  Nine different ideas on how to make your pumpkins pop this Halloween!  See any ideas that inspired you?  I wanna know what you loved!

[ | Posted in | Add Comment | ]

I hope everyone is having a fantastic Labor Day weekend!  This is our “anniversary weekend” (what can I say we like to celebrate!) and we have enjoyed a very relaxing time with the Lil Man!  He is too much fun!  In between hanging out with him though – I managed to make a cute fall wreath that I can’t wait to show you guys!  Isn’t it adorable?
DSC09011

Ok – so how did this pretty little creation come about?  Well for starters, I decided I wanted to make a fabric flower wreath after seeing WAAAAY too many that I loved all over blogland and Pinterest.  But I didn’t want to spend a ton of time making fabric flowers.  I do have a 9.5 week old baby that requires a lot of my free time!  So instead of cutting out multiple layers and stacking them – I decided to make two different types of flowers that only require one long strip of fabric.

For the first kind of flower, I took a strip of fabric and folded it accordion style.

DSC08983

Then I stitched the front corner together. 

DSC08985

Next, I cut around the edges one side to make them look more “petal” like.

DSC08986

And then we you unfold it and put both ends together – you get a nice flower!  See!

DSC08988

Then you just run a quick stitch down the ends to keep your flower together.

DSC08989

The second way I came up with was to again fold the flower accordion style and trim the edges.

DSC08990 Then, holding the first petal in the center – I folded each subsequent petal under and around until you make a full “flower”.  Then just throw a couple stitches in the middle to hold all the petals together and you have a flower.

DSC08991

Either one of these methods will allow you to make several flowers very quickly.  I made all the ones for this wreath in an hour one night while catching up on an episode of The Closer.  (I love that show!) 

Then I needed a wreath!  I decided to try out a tip I found on Pinterest and shared on my Facebook page last week.  Instead of paying for a wreath form, I went to Lowe’s and picked up a piece of 6 foot by 1 inch pipe wrap from the plumbing department.  It cost about $1.50 with tax.  And because it was 6ft long – I was able to cut it in half and I can make another wreath out of the rest later on!

DSC08993

The other awesome thing about using this pipe wrap means that you can make your wreath into whatever shape you like.  I decided to turn mine into a tear drop shape and then wrapped it with yarn. 

Next – I used button covers (which you can find with the zippers and other findings in your fabric store) and spray painted them with my favorite can of Krylon ORB!  (Oil Rubbed Bronze – for any newbies)  Rather than stitch them onto the flowers since I was pressed for time – I used a hot glue gun and just stuck them on!  I love that they look a little like Black Eyed Susan's! 

DSC09000

Then I put the flowers on using some stick pins and voila – I had a beautiful scrappy fall wreath!!

DSC09009

How about a few more shots of it?  Ok!

DSC09013

I also made a little hanger by braiding a couple pieces of yarn together.  Cute huh?  I love it!

DSC09002

So there you go!  A quick easy scrappy fall wreath!  I just love how it turned out!  One last picture ok? :)

DSC09004

Alrighty – what do you think?  Think you will make one like it?  Love my quick and dirty flowers?  I wanna know!

Linking this up to

I Made a Wreath out of What? Party with The Nester @ The Nesting Place
Metamorphosis Monday with Susan @ Between Naps on the Porch
Tip Me Tuesday with Laurie @ Tip Junkie
Before and After Party with Sarah @ Thrifty Decor Chick
Get Your Craft On with Kim @ Today’s Creative Blog
Tutorials and Tips Tuesday with Beth @ Home Stores A to Z


[ | Posted in | Add Comment | ]

Today I have another great blogger to share with you guys!  Madigan from Madigan Made is with us today and she is a sweetie!
Madigan is full of great ideas and easy DIY crafts and ideas.  Some of my favorites?  Well I loved this DIY Cornice Project.
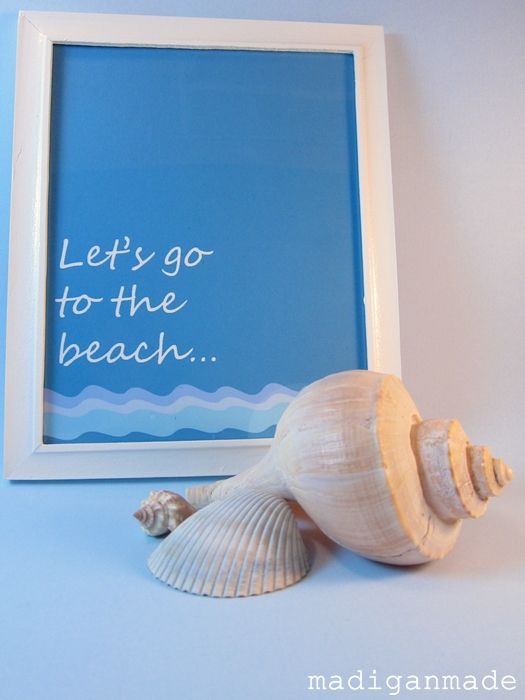
And then there is the beachy printable she made!  Love it.  And she left it for you to download and use on your own!
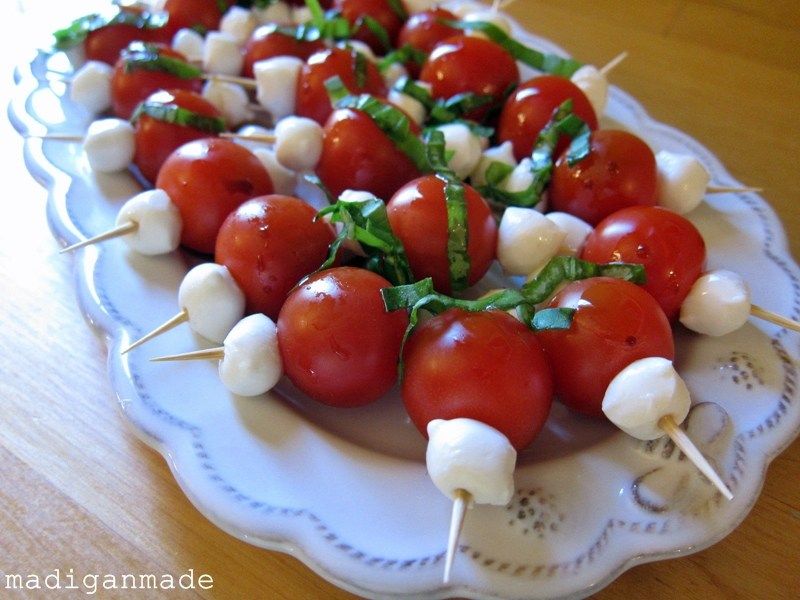
And right now she has a series going on called Summer Loving with NO Oven that features all kinds of yummy summer recipes that you don’t have to go near a hot stove to enjoy!   Loving these Caprese bites!  Delish!
So without any further ado – here is Madigan!
~~~~~~~~~~~~~~~~~~~~~~~~~~~~~~~~~~~~~~~~~~~~~~~~~~~~~~~~~~~
Hi there! I'm Madigan, the writer behind Madigan Made. I'm excited Jess invited me here today!
madigan button
If you are interested in simple crafts, recipes and home decor, then you may enjoy visiting me over at Madigan Made. I love easy and chic ideas and love to share them. (Oh, and I also love my hubby and puppy... and a little dark chocolate and coffee!)

Today I want to share an idea for wall art that involves sports tickets.


I'm a huge fan of personalized art for my home.
Anyone can pick up a print from a home store. I prefer to make it "mine". 

Well, this art project is very personal to  my husband. It is for our sports-themed basement.

Ever since I have known my husband, he saved all his golf score cards and any ticket to a sporting event. He knew that some day he would want to display them, maybe in a media room or basement. I came up with these frames as a way to meet that wish.

These tickets just prove that you can frame anything and it could be art. (if that is what you want to call this!)

Want to make one of these yourself? Well, first you will need:
  • A sports fanatic husband (who loves to golf and is often invited to sporting events by friends and family)
  • Many, many, many sports tickets and golf score cards (Mr. Madigan collected them for 10+ years.)
  • Adhesive (scrapbook glue dots/tabs would work well)
  • Large empty picture frames (I like the ones from IKEA. They are large and come with mats already.)
  • Poster board
First, cut your poster board to about the size of the glass.
Open the frame and using a pencil, draw an outline of the mat opening onto the poster board. Use that line as a guide for laying out your tickets.
You could lay out your pattern before adhering anything. But I just start in one corner and work my way across. Use the adhesive to secure the corners of the ticket to the poster board.
Try to alternate the type and look of each ticket and avoid too many of one kind next to each other. Carefully overlap the tickets when needed. You may need to trim off some of the tickets (I also trimmed down some of the golf score cards, too).
After you've covered the entire mat area, pop it in the frame. Could not be easier!
I love this project because once Mr. Madigan collects enough tickets to fill another one, I can just go and buy another frame at IKEA.
I slowly made these displays over the past several years.  I made six total frames for our basement.
Here are four more of them below.

I bet you could do this with other types of tickets...
For your music lover: Concert tickets?
For your theater or movie buff: show tickets?
For your roller coaster fanatic: Amusement park tickets?
It really is a great way to save and display a memory.
If you like this project, come visit me over at Madigan Made! You can also find me on Facebook, Pinterest, Twitter or StumbleUpon. I enjoy sharing 'behind the scenes' info and other great ideas I find.


Thanks, Jess, for letting me share this project!
(Hope you are enjoying your time with your little one!)

~~~~~~~~~~~~~~~~~~~~~~~~~~~~~~~~~~~~~~~~~~~~~~~~~~~~~~~~~~~~~

Thanks again Madigan for helping out and stopping by!   Didn’t you just love that project?   What a great way to keep mementos.  I think it would be a fun way to organize summer vacay memories too!   What would you make out of it?  I wanna know!

[ | Posted in | Add Comment | ]

Ok today I have another great blogger back today to share some great ideas with you guys!   Brittany from Pretty Handy Girl is an amazing blogger, incredibly talented handy gal, and a great friend!  She has been incredibly supportive for me and I just love her to death!  I got to meet her in person this year at Blissdom and she is just as incredibly friendly and helpful in person as she is on her blog!  Please make sure you head over and check her out if you haven’t already!  

I think you guys will love the project she has up for us today.  Super easy and a great way to customize your own fun party plates!  Enjoy!

~~~~~~~~~~~~~~~~~~~~~~~~~~~~~~~~~~~~~~~~~~~~~~~~~~~~~~~~~~

Congratulations to Jess and her husband! The photos of her little man are sooo sweet! I couldn't be more excited for them both.

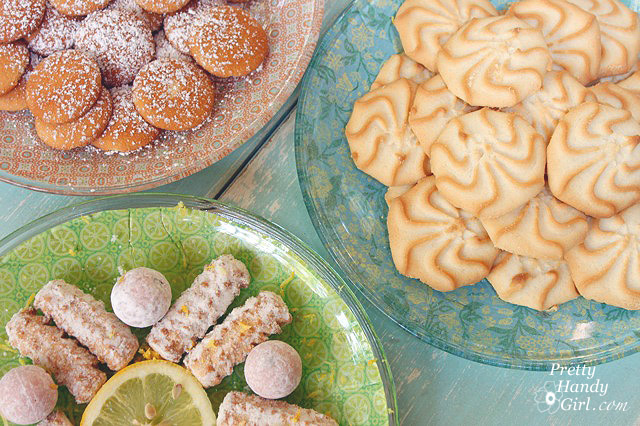
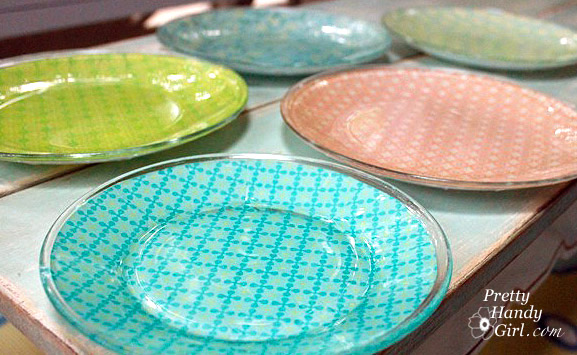
I want to thank Jess for inviting me over today to share with you an easy craft tutorial. I call these my citrus themed glass plates.

First let me take a minute to introduce myself. I'm Brittany, aka Pretty Handy Girl. I write a blog called, what else: Pretty Handy Girl! I'm on a mission to empower people to take on their own DIY project.

Some of my projects have been pretty:

Some of them have been ugly:

Some are fanciful:

And others are adventurous:

Regardless the project, I always provide detailed directions and pictures to help empower you to build it, craft it, sew it, or fix it yourself! I hope you will stop by soon and say "hi!"

Before my 4oth birthday party, I had been scouring the stores for some pretty citrus colored plates to serve sweets on. I was coming up empty-handed, was running out of time, and was concerned about my budget. I happened to stumble upon some glass plates I bought at Goodwill awhile ago. And then the idea hit me! Why not make my own decorative plates! 

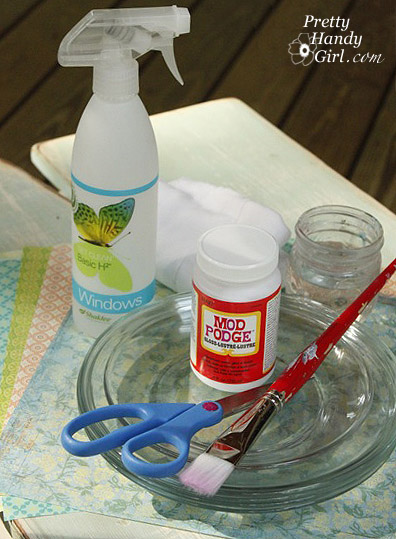
Materials:

  • Mod Podge Glossy
  • Paint Brush
  • Jar of Water
  • Glass Cleaner
  • Paper Towels
  • Scrapbook Paper (thin works better)
  • Glass Plates
  • Recycled Jar or Cans to Dry Plates on
  • Scissors
  • Pencil

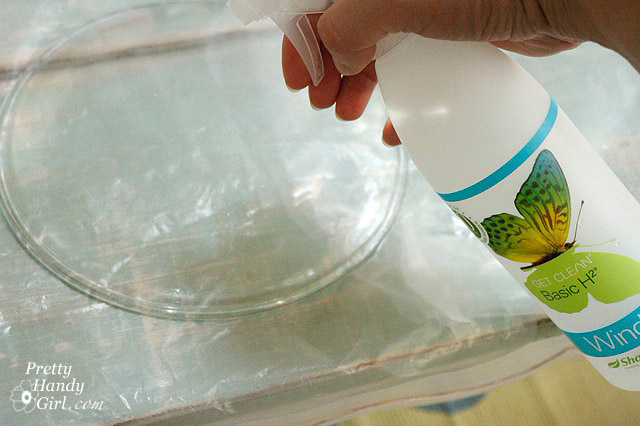
Instructions: 1. Clean the bottom of the glass plates with glass cleaner.

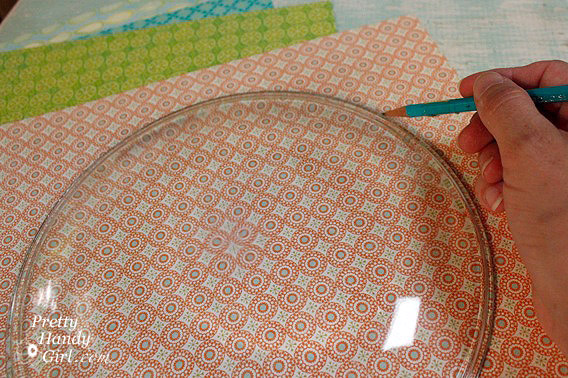
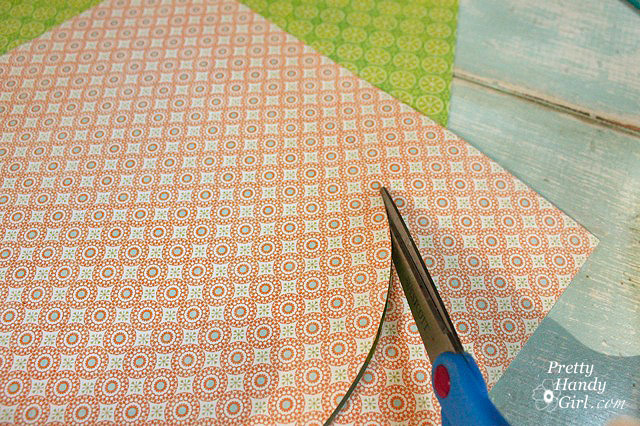
2. Trace around the plate on the scrapbook paper.

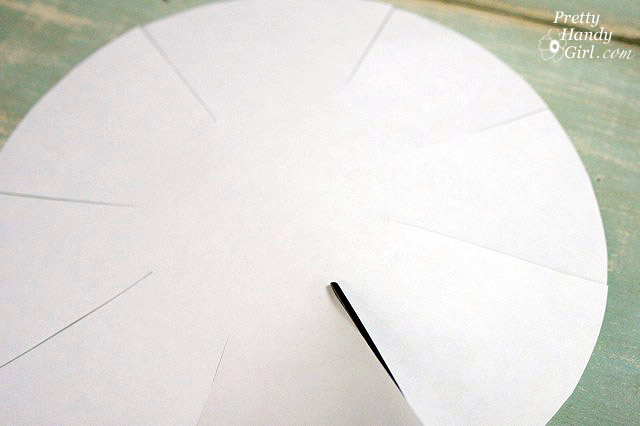
3. Cut out the circle.

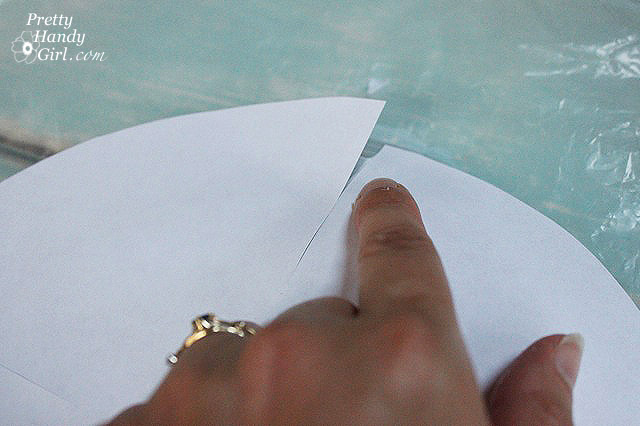
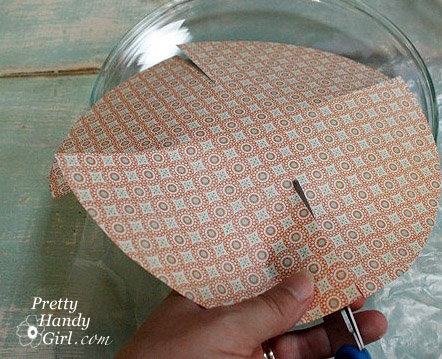
4. Snip four slits into the circle but NOT all the way to the center.

5. Snip four more slits centered between the first set of slits. You should end up with eight cuts equally spaced.

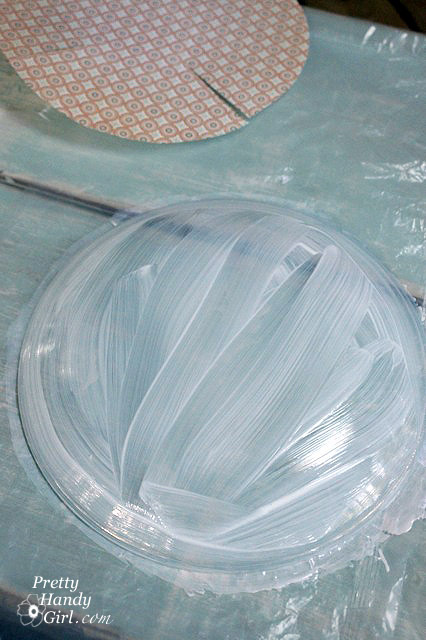
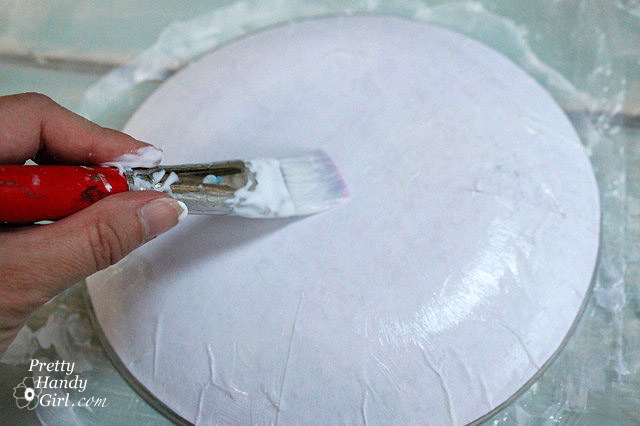
6. Cover the bottom of your glass plate with mod podge.

7. Center the cutout circle onto the bottom of the plate, pattern side down. Gently press the paper onto the plate allowing the paper to overlap slightly at each slit.

8. Liberally apply mod podge over the scrapbook paper.

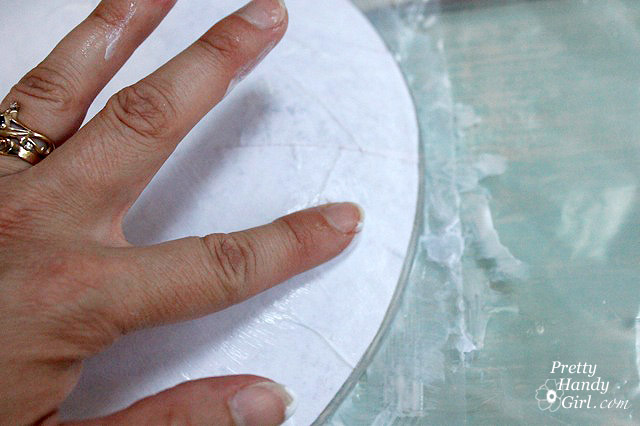
9. Use your finger to smooth out the wrinkles in the paper. But, be gentle or the paper will tear.

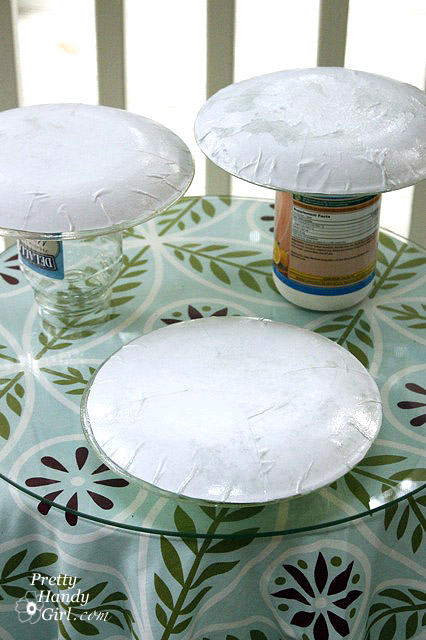
10. Lay the plates upside down on the jars and cans until dry. Add more mod podge if needed to seal the scrapbook paper and glue it down.

Turn them over and enjoy your unique decorative plates. Note: Do not fully submerse the plates in water, wipe them off and wash the tops so as not to mess up the paper side. Stack them with a paper towel in between so they don't stick together.


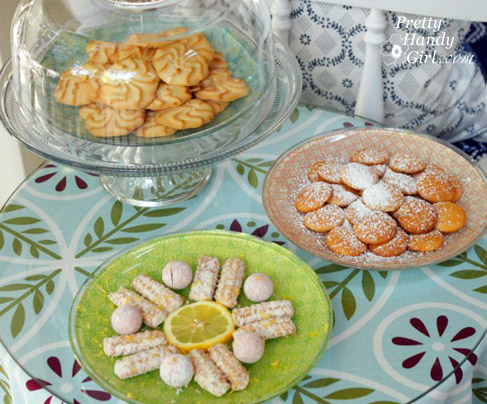
Load them up with some light citrus sweets and they will be the hit of the party!

 The possibilities are endless with these plates. Think about personalizing them with photos or monograms. What are your ideas for making your own plates?

~~~~~~~~~~~~~~~~~~~~~~~~~~~~~~~~~~~~~~~~~~~~~~~~~~~~~~~

I LOVE this!  Can’t you think how quick and easy this would be to do for holidays or themed birthday parties?  How cute would these be to give Christmas Cookies on over the season?  Oh my brain is spinning with possibilities!  How would you customize yours?  I wanna know!


Related Posts with Thumbnails