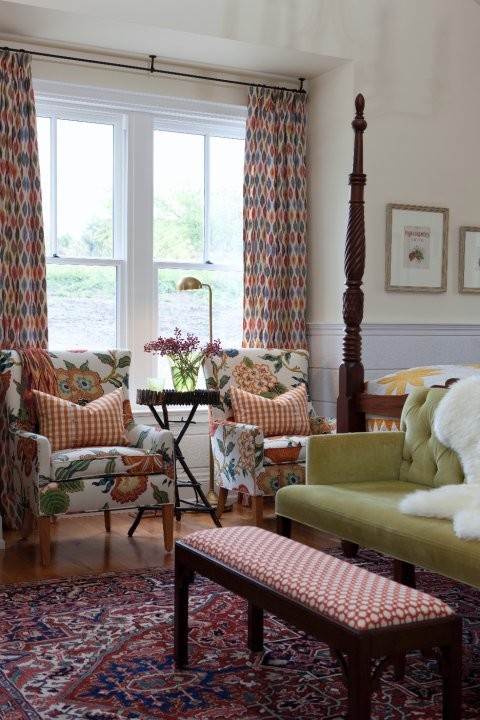
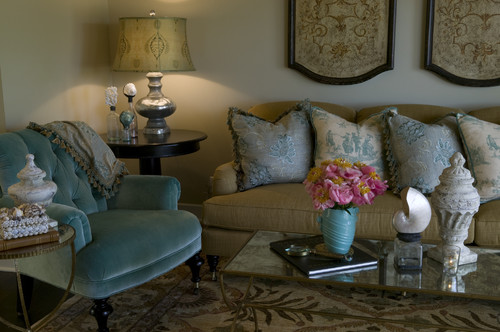
Welcome to Frugal with a Flourish!

Enjoy your time here! Don't miss a post by getting email updates any time there is something new. You can also get updates through Google Friend Connect or follow me on Facebook or Twitter to get the latest info and see all the things that inspire me!

[ | Posted in | Add Comment | ]

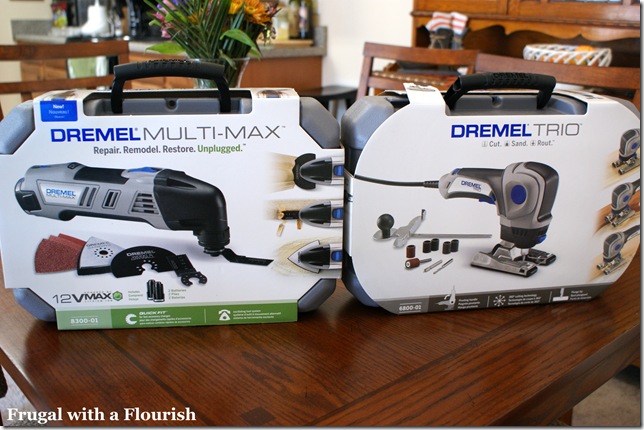
A while ago – I was contacted by the good folks at Dremel who asked me if I would like to try out their two new products.  The Dremel Trio and Dremel Multi Max.  I said “Of course!!!” because I love my original Dremel tool!  So they sent them over.  But with moving and such, I hadn’t had a weekend free to play with them yet.  That and I needed to find something that I wanted to do!  (Disclaimer: While Dremel did send me these fantastic tools – I have received no other compensation for this post and my words and opinions are my own.)

DSC06673

Then I saw Beckie’s  guest post she did on Thrifty Decor Chick where she showcased this beautiful wall panel.  Beckie blogs over at Infarrently Creative – and she is an absolute genius!  So I started thinking about that panel and decided I wanted to do something similar myself – inspired by Beckie! 

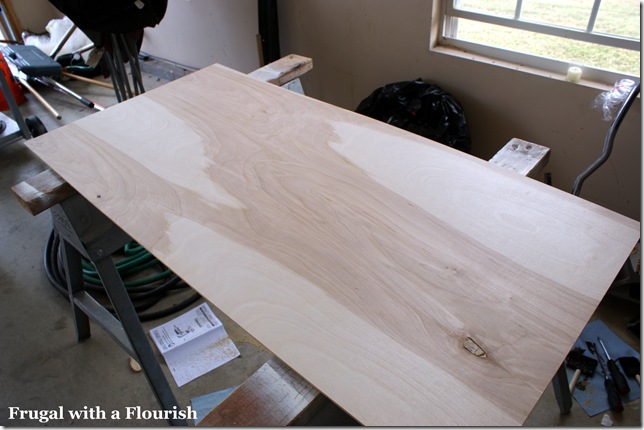
So first – I went out and got a 2’x4’ piece of birch plywood from Lowe’s – ran about $8.  I decided to do two vertical panels so I traced out those lines first. 

DSC06691

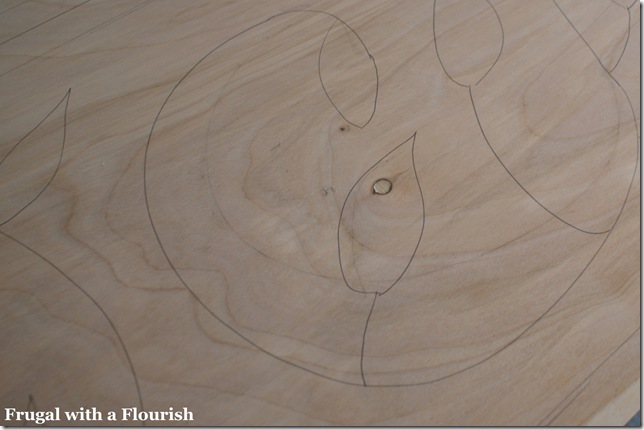
I decided I wanted to do a vine motif pattern on mine, but I couldn’t find a good stencil I wanted to use.  So I went back and checked out Beckie’s post.  Of course – she traced her design by hand!  Was I that brave?  Well after much web soul searching, I decided to just wing it and trace it out myself.  I also tried to be “smart” about it and trace any defects or blemishes into the design. 
DSC06695

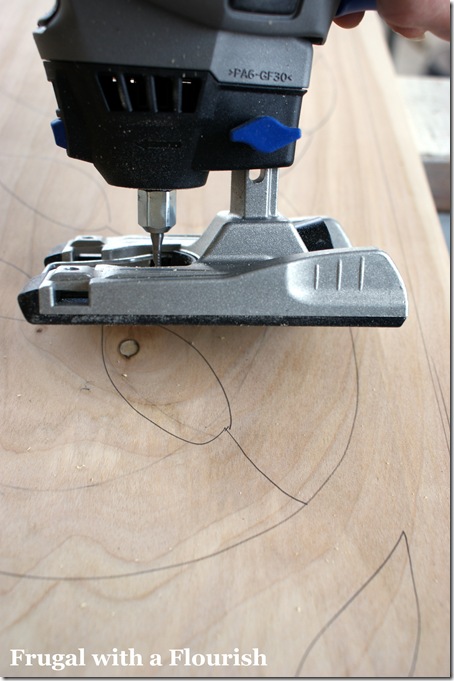
I then grabbed my handy dandy Dremel Trio and started cutting out my design.  The Trio can work as a jig or a router or a sander.  Handy little beast!  And cutting into wood with the Trio was so simple.  You just put the bit at a 90 degree angle and start it up and plunge in. 

DSC06698

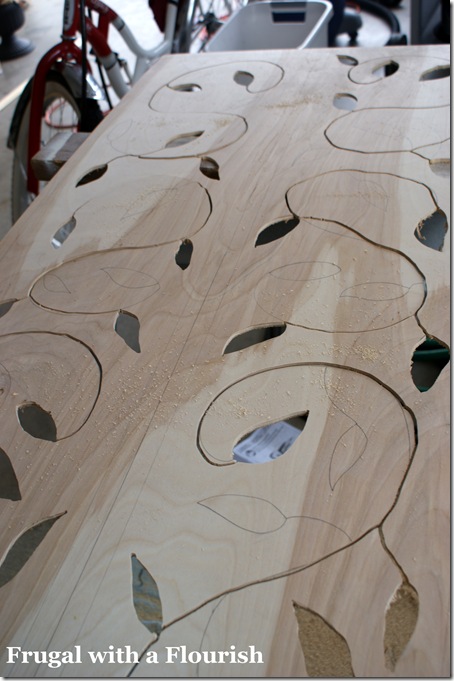
And it cuts like butter!  Ooh!  It took me no time to cut out my design.  Though I did decide for stability that I wouldn’t cut out quite as much as I had drawn.  I also left it whole instead of cutting it in half to start which also helped the wood be less shaky when cutting since it was so thin. 

DSC06699 

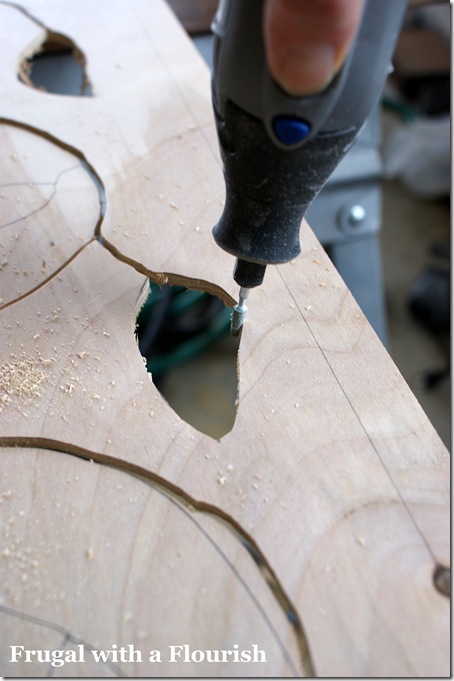
Next up – I had to sand down the rough edges.  So simple – first I took the Multi Max (cordless and I love it) to the back to take off any rough edges underneath where the plywood may have splintered.  Took me so little time – I forgot to take a picture of it!  Oops!  (Bad Blogger!!)  Then to get the detailed edges of my design – I attached a grinding bit to my regular Dremel.  Worked perfectly.

DSC06703

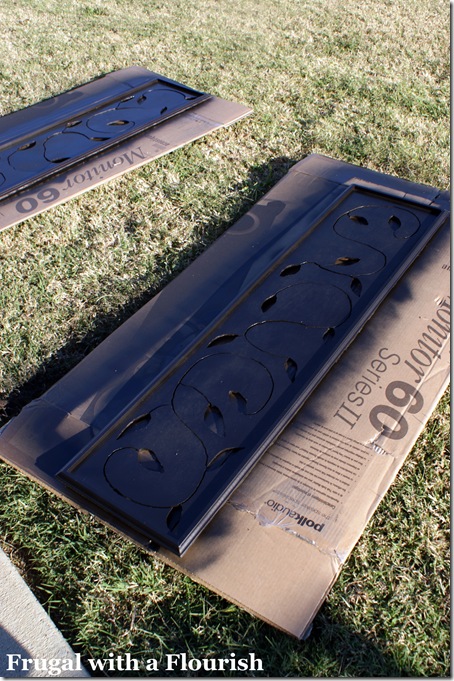
Next – I cut some molding out with my miter box and glued it on to the frame.  I then took the panels out and gave them a nice spray of ORB paint.   Don’t they look purdy!  

DSC06788

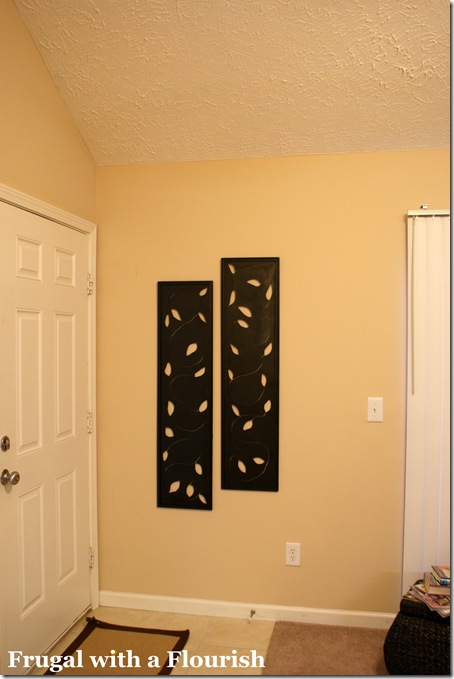
So here they are mounted up on the wall! 

DSC06792

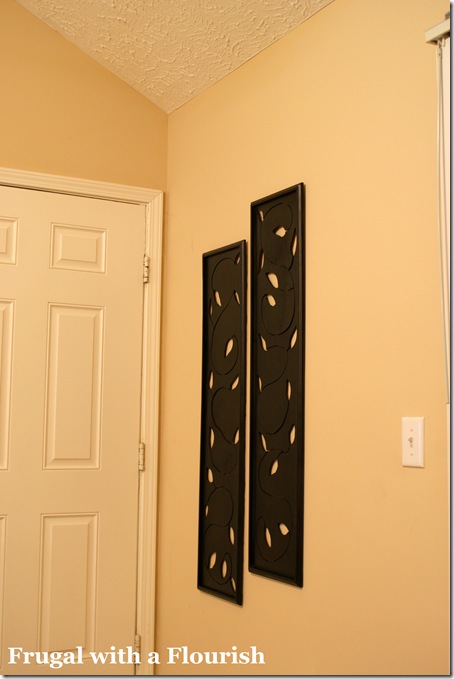
I decided to put them on the large expanse of wall behind our front door.  Really works well in the space there.  They pop off the wall and I think the cut out gives them some great 3-D depth! 

DSC06800 

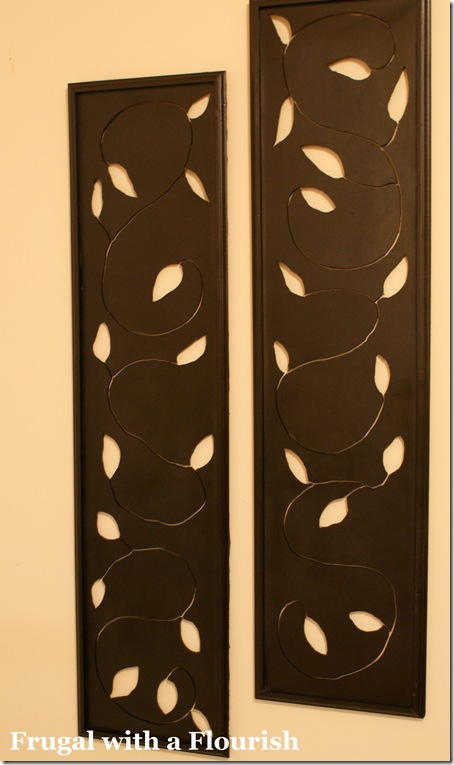
Here is a closer shot so you can see some of the detail! 

DSC06807

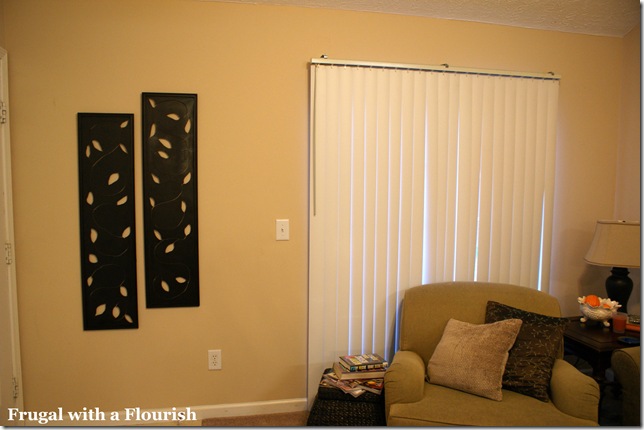
Ah … now all that’s left is to do something about those vertical blinds!  Oh well – we are never done are we!

DSC06794 

So – what do you think?  Are you itching to get some wood and pick up some tools? 

Make it for Monday with Cindy @ Cottage Instincts
Making the World Cuter Monday with Tiff @ Making the World Cuter

Made by You Monday with Cindy @ Skip to my Lou 
Anything Related with Rebekah & Bridgette @ All Thingz Related
Boardwalk Bragfest with Jan @ Bobbypins Boardwalk
Before and After Party with Sarah @ Thrifty Decor Chick
Tip Me Tuesday with Laurie @ Tip Junkie
Get Your Craft On with Kim @ Today’s Creative Blog
Power of Paint Party with Maryann @ Domestically Speaking
Make it Yours Day with Carolyn @ My Backyard Eden
Show and Share Day with Chris @ Just a Girl  
Remodelaholic’s Anonymous with Cassity @ Remodelaholic
Weekend Wrap Up Party with Jen @ Tatertots and Jello
Saturday Night Special with Donna @ Funky Junk

[ | Posted in | Add Comment | ]

I LOVE Halloween.  Probably my favorite holiday after Christmas.  I love that everyone decides to be someone else for a night, be friendly and hand out sweets!  And perhaps embrace their natural tendencies…

DSC06736

So last night – we headed out to a friends house for a Halloween party.  And in the sprit of the holidays – I decided to make Finger Cookies!  Now I know I normally don’t share recipes with you guys – but these were just too much fun.  Though they are pretty gross so if you get queasy easy – you may want to skip this post!  I used the recipe below from Epicurious.com.

Whatcha Need

Cookie Ingredients:

  • 1 cup butter, softened
  • 1 cup powdered sugar
  • 1 egg
  • 1 teaspoon vanilla extract
  • 2 3/4 cups all-purpose flour
  • 1 teaspoon baking powder
  • 1 teaspoon salt
  • 1/2 cup sliced almonds
  • 2 tablepoons Icing Glue (see below)

Icing Glue Ingredients:

  • 1/4 cup powdered sugar
  • 1 teaspoon water

Whatcha Do
1. In a large mixing bowl, beat the butter until smooth and creamy.

2. Add the sugar, egg, and vanilla extract and mix well.

3. Add the flour, baking powder, and salt and beat until completely mixed.

4. Cover the dough and refrigerate for 30 minutes.

5. Preheat the oven to 325°F.

6. With your hands, roll a heaping tablespoon of dough into a finger shape for each cookie. 

Cooks Notes: I found it was easiest to roll it out and then press down a front area for a nail bed, then bunch the dough up a little farther down for the first knuckle and then bunch it up some more for the second knuckle.  Oh – and then I also dipped the ends in a little red food coloring.  As if they weren’t already gross enough!  Make them pretty thin – if they are too thick they will puff up too much and you will have uh “ogre” fingers!  Actually – that would be a pretty fun Shrek spin to make on these … just saying!

DSC06743If the dough gets sticky and hard to work with, put it back in the refrigerator for a little while. Place fingers on an ungreased cookie sheet about 3 inches apart.

7. Use a butter knife to make knuckle marks on the finger cookies. 

Cook’s Note:  I found three little lines on the first knuckle and about six or so on the second really made them look realistic.

DSC06745 8. Bake 20-25 minutes, until fingers are slightly golden. Remove from the oven and let cool. Meanwhile, prepare the Icing Glue. Mix together powdered sugar and water in a small bowl until the consistency is similar to that of a paste.

9. Attach almond slice fingernails to the tips of the fingers with Icing Glue. Let glue dry for about 30 minutes. 

Cook’s note:  How gross are these?  Oh I love it!! 

DSC06750

Read More about the recipe here at Epicurious.

The cookies were a total hit at the party!  People would kinda tentatively pick one up and bite into it and then go - “Oh – those taste really good!”  This was always said with a huge look of relief.  Like the cookie was actually going to taste like fingers or something! 

DSC06753

So with those little tasty morsels, I wish you all a Happy Halloween and many treats (and tricks)! 

From the spy who loves all of you…

DSC06759 

Linking this up to

Sunday Recipe Swap with Cassity @ Remodelaholic

[ | Posted in | Add Comment | ]

Something about fall makes me think about cozy fabrics.  And nothing is more cozy than velvet.  I have found myself stopping several times when looking at rooms and just loving some of the velvet furniture out there.  But I think I would be hesitant to put it in my home.  I even started researching it online and apparently commercially manufactured velvet is pretty hardcore and can take a lot of abuse.  So my question for you to today is would you have velvet furniture in your home?  Or do you? 

I have some gorgeous pictures of some different velvet pieces to tempt you with as you decide!  Enjoy!

Love these wingback chairs but would be so afraid of stains!!
Carlyle Penthouse eclectic dining room


Using velvet is a great way to put a bold pop of color amid a sea of patterns. Just like the way this settee does.

Sarahs Houses Photos - Sarahs House: Season 3 | Facebook


While a lot of people think of velvet as a traditional design type fabric – it can be surprisingly modern on the the right piece of furniture.  Isn’t this sofa just beautiful?

Photo via House Beautiful

Love this pop of blue - it is just so classic in this room.
Zuniga Interiors traditional living room


These two little chairs are just so adorable.  I love the way they feel traditional but look so modern! Photo via House Beautiful

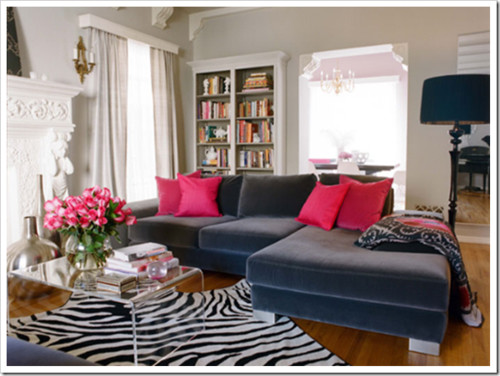
Isn't this charcoal sofa beautiful? Perfect with the pops of pink!
Velvet couch living room (via Colour Me Happy) contemporary living room


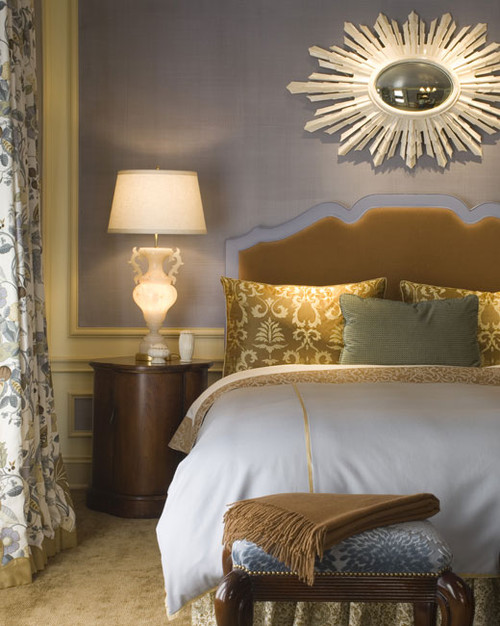
I love this velvet covered headboard. Just the perfect touch in this room. (Which by the way - I love this room!)

Glam Master Bedroom eclectic bedroom


So tell me now, did any of those intrigue you?  Are you pro-velvet or against it?  If you have some in your home please let us know if you would make the same decision again!  The jury is still out with me!

[ | Posted in | Add Comment | ]

We all use plates every day.  But because they are such everyday items we sometimes forget to think about them in terms of design and decor.  So today – I want to share with you seven great ideas on projects that you can make with plates.  Enjoy! 

1. Make a Wreath

For starters – since it is fall – I thought I would share this project I found at Midwest Living.  I really like the idea of using a plate to be your base for a cheerful wreath!  You just glue the leaves on and the peel them off when your done!

 2.  Turn them into a 3-D Sculpture    

I love this idea that Sarah @ The Thrifty Decor Chick had to create some beautiful art for her kitchen.  She cut a faux pear in half and glued it to a plate to create a creative art piece.  Brilliant!  And beautiful!

3.  Make a Unique Cake Stand

People have been using plates and glasses glued together all over blog land to make beautiful unique cake stands.  But I adore this one from Vic @ Punky & Me – the vivid red is just too cute! 

4.  Hang them on the Wall

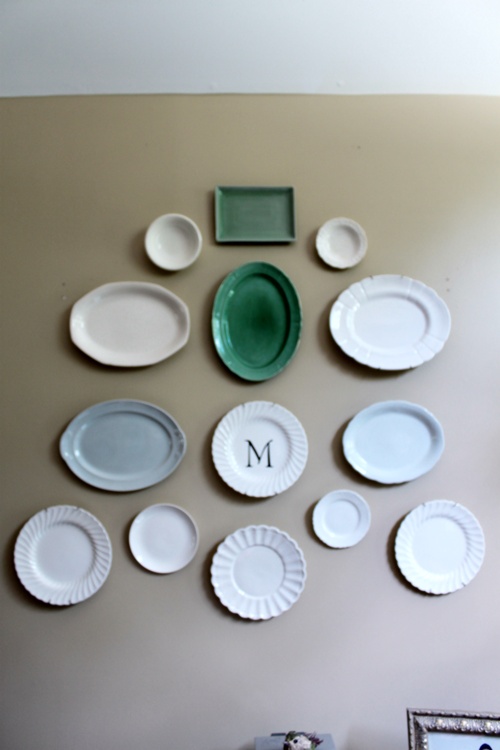
Hanging a grouping of plates on the wall is a great way to create a big impact in a space.  I love this collection from Rhoda @ Southern Hospitality.  She got them all at yard sales too! 

5.  Put a Graphic on It

I have seen all kinds of varieties of this around blog land.  A lot of people have used Cricuts or Silhouettes to cut out cute vinyl cut outs.  Some of us aren’t cool enough to have those fancy machines – so I made my Bird Plates using Mod Podge and card stock. 

6.  Create your own Stained Glass Window

What abou this idea from Becky @ Beyond the Picket Fence to take several glass plates to make her own stained glass window?  How creative is this?

7.  Turn it into a Mirror

I would love to find a beautiful scalloped plate like these that Monica @ Craftynest did.  She took some 4” mirrors that you set under candles and made the most beautiful mirrors!  Oh I just love them! 

So there you go! Seven great ideas on how to take your plates past the dinner table and into your decor.  So what do you think?  Have a favorite?  Have you done a great plate craft of your own?  If so – share it below in the comments or over on my Facebook page

[ | Posted in | Add Comment | ]

We will get to this project in a sec – but first, I want to explain how we got there!  The hubby has been wanting new speakers for awhile.  Since we got married actually.  And he finally found a great deal, so we got them.  Now with his speakers came something called a center channel.  That is the small long speaker that sits in the middle – and it is where the majority of your vocals comes from when you run 5.1 or 7.1 surround sound.  (Obviously – I am not a speaker expert here so we will leave my explanation of sound at that.)  We had a center channel set up in our old house on a shelf I bought from Target and we were going to use the same thing.  Then the speakers got here.  The new fancy center channel was WAY too deep to fit on the shelf. 

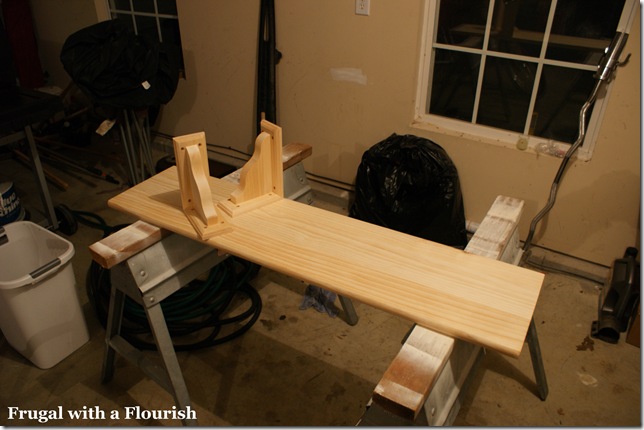
So now we had to come up with a different solution.  Hubby called me to meet him at Home Depot after work to look at some pre-made shelving options.  However, when I got there – he had come up with a different idea.  He decided to take a stair riser (which already has a fancy bull nose edge) and two wood brackets and make our own.  (Have I mentioned that I love this man!)  See below for the project pieces – total cost was about $30 – the stair was $9 and the each of the brackets were about $10 a piece.

DSC06557

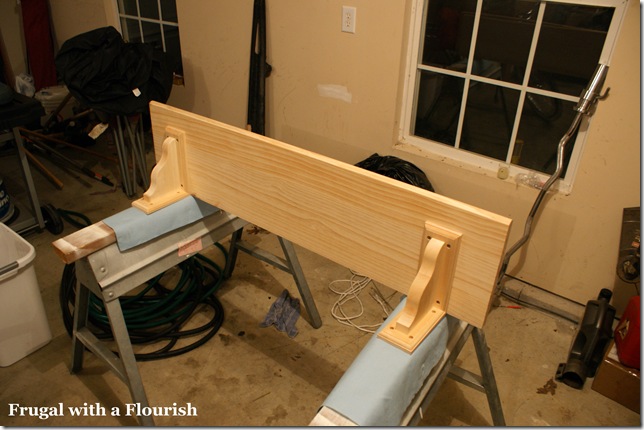
We measured for the shelf in the living room and then Hubby started assembling the shelf.  Please excuse our mess of a garage.  That is another project that we are working on finishing.

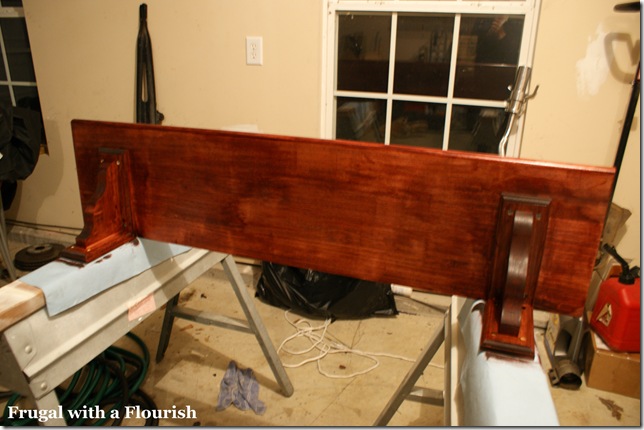
DSC06558We decided to stain the shelf Minwax’s Stain and Poly in one in Bombay Mahogany.  Here it is with the first coat on – so pretty!  I love this color! 

DSC06572

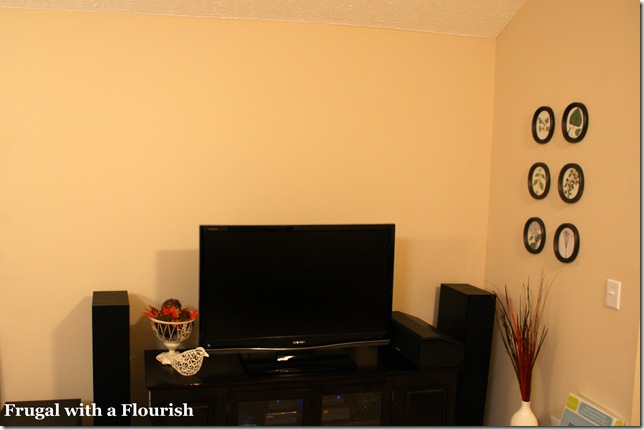
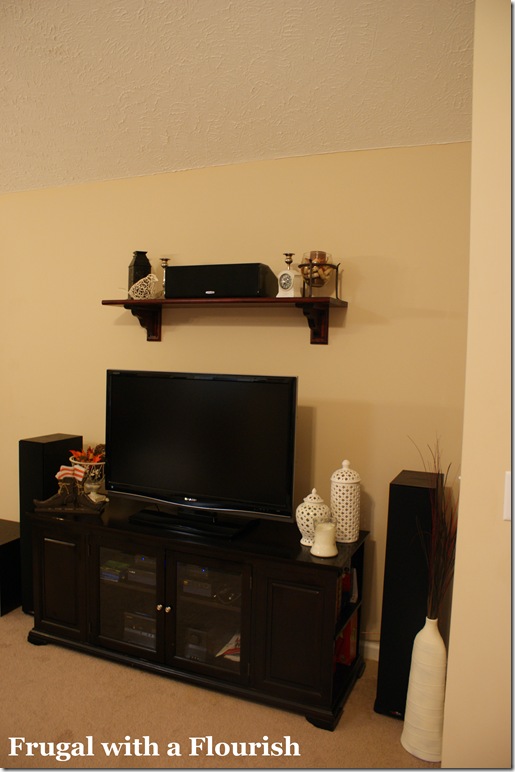
So here was our TV area before the shelf went up.  Sorry for the picture – not a great one – but you can see the new center channel sitting there on the console on the right side of the TV. 

DSC06554

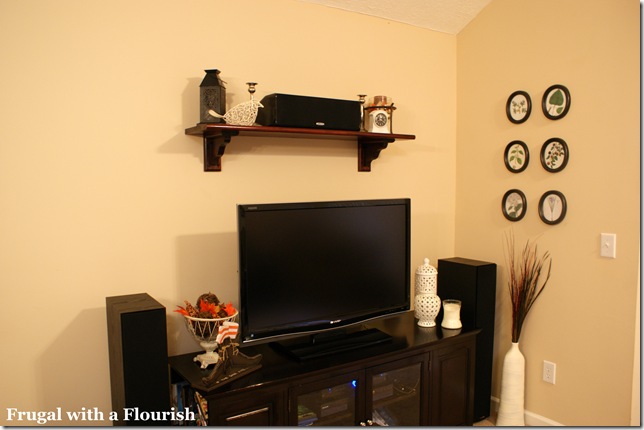
Now here is the space with our new shelf!   (And the hubby’s beautiful new center channel!)

DSC06706

I just love it!  I think the stain came out BEAUTIFUL!  The console is actually that same color – just a smidge darker.  I thought about giving it another coat – but was afraid it wouldn’t look right. 

DSC06709

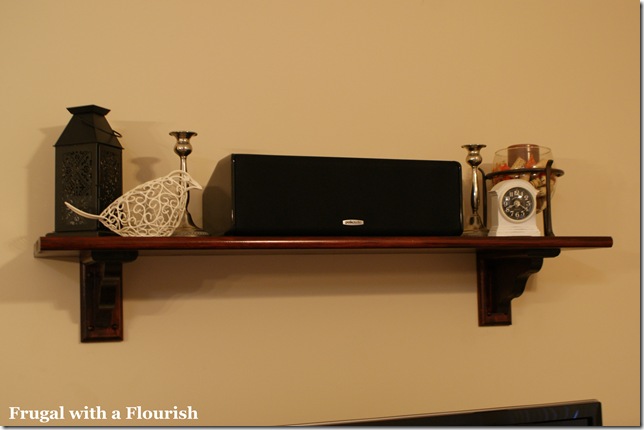
Of course I claimed all space that was not occupied by the speaker in the name of Jess and gussied it up a bit!  It is kinda like having a mantel!  I get to participate in mantle parties now!!  Hooray!!

DSC06724

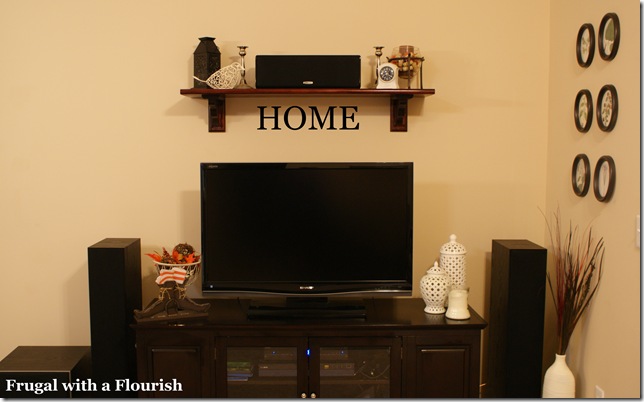
Now I do have a question for you guys!  Do you think I should hang a sign of some sort below the shelf?  See doctored example below of “HOME” in the space.

DSC06731-1

I am not sure if it works … or if it just becomes too cluttered.  What do you think?

Linking this up to

Metamorphosis Monday with Susan @ Between Naps on the Porch
Making it for Monday with Cindy @ Cottage Instincts
Table Top Tuesday with Marty @ A Stroll Thru Life
Anything Related with Rebekah and Bridgette @ All Thingz Related

Tip Me Tuesday with Laurie @ The Tip Junkie
Get Your Craft On with Kim @ Today’s Creative Blog
Boardwalk Bragfest with Jan @ Bobbypins Boardwalk
Make it Yours Day with Carolyn @ My Backyard Eden 
Transformation Thursday with Gina @ The Shabby Cottage 
Get Your Craft on Thursday with Lori @ Life with Lori 
Strut Your Stuff with Steph @ Somewhat Simple  
Furniture Feature Friday with Miss Mustard Seed @ Mustard Seed Creations
Frugal Friday with Gina @ The Shabby Nest
Show and Tell with Cindy @ My Romantic Home 
Weekend Wrap-up Party with Jen @ Tatertots & Jello 
Saturday Night Special with Donna @ Funky Junk


[ | Posted in | Add Comment | ]

Ok – for starters we have to get some business out of the way.  The winner of the $30 gift card from my Blog-aversary giveaway is ….

Entry #6 - Larissa @ Reef Botanicals!

Reef Botanicals: Handmade Craft Soaps & Other Indulgences

She said she would use the card to  go to Joann’s to “to get fabric to make a skirt for my face painting cart for an event I have in February.”  Larissa and her hubby Eric makes some fantastic looking natural botanical soaps and scrubs and such.  And she face paints.  And she’s a lawyer!  I love this chick!  Hop over and give her a little love today!   Did I mention she is having a giveaway for her stuff?   Would you be intrigued if I told you it was for some Almond Pastry Facial Scrub and other goodies?  That just sounds heavenly!

Now I have some other great news!  Open Sky has given me 10 coupons for 25% off anything in my shop!  That is a huge deal!  When I launched they only gave 15% off!  So if you are looking for anything for your home or want to get a head start on your Christmas shopping – this is the time! 

If you want to take advantage of this great offer – head over to my Open Sky Shop and use code FRUGALF30PCT at checkout.  This coupon is only good for purchases up to $100 and it has to be used by 10/31.  This is a limited code that will only work for the first 10 people that use it – so if you see something you want I would use it ASAP!   I will keep an eye out and let you know if it is still available – so if you are reading this now it is still good!!   Happy Shopping! 

Oh and just so you know – I have added some new stuff to the shop!  Wanna see?

For starters – I have expanded on my collection of vinyl wall art.  I added this customizable Nie Nie bird print that you can have created with your families name.  Normally this is $32 – but with the 25% off coupon you can get it for $24!

Click to buy in my shop!

I also added this 11x14 Beautiful Bird in Purple print that would be perfect with your little angels name on it!  It would also be $24 after the discount!  (BTW – Jayden Lily?? GREAT baby name!) 

Click to buy in my shop!

Or how about this Alphabet Soup Girl print!  Too cute!  I also have a boys version available too!  Both would be customized for you and only $24 with the discount! 

Click to buy in my shop!

Or perhaps you want some of that cute numbered stuff that is all the rage.  I have this Custom Vinyl Letter/Number Set with the numbers 0, 1, 2, and 3 in the shop.  You can just add them to your own containers and dishes to make some customized creations!  These are normally $16 but they would be just $12 with the coupon!

Click to buy in my shop!

I also have this customizable set of two 8x10 prints with a Garden Silhouette and Initial.  A great accent piece to any room and would only be $22.50 after the discount!   Click to buy in my shop!

Want to get your household more organized?  I am offering both a set of White board Wall Decals and a set of Chalk Board Wall Decals.  Both have three pieces that will allow you to hang separately or together to make one big writing surface.   You can hang and remove and rehang again and again!  And each set will only set you back $13.50 with the discount!  Click to buy in my shop!

Click to buy in my shop!


Perhaps you want some new accents for your home.  I have added a rustic wire basket and a set of eight rusted feathers.  After discount the pack of feathers is on $13.50 and the basket is only $21.75!

   Click to buy in my shop!

Click to buy in my shop!

I have also added this beautiful embroidered Sawyer Hill Runner!  Normally $32 – this will only be $24 after the discount!  I think it is just gorgeous!
Click to buy in my shop!
Now I love this one!  This Whimsical Birds Shower Curtain is eco-friendly, recyclable and 100% PVC free!  Cute and environmentally friendly!  And only $18.50 after the discount!

Click to buy in my shop!

Another great idea and a perfect gift, the book Inspirational Home features ways that you can infuse your faith into your home with craft and decor ideas!  Written by Jeanne Winters – this could be a great addition to your or your favorite crafters bookcase!  Normally, $25 it will only be $18.75 with your discount!

Click to buy in my shop!


Now I know I might lose some of you guys here – but I also added a few Holiday/Christmas items!  (Hey – if the big stores can do it I guess I can too!  I saw a woman at Hobby Lobby the other day with two carts full of stuff at the checkout!  Crazy!)  Anyways – if you are already out shopping for your Holiday decor needs I have this Poinsettia Table Topper and this Scandia Holiday Runner up for grabs as well.  Both are only $28.50 after the discount! 

Click to buy in my shop!Click to buy in my shop!

And that isn’t all – there are even more things over at the shop – including that zinc memo board you all went crazy for initially!  (It’s only $21 after the discount!)  But I think if I put any more things in this post – you guys will kill me! 

Have any favorites?  Are you going to take advantage of the discount?  I hope so! 

Happy Shopping!


Related Posts with Thumbnails