Welcome to Frugal with a Flourish!

Enjoy your time here! Don't miss a post by getting email updates any time there is something new. You can also get updates through Google Friend Connect or follow me on Facebook or Twitter to get the latest info and see all the things that inspire me!

[ | Posted in | Add Comment | ]

So - in the new dining area (which I am sure you are sick of hearing me talk about) I have been thinking that I need something on that big wall behind the table.

At first, I was thinking a big piece of art - but I can't decide on anything that I like well enough to put there year round.  I plan on switching out the pillow covers with the seasons but I can't afford to switch out large art that often. But then I got to thinking - there is really only one "window" in that room and it is the sliding glass door that is directly across on the opposite wall.  So what I really need is a big mirror! 

Mirrors are a great way to spread light around a room.  And when you spread the light you need less artificial light - which is better for your wallet and the earth!  It is Earth Day after all!

So - as I was browsing - I found all kinds of great mirrors out there.  Still haven't found "the one" for my space yet, but here are eight great mirrors to add to any space!  Enjoy! (I get absolutely nothing for sharing these with you - this is just me finding great deals!)


This mirror would be perfect for a bathroom.  And for the price you can hang one above each sink for a double vanity! 
Boulavard Wall Mirror from Overstock.com - 19"x26" - $44.99

Love the convex effect in this Bulls-eye mirror.  I would think a trio of these on a wall would make a really nice effect.  Or two on either side of a bed would also be neat! It would have a very porthole like vibe!
Beaded Bullseye Mirror from Home Decorators - 11" Round - $29.00

Next - I am going to need all you burlap freaks to calmly proceed to Home Depot for this Burlap inspired frame.  I love the silvery-chocolate finish! 
Silver Burlap Frame Mirror from HomeDepot.com - 25.5" Square - $49.98


I love the leather wrap on this mirror.  Very masculine and perfect for an office or den! 
Aiken Leather Wrapped Mirror from Overstock.com - 26.75" Square - $99.99

Perfect for Earth Day - how about this colorful mirror made out of recycled magazines!
Recycled Magazine Mirror from SmartBargins.com - 17" Round - $39.99

Love the stainless steel edge on this mirror!  Super modern but yet very classic!
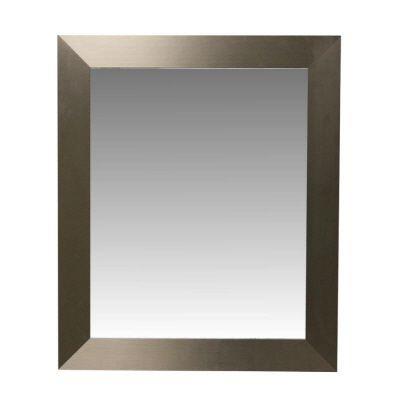
Stainless Steel Framed Mirror from HomeDepot.com - 21"x25" - $58.98

This is a classic large mirror - love the beveled edge with the cherry trim! 
Dartmouth Wall Mirror from Overstock.com - 30"x24" - $90.99


This PB Knock off from Target is ultra feminine and very chic!   This would look great over a re-purposed secretary desk turned vanity!
Beveled Hanging Mirror from Target - 19" overall - $69.99


So there you have it - eight great mirrors!  Which one is your favorite?


Linking this up to Melissa's Inspired by Party @ The Inspired Room! Come over and get inspired!

[ | Posted in | Add Comment | ]

After I posted my dining room redo, I got several emails and questions from friends on exactly how one goes about doing this if you have never done any furniture projects.  Therefore, this post isn't for you DIY experts.  This is for the newbies, the people who haven't thought they could tackle a furniture redo project.  So, for all you Refinishing and Reupholstering virgins - this post is for you.  Because technically - this was my first big furniture project.  So I am going to step you through it and give you some hints and tricks that I learned along the way so that you can do this yourself if you like!   (Warning - picture intensive post to follow!)

To start, the first thing you need to do is flip your chair and/or table over and investigate how it put together.  I initially thought that the table top would be bolted to the legs and I would have to tape it all off.  Nope - there were just some common Philips head screws holding it in.  So - off it came!

I also unscrewed the chair cushions off the base so that all I had to work with was the metal furniture.

Can I just share a close up of the hammered grey that is now gone?  So much better black!  
 
The next step was to sand down the metal to remove the shiny finish.  I used a sanding pad and it was a breeze.  You don't need to sand hard - just take off the shine so the paint has something to grab on to instead of slide off.  After you sand, get some plain soap and water and wash off any remaining dust so you have a nice clean surface to work on.  Make sure that you take proper precautions if the furniture is old in case there was any lead paint used on it.  You don't want to inhale that in! 

For the actually painting stage of the project, I got a couple of big cardboard boxes that I cut open to use as spraying and drying platforms.  It makes it easier to keep any grass off the thing your spraying and keeps your grass from turning various shades of colors. I also highly recommend wearing plain latex disposable gloves while spraying to avoid getting a miscolored trigger finger!  Simply spray in a uniform pattern and try to do each piece of furniture the same way so you don't miss any areas.  

Here you can see some finished chairs that are drying - oh the black looks so much better! 

Now once you get your first coat on, do a visual scan to see if there are any missed spots or uneven areas.  Simply wait the recommended time that is listed on your spray paint can and then do your retouching.  Also - if it happens to be somewhat breezy when your working with, oh lets say a black spray paint, and you come in with a dark hairy looking man arm on your spray can spraying side - just hop in the shower and use an exfoliating cleanser.  It will come right off!   Once you are totally done, I recommend waiting the recommended time for the paint you are using before you set on a rug or carpet or replace those cushions.

To start recovering the seat cushions, you need to evaluate the type of fabric you are using and the kind of chair you are covering.  For me - the fabric I chose was a really nice durable Chenille (Eddie Bauer from JoAnn's if you are interested) but that was a lot thicker that the previous fabric.  Combine that with the fact that the cushions had to fit down into the chair frame rather than sitting on top. So no matter how tight I stapled - I ended up with bunches like this when I shoved the seat into the chair frame. If you end up in the same situation - keep reading.  Otherwise, you should be able to staple your fabric on the cushion, screw back on and move on with life! 
However, because my fabric was thick it bunched.  So I changed my plan of attack. First, I put in some staples in the center of each side to get the fabric centered where I wanted it. 

Next, I put the cushion in to the chair and used a large rubber mallet (covered with a clean dishtowel) to beat it down into the chair frame.  Once the seat was in, I reached up under the chair and using either my fingers or a pair of needle-nose pliers pulled the fabric taunt around the cushion.

When I had the fabric where I wanted it, I went ahead and screwed the cushion back into place and then made sure that it didn't shift (which it always did) and cause any new bumps or wrinkles (which it always did).

Finally, when the cushion was secured and the fabric taunt, I finished my staples around the bottom of the cushion to keep the fabric in its new permanent place.

And there you have it!  Those are all my tips and tricks for redoing a metal dining set. 

What about you?  Do you have any tips and tricks you would like to share with some other newbies in the comments section?  Or are you a newbie who now feels empowered?  Either way - let me know!


Linking this up to the following
Power of Paint Party with Maryann @ Domestically Speaking
Make it Yours Day with


Visit thecsiproject.com

[ | Posted in | Add Comment | ]

Ok - I have worked my fingers to the bone on this one this weekend. Here it is - the new dining area with a before and after shot! 


Dontcha just LOVE it!  I do!  So here is the breakdown on what I did
  -  Spray painted the metal from the hammered grey to black
  -  Reupholstered the chairs in a bright green chenille
  -  Made the cute pillows out of some fabric I have had forever
  -  Got some new placemats, linens, and a vase


Love it!  Oh and the roses were a special today!  Ran into to Food Lion to get some other things real quick and they had "Rainbow Rose" dozens 2 for 1 at $8.89!  I love getting fresh flowers on the cheap. 

I also am "tying" in the look to the kitchen with some new dish towels!  Of course, my favorite bird plates are in the background there along with my Mod Podged Wine Bottle (next to that gigantic pile of papers I need to file)!

Here is a close up of the chair transformation. The black looks SO much better than than hammered grey look and I LOVE my new fabrics!  My goal is to switch out the pillow covers between seasons to give the room a different look.  These paisley beauties are my "spring" ones! 


So there you go - my new dining room!  Total cost of this redo was $74.91!  Here is a breakdown of the costs:

Paint - $9.98
Chenille - $29.99
Pillow Forms - $13.98
Placemats - $7.99
Dish Towels - $7.98
Vase - $5.00

Stay tuned this week for my tips and tricks on how I got this done on the cheap! 


Linking this up to 
Met Monday with Susan @ Between Naps on the Porch

And because this was my FAVORITE project that I did in April I am linking it up to The Best DIY Project of April Party with Traci @ Beneath My Heart. Head over and check out everyone else's favorite projects.


Related Posts with Thumbnails