Welcome to Frugal with a Flourish!

Enjoy your time here! Don't miss a post by getting email updates any time there is something new. You can also get updates through Google Friend Connect or follow me on Facebook or Twitter to get the latest info and see all the things that inspire me!

[ | Posted in | Add Comment | ]

This Halloween, if you want to go beyond your standard Jack-o-Lantern carving on a pumpkin – have I got some ideas for you!  Below are some of the beautiful ideas for decorating pumpkins that I have been collecting on my Fall Inspiration board on Pinterest.  Here are nine different ways to purty up your pumpkin – enjoy!

1.  Paint Them with a Pattern

These painted patterned pumpkins (say that three times fast!) from Lolly Jane Boutique are so cute!  I think I may HAVE to do this! 

Photo via Lolly Jane Boutique

2.  Add a Band of Beans

These lentil studded candles and pumpkins would make such a great centerpiece. 

Photo via HGTV

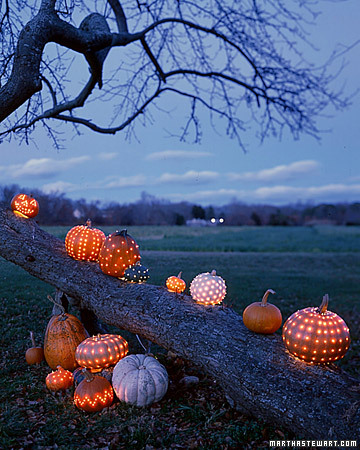
3.  Stuff them with Christmas Lights

Create twinkling pumpkins with some white lights!  Magical aren’t they!

Photo via Martha Stewart

4.  Turn them into Planters

Use your pumpkin as a chic pot for your fall flowers!  Don’t these look cute lining the stairway?

Photo via Habitually Chic

5. Spell out a Message

These are so pretty and I love the lace details!  I can think of all kinds of cute sayings you could put on a set of Pumpkins!

Photo via Seeing Inkspots

6.  Gild them with Gold Paint

Shiny metallic paints can really make a statement on your gourds!

Photo via Country Living

7.  Put some Bling on it!

Get that Bedazzler out and stick some rhinestones on your pumpkin!  I love the spider web detail on this one!

Photo via BHG

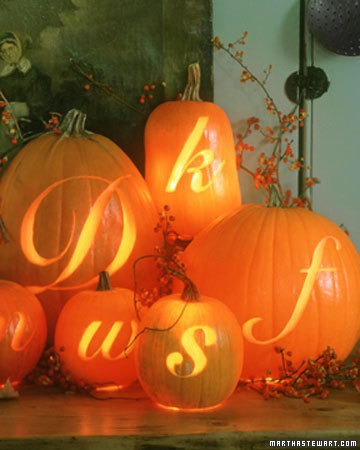
8.  Carve out a Monogram

These are so classy!  I love the script initials.  Leave it to Martha to do something so elegant.

Photo via Martha Stewart

9.  Tattoo them with a Vintage Print

I freaking LOVE this idea that I first saw on Holly’s blog, 504 Main, last year.  Silhouette makes printable temporary tattoos and as Holly figured out – they affix to all kinds of skin, including the skin of pumpkins. 
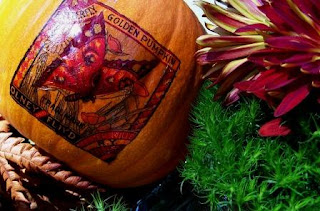
 Photo via 504 Main

So there you go!  Nine different ideas on how to make your pumpkins pop this Halloween!  See any ideas that inspired you?  I wanna know what you loved!

[ | Posted in | Add Comment | ]

I think we can all agree that birds on stuff has become quite the trend.  Birds are on everything – dishes, bedding, accessories.  The top searched item on my blog are my Bird Silhouette plates.  And I saw this video a while ago when Melissa @ The Inspired Room posted it and if you haven’t seen it – you will thoroughly enjoy it. 


Now my question was this - are birds on stuff still in or on the way out?  Based on the evidence that I am finding out there still for sale – it doesn’t look like  it.  Just take a look at the latest Pottery Barn catalog for proof of that!  And don’t even get me started on the latest phenomenon of owl merchandise. 

So in honor of the beloved bird accessory – I found eight options for you to get your bird on! 

For starters how about this kitchen set that features a graphic bird print.  Reminds me of woodblock prints!

5 pc Kitchen Set from Target – $19.99

How about a darling little bird to perch on your jewelry dish?  Leave your bracelets in the dish and your rings on the tail!

Bird Jewelry Dish from Pottery Barn – $19

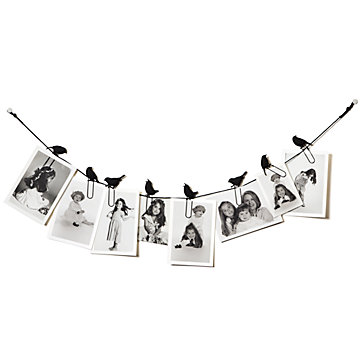
Need a cute way to display more snapshots?  How about this “Bird on a Wire” photo holder.  This is seriously cute!

Bird on a Wire Photo Holder from ZGallerie – $12.95

These white bird frames have a rustic feel.  Love the distressed look.

White Ave Bird Frames from World Market – $12.99 – 14.99

Take your bird a little more tropical and grab a parrot pillow from Pottery Barn.

Pineapple Bird Pillow Cover from Pottery Barn – $29.00

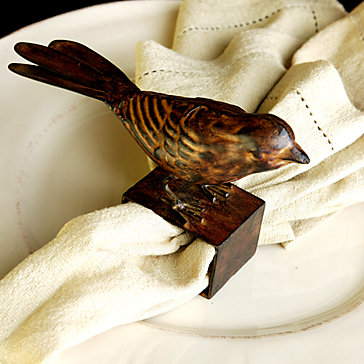
This is probably one of the only ways birds would be welcome at your dinner party – on the napkin rings!

Bird Napkin Rings (set of 4) from ZGallerie – $19.80

Make a “bird” bath in your house!  (Sorry – that was a horrible pun, but I couldn’t help myself!)   These birds are based on flower patterns found from old books.  Which actually sounds pretty cool.

Bird Collage Shower Curtain from West Elm – $39.00

And if you thought birds couldn’t be put on anything else – how about on the top of these glass canisters? 

Glass Bird Canisters from Pottery Barn – $29 - 44

So there you go – eight fantastically featherful accessories.  Now I wanna know – do you love bird stuff?  Or are you over this trend?  Sound off!

[ | Posted in | Add Comment | ]

As I said the other day, I am ready for fall.  And being ready for fall always makes me think about being cozy on cooler nights.  Last year I did a “Fall is Cozy” post and this year – since it is still on my mind – I thought I would do a similar one.  So for today – I want to feature some cozy living rooms for you to enjoy!  Hopefully – you can snuggle up with a throw and grab a cup of tea or cider and get yourself into that cozy mood too!

Pops of bright colors can help a room to get that cozy feel.

Photo via I like it, I love it

Cozy rooms don’t have to be dark – but they do have to have plenty of pillows!

Photo via Pottery Barn

Cozy rooms typically have a lot of texture.  And the more they look like sweaters – the cozier they get!

Photo via Desire to Inspire

Dark wood tones and leather furniture will always be cozy!

Photo via Stephen Saint-Onge Blog

One comfy chair can be all you need to make a space cozy.

Photo via My Home Ideas

Fireplaces and furs ooze cozy!  Careful not to make your home look like a hunting lodge though!

Photo via Elle Decor

There you go!  Feeling cozier?  What is cozy to you?  How do you incorporate cozy into your home?  I wanna know!


[ | Posted in | Add Comment | ]

I hope everyone is having a fantastic Labor Day weekend!  This is our “anniversary weekend” (what can I say we like to celebrate!) and we have enjoyed a very relaxing time with the Lil Man!  He is too much fun!  In between hanging out with him though – I managed to make a cute fall wreath that I can’t wait to show you guys!  Isn’t it adorable?
DSC09011

Ok – so how did this pretty little creation come about?  Well for starters, I decided I wanted to make a fabric flower wreath after seeing WAAAAY too many that I loved all over blogland and Pinterest.  But I didn’t want to spend a ton of time making fabric flowers.  I do have a 9.5 week old baby that requires a lot of my free time!  So instead of cutting out multiple layers and stacking them – I decided to make two different types of flowers that only require one long strip of fabric.

For the first kind of flower, I took a strip of fabric and folded it accordion style.

DSC08983

Then I stitched the front corner together. 

DSC08985

Next, I cut around the edges one side to make them look more “petal” like.

DSC08986

And then we you unfold it and put both ends together – you get a nice flower!  See!

DSC08988

Then you just run a quick stitch down the ends to keep your flower together.

DSC08989

The second way I came up with was to again fold the flower accordion style and trim the edges.

DSC08990 Then, holding the first petal in the center – I folded each subsequent petal under and around until you make a full “flower”.  Then just throw a couple stitches in the middle to hold all the petals together and you have a flower.

DSC08991

Either one of these methods will allow you to make several flowers very quickly.  I made all the ones for this wreath in an hour one night while catching up on an episode of The Closer.  (I love that show!) 

Then I needed a wreath!  I decided to try out a tip I found on Pinterest and shared on my Facebook page last week.  Instead of paying for a wreath form, I went to Lowe’s and picked up a piece of 6 foot by 1 inch pipe wrap from the plumbing department.  It cost about $1.50 with tax.  And because it was 6ft long – I was able to cut it in half and I can make another wreath out of the rest later on!

DSC08993

The other awesome thing about using this pipe wrap means that you can make your wreath into whatever shape you like.  I decided to turn mine into a tear drop shape and then wrapped it with yarn. 

Next – I used button covers (which you can find with the zippers and other findings in your fabric store) and spray painted them with my favorite can of Krylon ORB!  (Oil Rubbed Bronze – for any newbies)  Rather than stitch them onto the flowers since I was pressed for time – I used a hot glue gun and just stuck them on!  I love that they look a little like Black Eyed Susan's! 

DSC09000

Then I put the flowers on using some stick pins and voila – I had a beautiful scrappy fall wreath!!

DSC09009

How about a few more shots of it?  Ok!

DSC09013

I also made a little hanger by braiding a couple pieces of yarn together.  Cute huh?  I love it!

DSC09002

So there you go!  A quick easy scrappy fall wreath!  I just love how it turned out!  One last picture ok? :)

DSC09004

Alrighty – what do you think?  Think you will make one like it?  Love my quick and dirty flowers?  I wanna know!

Linking this up to

I Made a Wreath out of What? Party with The Nester @ The Nesting Place
Metamorphosis Monday with Susan @ Between Naps on the Porch
Tip Me Tuesday with Laurie @ Tip Junkie
Before and After Party with Sarah @ Thrifty Decor Chick
Get Your Craft On with Kim @ Today’s Creative Blog
Tutorials and Tips Tuesday with Beth @ Home Stores A to Z


[ | Posted in | Add Comment | ]

Ok – the heat has finally gotten the better of me and I am ready for the cooler weather of Fall!  Is it too early to start thinking about leaves turning, crisp mornings and the general loveliness of a mild clear day?  No – I think not.  In fact I have been collecting a ton of inspirational ideas for decorations, crafts and other goodies in my Pinterest “Fall Inspiration” board.  Here are some of my favorites!

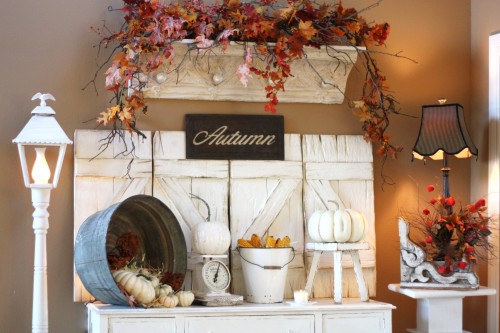
Love this fall vignette from Sugar Pie Farm House.  Those leaves really pop against all the creamy whites!

Photo via Sugar Pie Farm House

Make a simple display of the fall foliage to accent a wall.  Beautiful and rustic all at once!

Photo via Bloesem Living

Need some fall printables?  Colleen @ Mural Maker and More has 12 reasons why you will want to download these for yourself!  (You have to read this post – it is hysterical!)

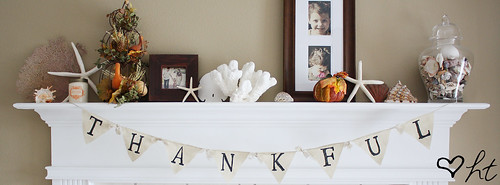
Love this mantel from Happy Together.  The Thankful pennant really makes it!

Photo via Happy Together

These DIY Fall Tiles are adorable and easy to make!  Visit Erika’s blog for a full tutorial!

Photo via Little Miss Crafty Pants

Love this trio of wreaths that Tricia @ The Sweet Survival made!  So pretty!

Photo via The Sweet Survival

Aren’t these lanterns gorgeous!  These Pottery Barn beauties have me scheming how I could knock them off. 

Photo via Pottery Barn

Love these ideas?  Hop over and check out some of the others I have saved in my Fall Inspiration board!  I will also be sharing more of my favorite finds on my Facebook page for the month of September.  Make sure you “Like” Frugal with a Flourish to make sure you don’t miss a good one! 

[ | Posted in | Add Comment | ]

Trellis patterns are all over!  The pattern of overlapping lines can be as simple as just diamonds and as complicated as the imperial pattern.  How can you use this classic pattern in your home?  Well, I have come up with seven ways to incorporate it into your decor below!  Enjoy! 

1. Overlay it on a Mirror

The contrast of trim over a mirror is a great way to feature the pattern and can really add some great layered texture in a room.

Photo via HGTV

2. Frame Fabric and Hang on Walls

This is a quick and easy way to incorporate different trellis patterns into your decor.  Bonus points if you get your fabric from the remnant bin at your fabric store.

Photo via Pinterest

3.  Use it to Tie Together Accent Pieces

The use of the imperial trellis pattern on the pillows and the ottoman is a great way to add in a vivid pattern and tie the accent pieces in the room together. 

Photo via Decor Pad

4.  Alter an Basic Accessory

This simple DIY lamp makeover is a great way to add a little trellis pattern into your room.  You could also extend this idea to other accessories like a tray, the top of a table or a vase. 

Photo via Caitlin Wilson Design

5.  Use it in your Window Treatments

If busy patterns make you a little nervous – contain them to just your window treatments and leave the rest of your room fairly neutral like the photo below. 

Photo via Decor Pad

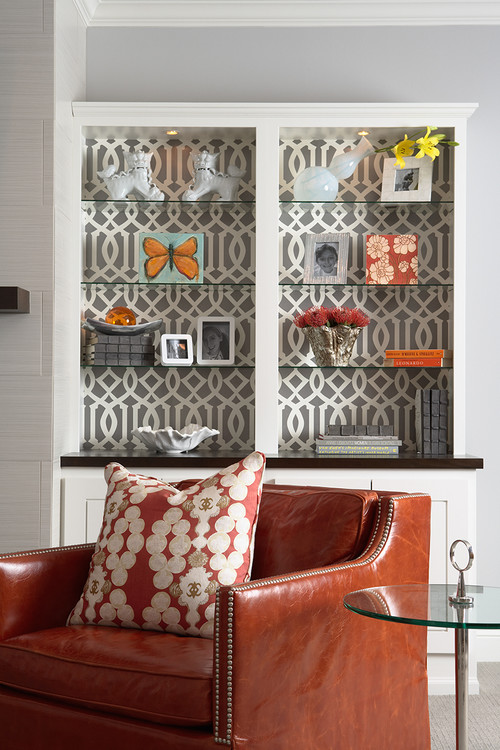
6.  Accent the Back of a Bookcase

Love this idea!  Again this is a great way to add a little punch of pattern into a room and create a visual focal point.  

Martha OHara Interiors Showroom  home office

7. Stencil it on a Wall

I think everyone was in love with this stenciled wall that Kate @ The Centsational Girl did in her Master Bedroom.  It was even shown when she was on the Nate Berkus Show!  Stenciling can be subtle – like Kate’s – or more dramatic.  All you have to do is adjust the contrast of your stencil color from your background color!

Photo via Centsational Girl

So there you go!  Seven great ways to add a beautiful and classic trellis pattern into your decor.  So I wanna know, do you like this pattern?  Have any in your home?  Any of these ideas inspire you to add some? 

Linking this up to

Weekend Bloggy Reading with Amanda @ Serenity Now

Pinning and Singing Party with Natasha @ Five Minutes for Me


Related Posts with Thumbnails