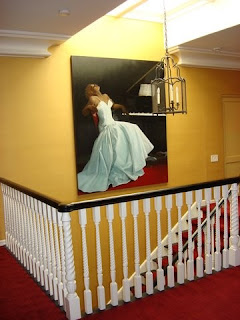
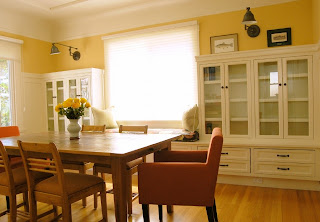
This is the third post in this series where I am featuring ideas and inspiration on how to decorate spaces with big open walls. In the second post
here, we looked at how to do this by adding some built-ins. Today, I want to look at one of my favorite frugal decorating ideas, picture groupings.
Picture Groupings
This is honestly one of the cheapest and easiest things you can do around your home. It is just so simple. There are several ways to group your pictures. You can go with a uniformed look, a random look or a linear look. Check out these great inspirational pics to see what would fit best in your space.
Even sizes with even spaces makes for a uniformed look. There are some great examples below.
You would need lots of little frames and a good ladder for something like this! Although I would love to see someone with a two story foyer do this (if you do – please send me the link!!!)
For a more organic look, try random sizing and placement. Keep your common denominator (aka the subject matter) consistent.
I think you could do a similar thing with wrapping paper in matted frames for an easy quick look!
One of my favorite bloggers –
Thrify Decor Chick and her awesome use of frames and trim to highlight her big tall walls!
If you have a long, horizontal wall try linear placement. It is a great way to get a gallery feel. Ikea, of course, has the fantastic lighting
here if you want to highlight your collection.
So those are the ideas, now what do you need to get it done.
First, you are going to need something to frame. For most of us we frame photos that we have taken of family or places we have visited. Need photos to frame? Try bigstockphoto.com if you are looking some royalty free images to create your perfect scheme. Ikea has also come out with some
great photo collections that are already matted that run from $10-20.
Another great idea, create your own textures and patterns through fabric or paper. Simply cut to fit so that you have enough to wrap around the back of a strong piece of cardboard, mat and frame. You will have a cheap and easy piece of art. (Hint - a good place to look for unique paper is in the scrapbooking section of craft stores!)
Looking for something more unique? I love getting old books and framing illustrations. Another great idea is to go to antique stores and find piles of old magazines. Some of those classic advertisements from Life, Time, or Vogue can become instant art when framed.
Next, you are going to need something to frame all this beautiful art up in so you can group it up. Personally, I like getting frames from clearance bins, $1 stores, garage sales and flea markets. This is especially good if you have a more eclectic decor scheme going on. If you want to plan something that is styled to be even and consistent, you may want to buy frames in bulk.
This
frame and many others like it are available in bulk from frameusa.com if you are willing to place an order of at least $50. (If you buy up, orders over $100 are not assessed a $15 charge.) For the frame above, the bulk order will run you $5.35 a frame (for an 8x10!) and it looks like you can mix and match sizes to get you up to that $50 to $100 minimum. They also have the hard to find 5x5 and 8x8 square frames. If you want to place an order for under $50, their sister site frameplace.com has
8x10’s for 8.50 a piece.
If you would rather just purchase a set of frames, Photoframes.net has a
6 pack of 11x14’s for only $35.10 and a
studio group 5 pack of black frames in different sizes for only $29.99.
Displays2go.com has a great deal on
bulk purchase matted frames. For an minimum order of 12, you can get 8x10’s with a 5x7 mat for $4.93 a piece. They also have some great overstock sales if you are interested!
Once you have all your art framed and ready to go on the wall, you have to get your plan together to get these bad boys hung. Several sites recommend that you cut out newspaper or butcher paper outlines to “tack” up to the walls which I think is a great idea. (Cause, I am that person that hangs the picture up, stands back and goes – “yeah that is crooked!” and creates multiple holes in the wall in an attempt to get it straight!) I would also recommend a measuring tape and a level if you are trying to space them all evenly. A good friend of mine recommended creating a grid out of painters tape, which seems like overkill. But if you are that paranoid about getting it perfect it might be the thing to do!
So what about you? Have you done picture groupings? Have pictures or links?? Please share!!
BTW - I think that we are reaching a level of collective thought out here! I have been working on this series for a couple of days and two of my favorite blogs just had similar posts yesterday about photo groupings! I gotta give a shout out. Please check them out below!
The Nesting Place
here – with her great frame collection and fantastic song writing skillz!
Pure Style Home – for framing up some art
here that is just beautiful.
Next up tomorrow – Featuring “BIG” art pieces to highlight an open wall space (and where to get some on the cheap!). Make sure you don't miss it - subscribe to my blog or follow me on twitter.


