Welcome to Frugal with a Flourish!

Enjoy your time here! Don't miss a post by getting email updates any time there is something new. You can also get updates through Google Friend Connect or follow me on Facebook or Twitter to get the latest info and see all the things that inspire me!

Showing posts with label DIY Tips. Show all posts
[ | Posted in | Add Comment | ]

I hope everyone is having a fantastic Labor Day weekend!  This is our “anniversary weekend” (what can I say we like to celebrate!) and we have enjoyed a very relaxing time with the Lil Man!  He is too much fun!  In between hanging out with him though – I managed to make a cute fall wreath that I can’t wait to show you guys!  Isn’t it adorable?

DSC09011

Ok – so how did this pretty little creation come about?  Well for starters, I decided I wanted to make a fabric flower wreath after seeing WAAAAY too many that I loved all over blogland and Pinterest.  But I didn’t want to spend a ton of time making fabric flowers.  I do have a 9.5 week old baby that requires a lot of my free time!  So instead of cutting out multiple layers and stacking them – I decided to make two different types of flowers that only require one long strip of fabric.

For the first kind of flower, I took a strip of fabric and folded it accordion style.

DSC08983

Then I stitched the front corner together. 

DSC08985

Next, I cut around the edges one side to make them look more “petal” like.

DSC08986

And then we you unfold it and put both ends together – you get a nice flower!  See!

DSC08988

Then you just run a quick stitch down the ends to keep your flower together.

DSC08989

The second way I came up with was to again fold the flower accordion style and trim the edges.

DSC08990 Then, holding the first petal in the center – I folded each subsequent petal under and around until you make a full “flower”.  Then just throw a couple stitches in the middle to hold all the petals together and you have a flower.

DSC08991

Either one of these methods will allow you to make several flowers very quickly.  I made all the ones for this wreath in an hour one night while catching up on an episode of The Closer.  (I love that show!) 

Then I needed a wreath!  I decided to try out a tip I found on Pinterest and shared on my Facebook page last week.  Instead of paying for a wreath form, I went to Lowe’s and picked up a piece of 6 foot by 1 inch pipe wrap from the plumbing department.  It cost about $1.50 with tax.  And because it was 6ft long – I was able to cut it in half and I can make another wreath out of the rest later on!

DSC08993

The other awesome thing about using this pipe wrap means that you can make your wreath into whatever shape you like.  I decided to turn mine into a tear drop shape and then wrapped it with yarn. 

Next – I used button covers (which you can find with the zippers and other findings in your fabric store) and spray painted them with my favorite can of Krylon ORB!  (Oil Rubbed Bronze – for any newbies)  Rather than stitch them onto the flowers since I was pressed for time – I used a hot glue gun and just stuck them on!  I love that they look a little like Black Eyed Susan's! 

DSC09000

Then I put the flowers on using some stick pins and voila – I had a beautiful scrappy fall wreath!!

DSC09009

How about a few more shots of it?  Ok!

DSC09013

I also made a little hanger by braiding a couple pieces of yarn together.  Cute huh?  I love it!

DSC09002

So there you go!  A quick easy scrappy fall wreath!  I just love how it turned out!  One last picture ok? :)

DSC09004

Alrighty – what do you think?  Think you will make one like it?  Love my quick and dirty flowers?  I wanna know!

Linking this up to

I Made a Wreath out of What? Party with The Nester @ The Nesting Place
Metamorphosis Monday with Susan @ Between Naps on the Porch
Tip Me Tuesday with Laurie @ Tip Junkie
Before and After Party with Sarah @ Thrifty Decor Chick
Get Your Craft On with Kim @ Today’s Creative Blog
Tutorials and Tips Tuesday with Beth @ Home Stores A to Z


[ | Posted in | Add Comment | ]

Hey guys – back with another guest post for you guys today and I think you are going to love it!  Today’s guest post is from Tammy @ Not Just Paper and Glue.  I love Tammy – she quickly became one of my favorite bloggy friends.

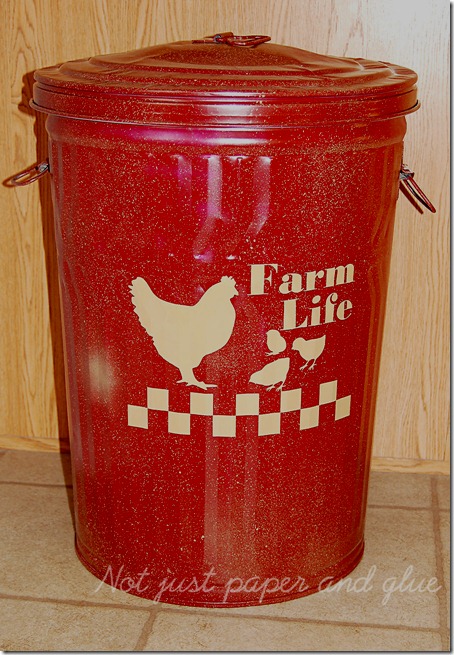
Tammy makes some of the most amazing scrapbook pages and cards, but like her blog says, she isn’t just about paper and glue.  She also does some fun DIY and thrifty projects like this galvanized trash can into dog food container!

Or this awesome lampshade to bucket tutorial!  I love this one!

And she also hosts a Pinterest Master List full of awesome people for you follow on Pinterest.  Make sure you go and add your profile and check out some other people to follow!

Now today – Tammy has another great tutorial to share with us!  I think all you animal lovers are going to love this one!  Enjoy!

~~~~~~~~~~~~~~~~~~~~~~~~~~~~~~~~~~~~~~~~~~~~~~~~~~~~

Hi everyone! Tammy here from Not Just Paper and Glue. I am very honored that Jess invited me to stop in today and share my latest project with all of you while she is on maternity leave.
I purchased an end table from the Salvation Army store for $10 for my little studio and I was going to refinish it. table-in-studio As it goes around here, I ended up not needing it and eventually my husband said he was going to throw it out but I had just found the most adorable idea!
courtesy LucyDesignsOnline.com
When I saw this cute dog bed from Lucy Designs, I knew this is what I wanted to make for my little dogs. My husband also agreed that it was a great idea so we took it into the living room; turned it upside down; and placed my little dogs favorite blanket in it to see if they would get into it.
Table-upside-down
As it turned out, they loved it and was frequently found napping in this upside down table. My husband cut the legs off for me and we used the ends of the legs for feet of the bed.
Table-with-legs-cut-off
Now was the scary part. You see, this would be the very first time that I had ever refinished a piece of furniture. I kept telling myself that it was “only a dog bed”, but still…. I wanted it to turn out pretty.
One evening I got brave and broke out the sander and began trying to rough up the slick finish of the table. When I was finished I wiped it down really well to remove any dust particles.
Sanding 
I wanted the basic color to be an antique white but envisioned some distressing of the original brown color but also some pink. To achieve this look, I gave the entire piece a random coat of Sweet Pea spray paint and let it dry overnight.
Table-in-Pink
The next morning I used my favorite spray paint color, Heirloom White. I wanted to make sure that I gave the entire piece a good smooth coverage of paint. When finished I realized that some of the pieces, especially on the posts, I noticed that it did not completely cover, but this was happy mishap. When the bed was dry I noticed that it gave a great worn and distressed look by allowing just some of the pink to show through – just the look I was trying to achieve!
Dog-Bed-in-White Distressed-post
It needed a bit more distressing so I used my sander to just “bump off” a few areas, and also along the edges of the bed.
It was now time for the fun part – decorating! I purchased some wood appliques from Hobby Lobby at 40% off ($2.40 total) along with a package of wooden balls ($1.79) and I spray painted them with the Heirloom White.
Decorative-Wood-Supplies  Decorative-Pieces-Painted
Once the wooden pieces were dry, I brushed Modge Podge over the top and lightly dusted some Light Pink Glitter Crystals over the top of each piece and set them aside to dry. You didn’t think I could do a project without adding a little “bling” now did ya? lol
You will notice I am using a make up sponge to apply the Modge Podge. I couldn’t find my sponge brushes and then I remembered… I donated them to our Children’s Church. In a pinch, a make up sponge will work – or at least it did in this case.
Adding-Modge-Podge  Adding-Glitter
Once the pieces were dry, I used Wood Glue to attach all of the pieces to my dog bed.
adding-glue-to-pieces  Decorative-Pieces-upclose
I couldn’t believe the bed was finally complete and I was completely satisfied with the end result. I don’t know why I was so scared to start this project – it was easy!
Dog-Bed-corner  Dog-Bed-Details-outside
And here is my “little princess” in her new bed. She knows that no one will say anything about her bad hair cut since she really is a “princess” and she is lounging in her adorable bed.
The-PrincessMidge is an overweight, elderly AKC Yorkie and this is not one her “better days”.
NOTE: We did not remove the screws that hold the table together which you may have noticed in earlier pictures. We put an oversized pillow in the bottom with a velour throw blanket over the top. Both dogs have been using this bed for some time now and it has not been an issue for us. If you decide to make one of these beds, you may want to use an alternative method to hold the table together.
Supplies: Table (Salvation Army) Sander Artistic Appliques: Floral Pair and Small Flower (Hobby Lobby) Spray Paint: Sweet Pea and Heirloom White (Rust-oleum) Glitter: Light Pink Crystals Glitter (P K Glitz)  Modge Podge (Satin) Wood Glue (Gorilla Glue) I want to thank Jess for allowing me to visit with all of you today. I hope you enjoyed my very first attempt at refinishing a piece of furniture. If you decide to attempt something like this, I would love take a peek!

~~~~~~~~~~~~~~~~~~~~~~~~~~~~~~~~~~~~~~~~~~~~~~~~~~~~~~~

Tammy – I think this is just too cute and creative!  And I am with you!  I would love to take a peek at something like this if someone takes a crack at it!  What about you?  Does this give you some ideas??  I wanna know!

[ | Posted in | Add Comment | ]

Today I have another great blogger to share with you guys!  Madigan from Madigan Made is with us today and she is a sweetie!
Madigan is full of great ideas and easy DIY crafts and ideas.  Some of my favorites?  Well I loved this DIY Cornice Project.
And then there is the beachy printable she made!  Love it.  And she left it for you to download and use on your own!
And right now she has a series going on called Summer Loving with NO Oven that features all kinds of yummy summer recipes that you don’t have to go near a hot stove to enjoy!   Loving these Caprese bites!  Delish!
So without any further ado – here is Madigan!
~~~~~~~~~~~~~~~~~~~~~~~~~~~~~~~~~~~~~~~~~~~~~~~~~~~~~~~~~~~
Hi there! I'm Madigan, the writer behind Madigan Made. I'm excited Jess invited me here today!
madigan button
If you are interested in simple crafts, recipes and home decor, then you may enjoy visiting me over at Madigan Made. I love easy and chic ideas and love to share them. (Oh, and I also love my hubby and puppy... and a little dark chocolate and coffee!)

Today I want to share an idea for wall art that involves sports tickets.


I'm a huge fan of personalized art for my home.
Anyone can pick up a print from a home store. I prefer to make it "mine". 

Well, this art project is very personal to  my husband. It is for our sports-themed basement.

Ever since I have known my husband, he saved all his golf score cards and any ticket to a sporting event. He knew that some day he would want to display them, maybe in a media room or basement. I came up with these frames as a way to meet that wish.

These tickets just prove that you can frame anything and it could be art. (if that is what you want to call this!)

Want to make one of these yourself? Well, first you will need:
  • A sports fanatic husband (who loves to golf and is often invited to sporting events by friends and family)
  • Many, many, many sports tickets and golf score cards (Mr. Madigan collected them for 10+ years.)
  • Adhesive (scrapbook glue dots/tabs would work well)
  • Large empty picture frames (I like the ones from IKEA. They are large and come with mats already.)
  • Poster board
First, cut your poster board to about the size of the glass.
Open the frame and using a pencil, draw an outline of the mat opening onto the poster board. Use that line as a guide for laying out your tickets.
You could lay out your pattern before adhering anything. But I just start in one corner and work my way across. Use the adhesive to secure the corners of the ticket to the poster board.
Try to alternate the type and look of each ticket and avoid too many of one kind next to each other. Carefully overlap the tickets when needed. You may need to trim off some of the tickets (I also trimmed down some of the golf score cards, too).
After you've covered the entire mat area, pop it in the frame. Could not be easier!
I love this project because once Mr. Madigan collects enough tickets to fill another one, I can just go and buy another frame at IKEA.
I slowly made these displays over the past several years.  I made six total frames for our basement.
Here are four more of them below.

I bet you could do this with other types of tickets...
For your music lover: Concert tickets?
For your theater or movie buff: show tickets?
For your roller coaster fanatic: Amusement park tickets?
It really is a great way to save and display a memory.
If you like this project, come visit me over at Madigan Made! You can also find me on Facebook, Pinterest, Twitter or StumbleUpon. I enjoy sharing 'behind the scenes' info and other great ideas I find.


Thanks, Jess, for letting me share this project!
(Hope you are enjoying your time with your little one!)

~~~~~~~~~~~~~~~~~~~~~~~~~~~~~~~~~~~~~~~~~~~~~~~~~~~~~~~~~~~~~

Thanks again Madigan for helping out and stopping by!   Didn’t you just love that project?   What a great way to keep mementos.  I think it would be a fun way to organize summer vacay memories too!   What would you make out of it?  I wanna know!

[ | Posted in | Add Comment | ]

Now today I am excited to share a couple projects with you by Allison @ House of Hepworths!  Allison is super sweet and we got to know each other at Blissdom!  You can tell she is one of those down to earth people by the way she writes on her blog – and that is SO true when you meet her in person.  I can’t wait to share with you guys some of the great ideas she has had recently and if you haven’t had the pleasure of reading her blog – you have to go over immediately and get yourself better acquainted!

~~~~~~~~~~~~~~~~~~~~~~~~~~~~~~~~~~~~~~~~~~~~~~~~~~~~~~~~~~~~~~

Hey guys! I'm Allison...

...and I blog over at House of Hepworths!
HouseofHepworths

I am so excited to be Guest Blogging here today. I absolutely adore Jess! She is such a gem, isn't she?! I met Jess last year at Blissdom and we pretty much hung out in the same group the remainder of the week. She quickly became a confidant to me, and we had a few really nice heartfelt chats. She just has such a warm effect on people and makes you feel like you can trust her with your life. I so wish we lived closer to one another (I'm in Texas, she's in Tennessee) or at least that I was better about keeping in touch. Jess is the type of friend that you have for life. She is hard-core a REAL person. And I love that about her!

Okay, enough sappy schmoozing! lol. Let's get down to business!

House of Hepworths is a Home Decorating blog. I blog about decorating my home, crafting all sorts of fun projects, DIY projects and renovations, and anything "home" related. If it will help make my house more of a home for me, I'll blog about it.

I recently shared how to create a Spa Bath Mat using IKEA outdoor decking. It's been a hit right out of the shoe and was even featured on Re-Nest!

Here are a few of my recent crafts that have been very popular:

Make cute cheap accessories using fun printed Duct Tape!

Using only Dollar Store finds, make a fun Pinwheel Wreath!

Want a fun easy project to help keep your kids cooled off this summer? Make a few Sponge Water Bombs!

Very recently I finished a big dining table refinish project I've been working on for forever. Here are the before and after:
 
The chairs are still mid-project as well as the dining room, but hopefully I'll have it all finished by the end of the summer!

I have all my craft projects sorted and organized for easy viewing if you'd like to check out all the other fun stuff I've done.

I'd love for you to stop by and say hi!

Jess, thanks so much for inviting me as a guest on your blog. You have been a gracious host! I hope you are enjoying your adorable new baby boy! Aren't babies just so squishy and loveable? I could snuggle down with an infant any day of the week. Take care my friend, and do try to get some rest! xoxo

~~~~~~~~~~~~~~~~~~~~~~~~~~~~~~~~~~~~~~~~~~~~~~~~~~~~~~~~~~~~

Thanks Allison for stopping by and sharing some of these great ideas!  I am loving the bath mat and that pinwheel wreath is AMAZING!  So what do you think?  Any of these projects get your mind going?  I wanna know!


Related Posts with Thumbnails