Welcome to Frugal with a Flourish!

Enjoy your time here! Don't miss a post by getting email updates any time there is something new. You can also get updates through Google Friend Connect or follow me on Facebook or Twitter to get the latest info and see all the things that inspire me!

Showing posts with label Holiday Fun. Show all posts
[ | Posted in | Add Comment | ]

This Halloween, if you want to go beyond your standard Jack-o-Lantern carving on a pumpkin – have I got some ideas for you!  Below are some of the beautiful ideas for decorating pumpkins that I have been collecting on my Fall Inspiration board on Pinterest.  Here are nine different ways to purty up your pumpkin – enjoy!

1.  Paint Them with a Pattern

These painted patterned pumpkins (say that three times fast!) from Lolly Jane Boutique are so cute!  I think I may HAVE to do this! 

Photo via Lolly Jane Boutique

2.  Add a Band of Beans

These lentil studded candles and pumpkins would make such a great centerpiece. 

Photo via HGTV

3.  Stuff them with Christmas Lights

Create twinkling pumpkins with some white lights!  Magical aren’t they!

Photo via Martha Stewart

4.  Turn them into Planters

Use your pumpkin as a chic pot for your fall flowers!  Don’t these look cute lining the stairway?

Photo via Habitually Chic

5. Spell out a Message

These are so pretty and I love the lace details!  I can think of all kinds of cute sayings you could put on a set of Pumpkins!

Photo via Seeing Inkspots

6.  Gild them with Gold Paint

Shiny metallic paints can really make a statement on your gourds!

Photo via Country Living

7.  Put some Bling on it!

Get that Bedazzler out and stick some rhinestones on your pumpkin!  I love the spider web detail on this one!

Photo via BHG

8.  Carve out a Monogram

These are so classy!  I love the script initials.  Leave it to Martha to do something so elegant.

Photo via Martha Stewart

9.  Tattoo them with a Vintage Print

I freaking LOVE this idea that I first saw on Holly’s blog, 504 Main, last year.  Silhouette makes printable temporary tattoos and as Holly figured out – they affix to all kinds of skin, including the skin of pumpkins. 
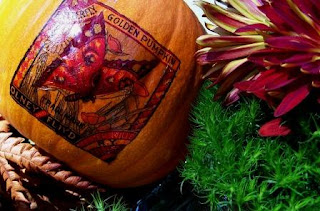
 Photo via 504 Main

So there you go!  Nine different ideas on how to make your pumpkins pop this Halloween!  See any ideas that inspired you?  I wanna know what you loved!

[ | Posted in | Add Comment | ]

Ok – the heat has finally gotten the better of me and I am ready for the cooler weather of Fall!  Is it too early to start thinking about leaves turning, crisp mornings and the general loveliness of a mild clear day?  No – I think not.  In fact I have been collecting a ton of inspirational ideas for decorations, crafts and other goodies in my Pinterest “Fall Inspiration” board.  Here are some of my favorites!

Love this fall vignette from Sugar Pie Farm House.  Those leaves really pop against all the creamy whites!

Photo via Sugar Pie Farm House

Make a simple display of the fall foliage to accent a wall.  Beautiful and rustic all at once!

Photo via Bloesem Living

Need some fall printables?  Colleen @ Mural Maker and More has 12 reasons why you will want to download these for yourself!  (You have to read this post – it is hysterical!)

Love this mantel from Happy Together.  The Thankful pennant really makes it!

Photo via Happy Together

These DIY Fall Tiles are adorable and easy to make!  Visit Erika’s blog for a full tutorial!

Photo via Little Miss Crafty Pants

Love this trio of wreaths that Tricia @ The Sweet Survival made!  So pretty!

Photo via The Sweet Survival

Aren’t these lanterns gorgeous!  These Pottery Barn beauties have me scheming how I could knock them off. 

Photo via Pottery Barn

Love these ideas?  Hop over and check out some of the others I have saved in my Fall Inspiration board!  I will also be sharing more of my favorite finds on my Facebook page for the month of September.  Make sure you “Like” Frugal with a Flourish to make sure you don’t miss a good one! 

[ | Posted in | Add Comment | ]

Ok today I have another great blogger back today to share some great ideas with you guys!   Brittany from Pretty Handy Girl is an amazing blogger, incredibly talented handy gal, and a great friend!  She has been incredibly supportive for me and I just love her to death!  I got to meet her in person this year at Blissdom and she is just as incredibly friendly and helpful in person as she is on her blog!  Please make sure you head over and check her out if you haven’t already!  

I think you guys will love the project she has up for us today.  Super easy and a great way to customize your own fun party plates!  Enjoy!

~~~~~~~~~~~~~~~~~~~~~~~~~~~~~~~~~~~~~~~~~~~~~~~~~~~~~~~~~~

Congratulations to Jess and her husband! The photos of her little man are sooo sweet! I couldn't be more excited for them both.

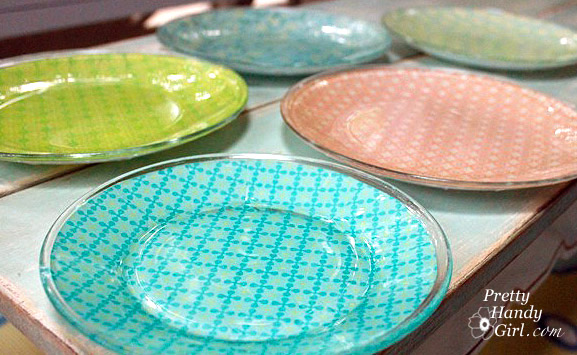
I want to thank Jess for inviting me over today to share with you an easy craft tutorial. I call these my citrus themed glass plates.

First let me take a minute to introduce myself. I'm Brittany, aka Pretty Handy Girl. I write a blog called, what else: Pretty Handy Girl! I'm on a mission to empower people to take on their own DIY project.

Some of my projects have been pretty:

Some of them have been ugly:

Some are fanciful:

And others are adventurous:

Regardless the project, I always provide detailed directions and pictures to help empower you to build it, craft it, sew it, or fix it yourself! I hope you will stop by soon and say "hi!"

Before my 4oth birthday party, I had been scouring the stores for some pretty citrus colored plates to serve sweets on. I was coming up empty-handed, was running out of time, and was concerned about my budget. I happened to stumble upon some glass plates I bought at Goodwill awhile ago. And then the idea hit me! Why not make my own decorative plates! 

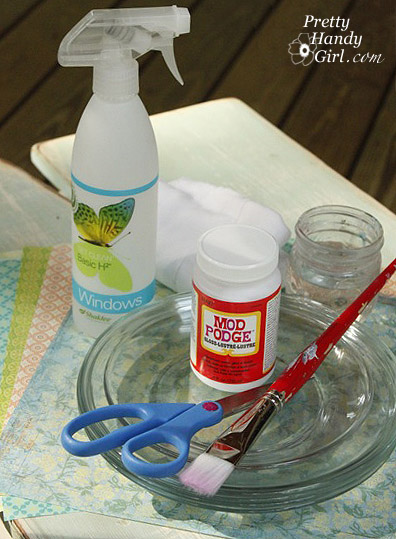
Materials:

  • Mod Podge Glossy
  • Paint Brush
  • Jar of Water
  • Glass Cleaner
  • Paper Towels
  • Scrapbook Paper (thin works better)
  • Glass Plates
  • Recycled Jar or Cans to Dry Plates on
  • Scissors
  • Pencil

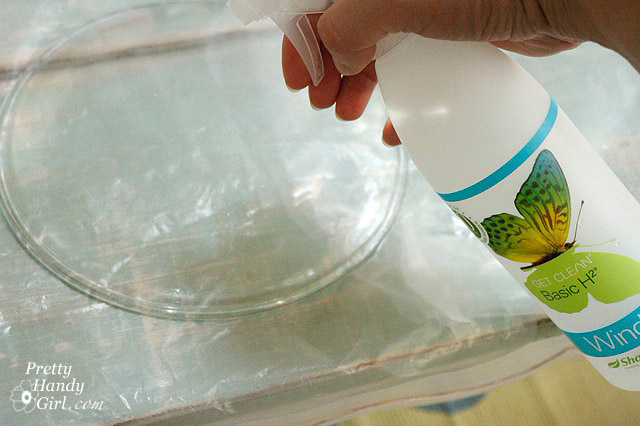
Instructions: 1. Clean the bottom of the glass plates with glass cleaner.

2. Trace around the plate on the scrapbook paper.

3. Cut out the circle.

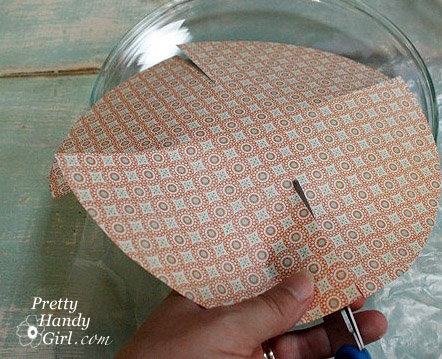
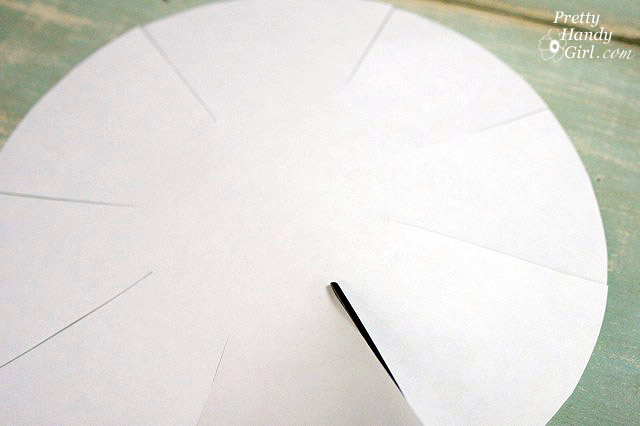
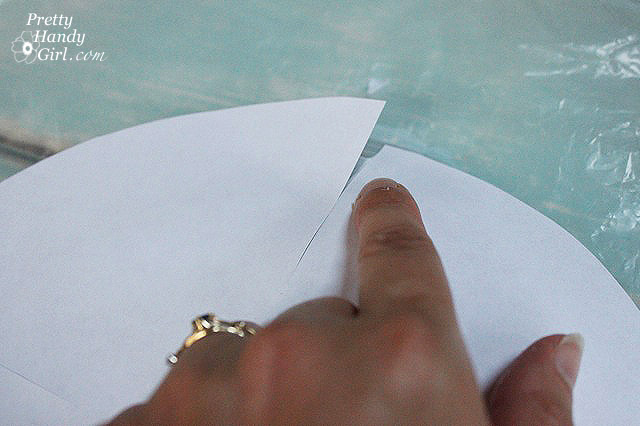
4. Snip four slits into the circle but NOT all the way to the center.

5. Snip four more slits centered between the first set of slits. You should end up with eight cuts equally spaced.

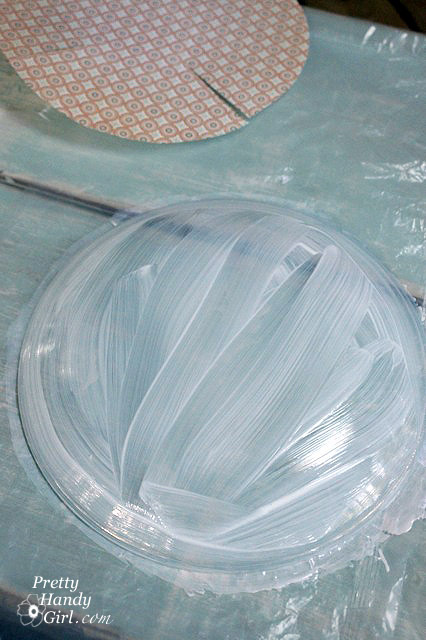
6. Cover the bottom of your glass plate with mod podge.

7. Center the cutout circle onto the bottom of the plate, pattern side down. Gently press the paper onto the plate allowing the paper to overlap slightly at each slit.

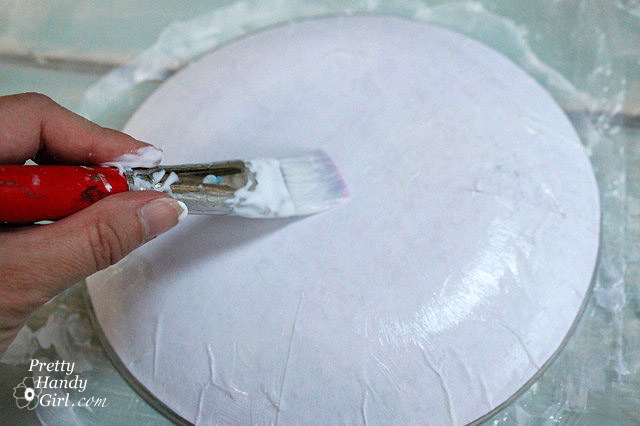
8. Liberally apply mod podge over the scrapbook paper.

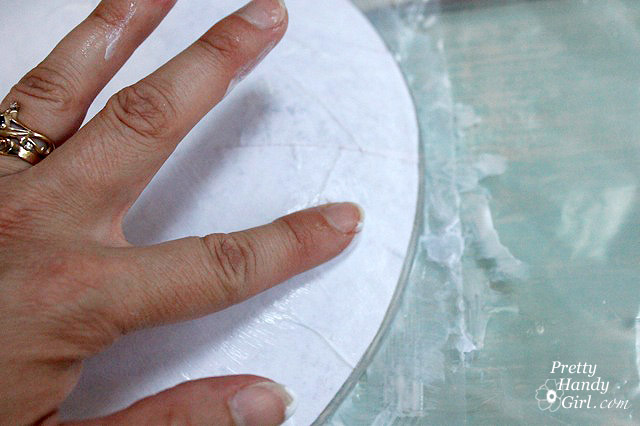
9. Use your finger to smooth out the wrinkles in the paper. But, be gentle or the paper will tear.

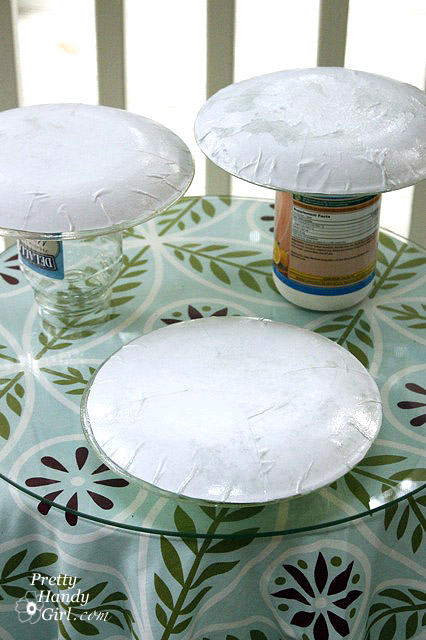
10. Lay the plates upside down on the jars and cans until dry. Add more mod podge if needed to seal the scrapbook paper and glue it down.

Turn them over and enjoy your unique decorative plates. Note: Do not fully submerse the plates in water, wipe them off and wash the tops so as not to mess up the paper side. Stack them with a paper towel in between so they don't stick together.


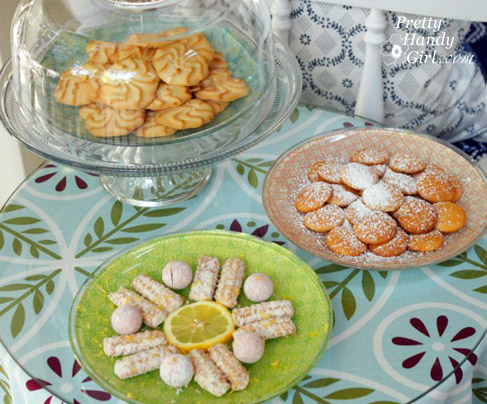
Load them up with some light citrus sweets and they will be the hit of the party!

 The possibilities are endless with these plates. Think about personalizing them with photos or monograms. What are your ideas for making your own plates?

~~~~~~~~~~~~~~~~~~~~~~~~~~~~~~~~~~~~~~~~~~~~~~~~~~~~~~~

I LOVE this!  Can’t you think how quick and easy this would be to do for holidays or themed birthday parties?  How cute would these be to give Christmas Cookies on over the season?  Oh my brain is spinning with possibilities!  How would you customize yours?  I wanna know!

[ | Posted in | Add Comment | ]

For some strange reason – I am possessed to decorate for Easter this year.  Maybe it is all the great ideas I am seeing from you guys.  Maybe it is all the baby hormones in my system.  Either way – I decided to “color” some eggs and make a little centerpiece.  What I came up with is below – the rest of the post is how we got there!

DSC07892

So for starters – I had these cardboard eggs that I picked up on clearance last year at Hobby Lobby after Easter.  I figured plain ole eggs could be used in a multitude of projects.  Who would have thought it would have taken me a year to do anything with them.  Anyways – I just jabbed a bamboo skewer into the bottom of them and decided to paint them up.

DSC07845

I didn’t have the perfect pastel colors in my paint stash – but I did have some white paint that I used to “mellow” out some of my more vibrant colors.  I went ahead and painted them and let them dry.  Like what I am using to “weigh down” my little buckets?  I tell you – when I craft – we get sophisticated!  :)

DSC07849

So once they were dry – I arranged them ever so slightly more artistically in my little galvanized buckets (which I already had) and then topped them off with a little moss.  And ta-da!  Centerpiece!

DSC07878

They are like little egg topiaries!  I just love em!  I feel like they just really brighten up the whole space.

DSC07885

Sometimes – just the littlest bit of color can add all kinds of smiles to your day! 

DSC07888

So what about you?  Have any bright pops of color brightening your day?  Anyone else have any crazy urges to decorate for Easter?  I wanna know if it is just me!

Linking this up to

Get Your Craft On with Kim @ Today’s Creative Blog
Tip Me Tuesday with Laurie @ Tip Junkie
Power of Paint Party with Maryann @ Domestically Speaking
Show and Tell with Becca @ Blue Cricket Design
Show and Share Day with Chris @ Just a Girl

[ | Posted in | Add Comment | ]

I had so much fun making this wreath!  Some of my favorite memories from my childhood were about Easter Egg hunts.  I mean – we got into it!  Waiting for the parents to hide eggs all over the back of a wooded hillside and then just tearing out after them like we were caged beasts!  It was so much fun.  So whenever I see a plastic Easter egg – I can’t help but have a little smirk on my face. 

What I started with was this ivy wreath I got on clearance from Ikea for $2.99.  I had gone out and hung it on the door earlier this weekend as a potential spring wreath candidate.  I love how full it is.  And that is what got me thinking about hidden Easter eggs.  (You guys should know by now how random my little brain can be!)

DSC07804

So I went out and got a pack of plastic eggs from the dollar store.  Then I dug into my floral supply stash and got some floral picks out.  My little eggs came with holes in the bottom – which was totally convenient for me.  I just ran the wire through and twisted it to secure.

DSC07814

Then I flipped the wreath over and wired all the eggs on from the back.  I was hoping this would provide the “hidden” look I was going for – and I think it did!

DSC07818

Check out the finished project!  I love it!

DSC07821

I think the ways the little eggs poke out from behind the leaves is just too cute!

DSC07824

I can’t wait to be able to do egg hunts with our little man.  It is so funny the things you start to look forward to once you know you have a little one to prepare them for!

DSC07831

Can you spot all eighteen eggs?  It might take a little while to find all of them!

DSC07835

I think it is the perfect wreath for about $4!  Here is one last shot!

DSC07841

So there you go!  What about you?  Got any Easter decorating going on at your house?  Do you have fun memories of Easter egg hunts from your past?  Planning one for this year?  I wanna know!

Also linking this to

Metamorphosis Monday with Susan @ Between Naps on the Porch
Spring Link Party with Kate @ Centsational Girl
Get Your Craft On with Kim @ Today’s Creative Blog
Tip Me Tuesday with Laurie @ Tip Junkie
Show and Tell with Becca @ Blue Cricket Design
Hooking up with HOH with Allison @ House of Hepworths
Transformation Thursday with Gina @ Shabby Chic Cottage
Show and Share Day with Chris @ Just a Girl

Weekend Wrap Up Party with Jen @ Tatertots and Jello


Related Posts with Thumbnails