Welcome to Frugal with a Flourish!

Enjoy your time here! Don't miss a post by getting email updates any time there is something new. You can also get updates through Google Friend Connect or follow me on Facebook or Twitter to get the latest info and see all the things that inspire me!

Showing posts with label Thrifty Revamps. Show all posts
[ | Posted in | Add Comment | ]

Hey guys – back with another guest post for you guys today and I think you are going to love it!  Today’s guest post is from Tammy @ Not Just Paper and Glue.  I love Tammy – she quickly became one of my favorite bloggy friends.

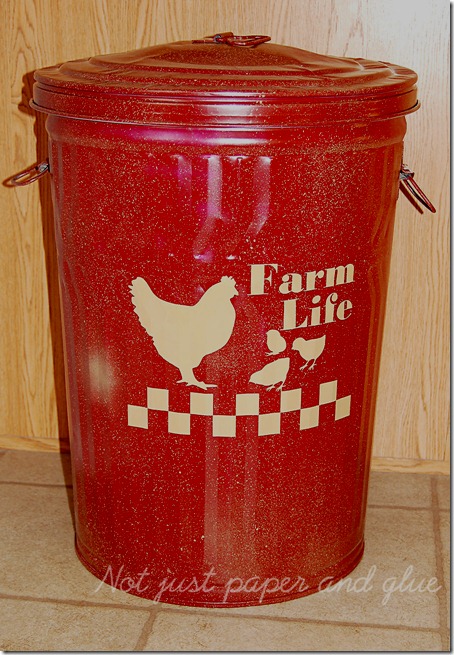
Tammy makes some of the most amazing scrapbook pages and cards, but like her blog says, she isn’t just about paper and glue.  She also does some fun DIY and thrifty projects like this galvanized trash can into dog food container!
Or this awesome lampshade to bucket tutorial!  I love this one!

And she also hosts a Pinterest Master List full of awesome people for you follow on Pinterest.  Make sure you go and add your profile and check out some other people to follow!

Now today – Tammy has another great tutorial to share with us!  I think all you animal lovers are going to love this one!  Enjoy!

~~~~~~~~~~~~~~~~~~~~~~~~~~~~~~~~~~~~~~~~~~~~~~~~~~~~

Hi everyone! Tammy here from Not Just Paper and Glue. I am very honored that Jess invited me to stop in today and share my latest project with all of you while she is on maternity leave.
I purchased an end table from the Salvation Army store for $10 for my little studio and I was going to refinish it. table-in-studio As it goes around here, I ended up not needing it and eventually my husband said he was going to throw it out but I had just found the most adorable idea!
courtesy LucyDesignsOnline.com
When I saw this cute dog bed from Lucy Designs, I knew this is what I wanted to make for my little dogs. My husband also agreed that it was a great idea so we took it into the living room; turned it upside down; and placed my little dogs favorite blanket in it to see if they would get into it.
Table-upside-down
As it turned out, they loved it and was frequently found napping in this upside down table. My husband cut the legs off for me and we used the ends of the legs for feet of the bed.
Table-with-legs-cut-off
Now was the scary part. You see, this would be the very first time that I had ever refinished a piece of furniture. I kept telling myself that it was “only a dog bed”, but still…. I wanted it to turn out pretty.
One evening I got brave and broke out the sander and began trying to rough up the slick finish of the table. When I was finished I wiped it down really well to remove any dust particles.
Sanding 
I wanted the basic color to be an antique white but envisioned some distressing of the original brown color but also some pink. To achieve this look, I gave the entire piece a random coat of Sweet Pea spray paint and let it dry overnight.
Table-in-Pink
The next morning I used my favorite spray paint color, Heirloom White. I wanted to make sure that I gave the entire piece a good smooth coverage of paint. When finished I realized that some of the pieces, especially on the posts, I noticed that it did not completely cover, but this was happy mishap. When the bed was dry I noticed that it gave a great worn and distressed look by allowing just some of the pink to show through – just the look I was trying to achieve!
Dog-Bed-in-White Distressed-post
It needed a bit more distressing so I used my sander to just “bump off” a few areas, and also along the edges of the bed.
It was now time for the fun part – decorating! I purchased some wood appliques from Hobby Lobby at 40% off ($2.40 total) along with a package of wooden balls ($1.79) and I spray painted them with the Heirloom White.
Decorative-Wood-Supplies  Decorative-Pieces-Painted
Once the wooden pieces were dry, I brushed Modge Podge over the top and lightly dusted some Light Pink Glitter Crystals over the top of each piece and set them aside to dry. You didn’t think I could do a project without adding a little “bling” now did ya? lol
You will notice I am using a make up sponge to apply the Modge Podge. I couldn’t find my sponge brushes and then I remembered… I donated them to our Children’s Church. In a pinch, a make up sponge will work – or at least it did in this case.
Adding-Modge-Podge  Adding-Glitter
Once the pieces were dry, I used Wood Glue to attach all of the pieces to my dog bed.
adding-glue-to-pieces  Decorative-Pieces-upclose
I couldn’t believe the bed was finally complete and I was completely satisfied with the end result. I don’t know why I was so scared to start this project – it was easy!
Dog-Bed-corner  Dog-Bed-Details-outside
And here is my “little princess” in her new bed. She knows that no one will say anything about her bad hair cut since she really is a “princess” and she is lounging in her adorable bed.
The-PrincessMidge is an overweight, elderly AKC Yorkie and this is not one her “better days”.
NOTE: We did not remove the screws that hold the table together which you may have noticed in earlier pictures. We put an oversized pillow in the bottom with a velour throw blanket over the top. Both dogs have been using this bed for some time now and it has not been an issue for us. If you decide to make one of these beds, you may want to use an alternative method to hold the table together.
Supplies: Table (Salvation Army) Sander Artistic Appliques: Floral Pair and Small Flower (Hobby Lobby) Spray Paint: Sweet Pea and Heirloom White (Rust-oleum) Glitter: Light Pink Crystals Glitter (P K Glitz)  Modge Podge (Satin) Wood Glue (Gorilla Glue) I want to thank Jess for allowing me to visit with all of you today. I hope you enjoyed my very first attempt at refinishing a piece of furniture. If you decide to attempt something like this, I would love take a peek!

~~~~~~~~~~~~~~~~~~~~~~~~~~~~~~~~~~~~~~~~~~~~~~~~~~~~~~~

Tammy – I think this is just too cute and creative!  And I am with you!  I would love to take a peek at something like this if someone takes a crack at it!  What about you?  Does this give you some ideas??  I wanna know!

[ | Posted in | Add Comment | ]

Ok today I have another great blogger back today to share some great ideas with you guys!   Brittany from Pretty Handy Girl is an amazing blogger, incredibly talented handy gal, and a great friend!  She has been incredibly supportive for me and I just love her to death!  I got to meet her in person this year at Blissdom and she is just as incredibly friendly and helpful in person as she is on her blog!  Please make sure you head over and check her out if you haven’t already!  

I think you guys will love the project she has up for us today.  Super easy and a great way to customize your own fun party plates!  Enjoy!

~~~~~~~~~~~~~~~~~~~~~~~~~~~~~~~~~~~~~~~~~~~~~~~~~~~~~~~~~~

Congratulations to Jess and her husband! The photos of her little man are sooo sweet! I couldn't be more excited for them both.

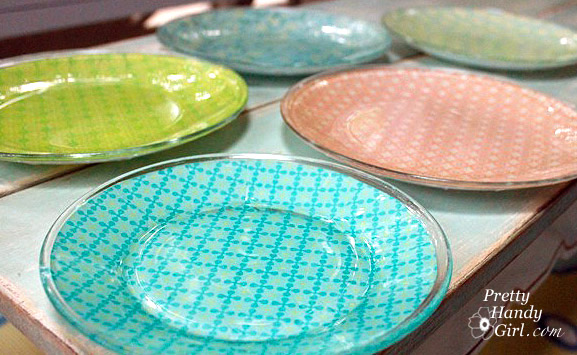
I want to thank Jess for inviting me over today to share with you an easy craft tutorial. I call these my citrus themed glass plates.

First let me take a minute to introduce myself. I'm Brittany, aka Pretty Handy Girl. I write a blog called, what else: Pretty Handy Girl! I'm on a mission to empower people to take on their own DIY project.

Some of my projects have been pretty:

Some of them have been ugly:

Some are fanciful:

And others are adventurous:

Regardless the project, I always provide detailed directions and pictures to help empower you to build it, craft it, sew it, or fix it yourself! I hope you will stop by soon and say "hi!"

Before my 4oth birthday party, I had been scouring the stores for some pretty citrus colored plates to serve sweets on. I was coming up empty-handed, was running out of time, and was concerned about my budget. I happened to stumble upon some glass plates I bought at Goodwill awhile ago. And then the idea hit me! Why not make my own decorative plates! 

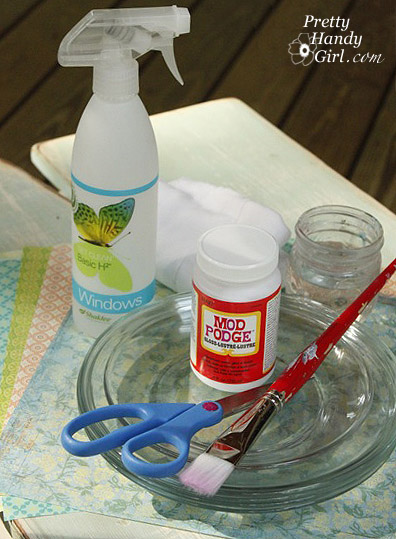
Materials:

  • Mod Podge Glossy
  • Paint Brush
  • Jar of Water
  • Glass Cleaner
  • Paper Towels
  • Scrapbook Paper (thin works better)
  • Glass Plates
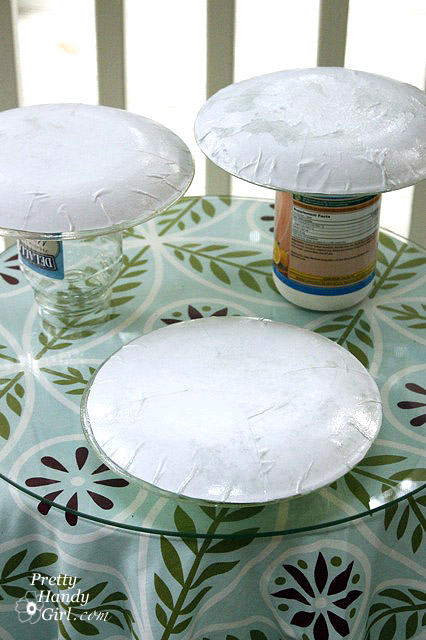
  • Recycled Jar or Cans to Dry Plates on
  • Scissors
  • Pencil

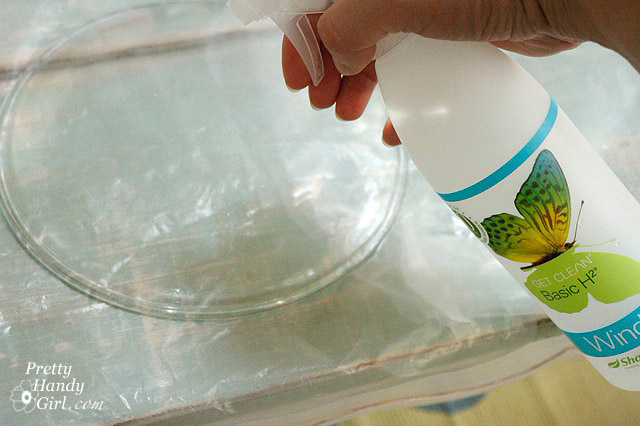
Instructions: 1. Clean the bottom of the glass plates with glass cleaner.

2. Trace around the plate on the scrapbook paper.

3. Cut out the circle.

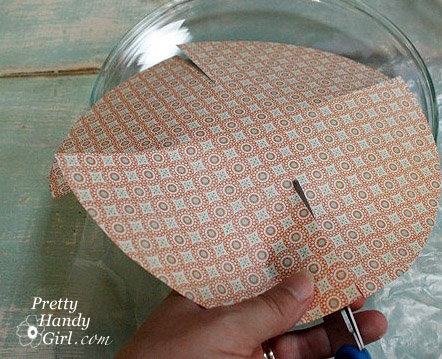
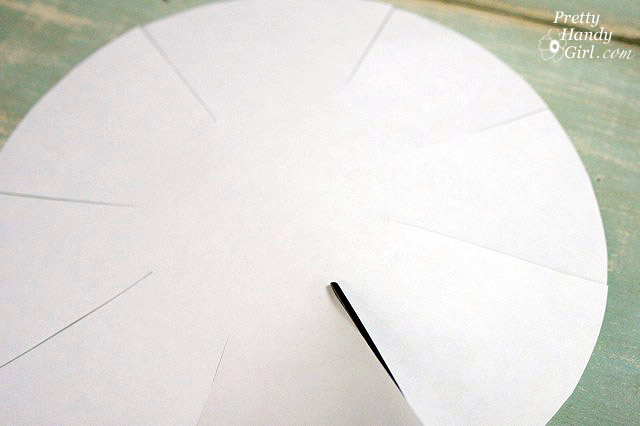
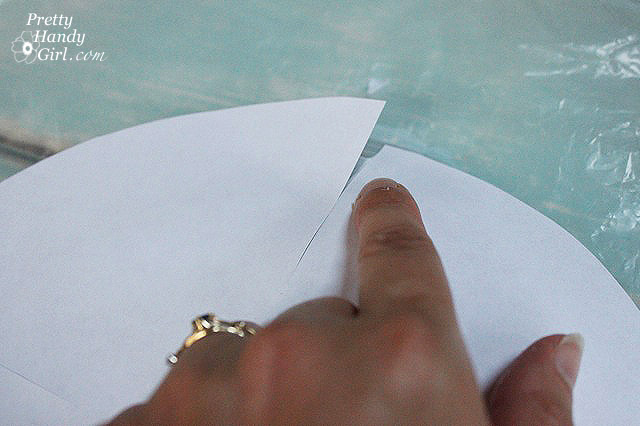
4. Snip four slits into the circle but NOT all the way to the center.

5. Snip four more slits centered between the first set of slits. You should end up with eight cuts equally spaced.

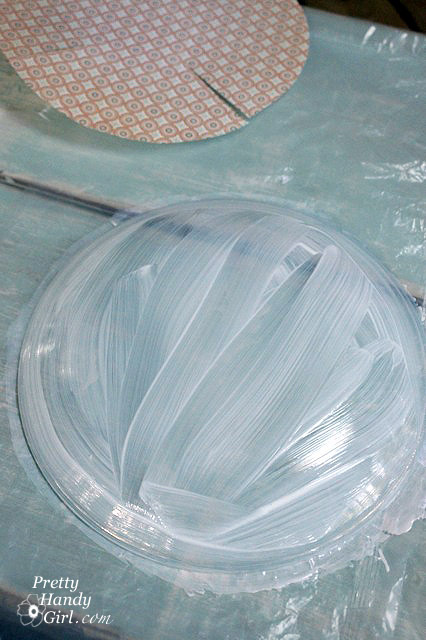
6. Cover the bottom of your glass plate with mod podge.

7. Center the cutout circle onto the bottom of the plate, pattern side down. Gently press the paper onto the plate allowing the paper to overlap slightly at each slit.

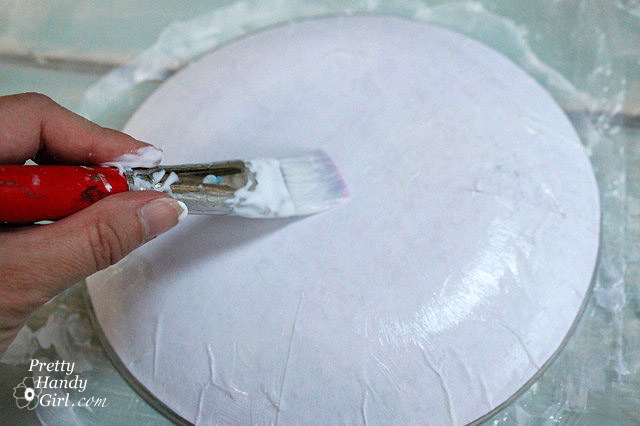
8. Liberally apply mod podge over the scrapbook paper.

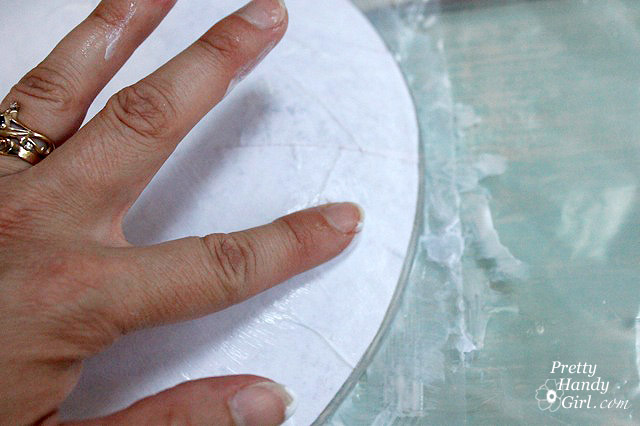
9. Use your finger to smooth out the wrinkles in the paper. But, be gentle or the paper will tear.

10. Lay the plates upside down on the jars and cans until dry. Add more mod podge if needed to seal the scrapbook paper and glue it down.

Turn them over and enjoy your unique decorative plates. Note: Do not fully submerse the plates in water, wipe them off and wash the tops so as not to mess up the paper side. Stack them with a paper towel in between so they don't stick together.


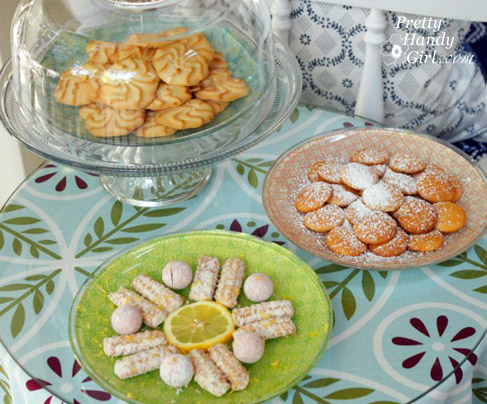
Load them up with some light citrus sweets and they will be the hit of the party!

 The possibilities are endless with these plates. Think about personalizing them with photos or monograms. What are your ideas for making your own plates?

~~~~~~~~~~~~~~~~~~~~~~~~~~~~~~~~~~~~~~~~~~~~~~~~~~~~~~~

I LOVE this!  Can’t you think how quick and easy this would be to do for holidays or themed birthday parties?  How cute would these be to give Christmas Cookies on over the season?  Oh my brain is spinning with possibilities!  How would you customize yours?  I wanna know!

[ | Posted in | Add Comment | ]

Now today I am excited to share a couple projects with you by Allison @ House of Hepworths!  Allison is super sweet and we got to know each other at Blissdom!  You can tell she is one of those down to earth people by the way she writes on her blog – and that is SO true when you meet her in person.  I can’t wait to share with you guys some of the great ideas she has had recently and if you haven’t had the pleasure of reading her blog – you have to go over immediately and get yourself better acquainted!

~~~~~~~~~~~~~~~~~~~~~~~~~~~~~~~~~~~~~~~~~~~~~~~~~~~~~~~~~~~~~~

Hey guys! I'm Allison...

...and I blog over at House of Hepworths!
HouseofHepworths

I am so excited to be Guest Blogging here today. I absolutely adore Jess! She is such a gem, isn't she?! I met Jess last year at Blissdom and we pretty much hung out in the same group the remainder of the week. She quickly became a confidant to me, and we had a few really nice heartfelt chats. She just has such a warm effect on people and makes you feel like you can trust her with your life. I so wish we lived closer to one another (I'm in Texas, she's in Tennessee) or at least that I was better about keeping in touch. Jess is the type of friend that you have for life. She is hard-core a REAL person. And I love that about her!

Okay, enough sappy schmoozing! lol. Let's get down to business!

House of Hepworths is a Home Decorating blog. I blog about decorating my home, crafting all sorts of fun projects, DIY projects and renovations, and anything "home" related. If it will help make my house more of a home for me, I'll blog about it.

I recently shared how to create a Spa Bath Mat using IKEA outdoor decking. It's been a hit right out of the shoe and was even featured on Re-Nest!

Here are a few of my recent crafts that have been very popular:

Make cute cheap accessories using fun printed Duct Tape!

Using only Dollar Store finds, make a fun Pinwheel Wreath!

Want a fun easy project to help keep your kids cooled off this summer? Make a few Sponge Water Bombs!

Very recently I finished a big dining table refinish project I've been working on for forever. Here are the before and after:
 
The chairs are still mid-project as well as the dining room, but hopefully I'll have it all finished by the end of the summer!

I have all my craft projects sorted and organized for easy viewing if you'd like to check out all the other fun stuff I've done.

I'd love for you to stop by and say hi!

Jess, thanks so much for inviting me as a guest on your blog. You have been a gracious host! I hope you are enjoying your adorable new baby boy! Aren't babies just so squishy and loveable? I could snuggle down with an infant any day of the week. Take care my friend, and do try to get some rest! xoxo

~~~~~~~~~~~~~~~~~~~~~~~~~~~~~~~~~~~~~~~~~~~~~~~~~~~~~~~~~~~~

Thanks Allison for stopping by and sharing some of these great ideas!  I am loving the bath mat and that pinwheel wreath is AMAZING!  So what do you think?  Any of these projects get your mind going?  I wanna know!


Related Posts with Thumbnails