Welcome to Frugal with a Flourish!

Enjoy your time here! Don't miss a post by getting email updates any time there is something new. You can also get updates through Google Friend Connect or follow me on Facebook or Twitter to get the latest info and see all the things that inspire me!

Showing posts with label Our Home. Show all posts
[ | Posted in | Add Comment | ]

I am back today with another nursery related post – but this is one that you can use anywhere in your home.  I know if you are like me that you love all those adorable graphic prints that you have seen for sale or out on Pinterest.  In fact, I wanted to do some for the nursery gallery wall and I did – for about $10 or less a print! (If you want to see the full nursery reveal post and all the projects make sure to hop over.)

DSC08418

Now I am going to show you how you can do the same without having a fancy graphics program!  All you need is your imagination and Picnik.  What is Picnik?  Picnik is a fantastic online photo editing tool that is free!  Yup – free!  There are some pretty awesome premium features that they offer that you have to have a subscription to use – but the amount of editing that they let you do for free is great.  (Note: This is not a sponsored post – I just love the program!)

So today – I am going to show you how to make the graphic letter print and the cute little owl print shown in the gallery wall above.  Both of them use the same concept but have a slightly different starting point.  The letter print is made entirely in Picnik while the owl print requires a base graphic upload.  Either way you are going to see how completely easy this is!  You are only limited by your imagination!

To make something from scratch

1.  Create a “blank” picture to upload in Paint.  Paint is a free drawing program that is included with all PCs – and I am sure there is something similar in Macs too!  Once you make a new file – you need to modify the size by going to the main menu and then clicking on Properties.  Under properties – size the blank file to the size that you want.  Here I made mine 11 x 14.

Fullscreen capture 7102011 24746 PM.bmp 

2.  Upload your Blank file into Picnik – rotate to the direction of your Print.  I have put a black border around the picture so you can see the outline of the picture.

Fullscreen capture 7102011 25223 PM.bmp

3. Go to Create.  (You can add the border here if you want to be able to see your workspace better.)  Then you can use all the fonts and graphics available to add in elements.  For this print, I just added letters using the Garamond font and made them all different colors. 

Fullscreen capture 7102011 25719 PM.bmp

Once you have a set of colors that you like – you should write down the hex code (or six digit id) that is located next to the color so that you end up using the same color for each letter.  You can find it up at the top of the Text Properties box on the right hand side of the screen.  Here – the green color is 36CA00. 

 Fullscreen capture 7102011 25719 PM.bmp

4. Save your “print” and then arrange to have it printed.  I sent mine off through Snapfish since you can’t get a 11x14 or larger done at the local drug store.  (No endorsement of Snapfish here – but that is just what I used!  An 11x14 print will run you $6.99.)  Then all you need is a frame and a mat.  The frame was one that we had and the mat was $3.99 at Hobby Lobby.

DSC08378

To Make Something Using a Graphic you already have

1.  Add your graphic into Print and the upload into Picnik.  You can either insert or just copy and paste.   For the Owl Print – I just used a clip art owl that was included with my Microsoft Office suite. 

Fullscreen capture 7102011 32521 PM.bmp

2.  Add additional text and graphics as needed.  I loved this little saying and it went so well with our book wall

Fullscreen capture 7102011 32905 PM.bmp

3.  Save and Print.  For this one I just printed as a 5x7 at my local drug store and added to a frame and mat I already had.  Total cost – $3.99. 

DSC08380

So that is how easy it is!  Now I wanna know what you think?  Love this idea?  Think you might create some custom pieces for yourself now?  Lemme know!!

Linking this up to

Metamorphosis Monday with Susan @ Between Naps on the Porch
Tip Me Tuesday with Laurie @ Tip Junkie
Tutorials and Tips Tuesday with Beth @ Home Stories A to Z
Get Your Craft On with Kim @ Today’s Creative Blog

[ | Posted in | Add Comment | ]

I can’t believe the overwhelming response on the floating book shelves that we did in the nursery!  I have been obsessed with that thought of these ever since I saw them in my inspiration room and I am so glad to see that I am not the only one loving the idea. 

DSC08384

So how can you get this look in your space?  Well here is what you will need.  The measurements below are to do this on a wall of a similar size to ours – you will need to adjust if you want to do a larger/smaller space. 

Supplies Needed

  • 6 – 1’ x 4’ x 6’ Poplar Boards Pre Cut Boards
  • 6 – 1’ x 8’ Poplar Trim Pieces
  • 20 – 1/4” x 4” Flat Head Hanger Bolts
  • 2 – 1/4” nuts
  • Chalk Line or Level
  • Stud Finder
  • Wood Glue
  • Finishing Nails
  • Paint

1. Measure your space and determine layout

We had an extremely scientific method for laying out the shelves.  It consisted of me standing back and saying “I think I want six, with the first one starting about this far from the ceiling and the last one right above the outlet.”  Seriously – that is how we got started.  But it worked and from there we were able to decide that we wanted 13 inches between each shelf and that would give us a total of six. 

We also had to determine length.  Again – it was extremely practical.  “I want it to be this far from the window and this far from the other wall.”  (I know you guys can see me all pregnant directing my poor hubby around with the ruler.  The man has so much patience to put up with me!)  We marked those lengths and were able to figure out that we would only have cut down a 6’ board by a minor amount to make that length work.

2.  Find the studs and mark your lines

Once we had the layout figured out – we used a stud finder and a chalk line to mark each shelf.  You will want to find the stud on either end of your shelf and mark those at how far apart you want them height-wise.  Then you line up your chalk line on the two ends and snap it to get a level line.  Once you have that line – you can mark the studs in between your two ends. 

DSC08207

3.  Install hanger bolts

Now if you haven’t ever worked with a hanger bolt – this is what they look like.  See how they are threaded tight on one side and looser on the other?  The tightly threaded side is called the machine threaded side.  The loosely threaded side is called the wood threaded side.  You are going to install the wood threaded side into the wall and leave the rest of it out to mount the shelf on.

To install them, you need to find the center of the stud along the line for your shelf.  Pre-drill a hole for the hanger bolt.  Then thread the 2 1/4 inch nuts on the machine thread side of the hanger bolt.  Tighten the two nuts against one another using two wrenches to make a place on the hanger bolt that you can use a socket on.  Then use either a deep socket with a ratchet OR deep socket on a drill with an adapter.  Slide the socket over the two tightened nuts and screw into the wall up to the end of the wood thread.   It is critical that you keep them as straight and centered as possible.  As you install them – they will look a little like the picture below. 

DSC08300

4.  Cut your boards and trim to length and attach trim pieces

Next you need to cut your boards down to the length you have determined you want for your wall.  If you want to have trim on the ends of the boards then you also need to account for that in your measurement.  Use either a miter box or a miter saw to make the corners of your trim all pretty!   Below is a close up of what our trim looks like – I didn’t get pictures the day the hubby was working on it!  (Bad blogger!)

DSC08462

Once your trim is cut – attach onto the shelves with a little wood glue and some finishing nails.  A nail gun makes quick work out of this but isn’t a necessity.

5.  Mark where hanger bolts will line up and drill holes into shelves

Once you have your shelves constructed you will need to take them into the room and line them up against your hanger bolts based on where you want the shelf to start and end.  Mark the center of where each hanger bolt will line up and make sure your marks are centered on your shelf.  (NOTE:  Make sure you have your shelf flipped the right way when you are marking it!  We had one that we had to redo because it was upside down when we marked it.)  Once those are marked you want to drill a slightly larger hole (either a 3/8” or 5/16”) into the shelf.   Test fit shelf on wall by sliding over hanger bolts – make any adjustments necessary to get a snug and secure fit. 

DSC08464

6.  Paint shelves

Once your shelves are all ready to roll – all you have left to do is paint them.  We ended up painting the same color as our trim in the room, but you could get really creative with these. 

7.  Mount and make pretty

Finally – all you have to do is slide the finished shelf over the hanger bolts and you are ready to decorate.  I think shelves like this would also look amazing as a gallery ledge with lots of pictures or artwork. 

DSC08467

How about one more shot of these in the room!  Ahhh… I love them so much!

DSC08419

So there you go!  Those are all the steps you need to make these fantastic shelves for yourself.  They really aren’t that challenging to make!  Now that you have seen the how to – are you going to try it?  I wanna know!

P.S.  Make sure you check out the full nursery post for a recap on the design and the how to for all the great projects that went into the room!

Linking this up to

Metamorphosis Monday with Susan @ Between Naps on the Porch

[ | Posted in | Add Comment | ]

Ok ok – I know I have been talking about it for months.  But I am finally ready to share with you guys the Lil Man’s nursery.  There was a lot of inspiration for this room.  It started with a key card from a hotel and ended with what you guys see here today.  Part of making this room what it is was this blog – and it helped me find and solidify my major themes and fabric choices to take the base nursery into this!  (Warning – picture intensive post to follow!)

DSC08423

Ack!!  I love it!  Let’s take a spin around the rest of the room.  Here is a shot of the dresser/changing table.

DSC08360

And in the other corner – my super comfy chair (that I am sitting in right now!).  Of course I had to make a pillow to match.  Those are also blackout shades back there in the window – which will come in handy for nap time since this room gets pretty bright!

DSC08403

So – let’s be honest here.  The most awesome feature of this whole room are the floating book shelves.  I think I did a good job talking the hubby into recreating them from my inspiration room!

DSC08369

How do I love them?  Oh I could go on and on – they helped add that pop of bright colors I was looking for while providing functional storage AND hopefully instilling a love of books into the Lil Man’s life for years to come.

DSC08404

Oh let’s throw in one more shot of them – just for fun!  I will be back with a tutorial on how to knock these off yourself in the near future!  (UPDATE: Tutorial for the floating book shelves is live!  Check it out!)

DSC08412

And if you can drag your eyes away from the book wall – I also want to show off our crib! 

DSC08419

I am so pleased with how our bedding came out!  I made the bumper and the crib skirt myself.  And the cute little name sign (which says his real name here at the house – I just put up the blog safe version here!)

DSC08435

If you want to do the same you can see the crib skirt tutorial and I will be back with a bumper tutorial soon!  And before I get any haters on the bumper – we aren’t planning on using it until he is actually big enough to be rolling around and “bumping” into things.  So don’t stress over that!

DSC08391

And my fantastically crafty MIL Lynn made us this beautiful quilt to match!

DSC08397

And of course – you can’t have a crib without a mobile.  Ours happen to be some oversized tissue poms.  I love the way they look and I think the Lil Man will appreciate this view!  I found tissue paper to match the color scheme at Hobby Lobby.  Each one was only 99 cents each to make!

DSC08409

Next to the crib I have my little nightstand that got the makeover last weekend.  Perfect for us to put the sound machine and Scentcy nightlight on and stash diapers and other necessities in and under!

DSC08398

And then the changing table!  First off – I love how the dresser came out that we stripped and restained – if you haven’t seen the “before and after” you have to check it out.  I still can’t believe we got it too look as close as we did to our Restoration Hardware inspiration piece and did it for about $50!

DSC08360

Oh and let me give you a little close up of our “gallery wall”.  I am going to be back with a tutorial on how you can make the cute alphabet and owl prints yourself!  I also framed some of the fabric from the bumper and found that cute little giraffe at Hobby Lobby in the clearance bin!  Of course he didn’t match at first – but a little spray paint and that was taken care of!  A matching clock from Target was the perfect final touch!  The green in their RE style line of products is the perfect green! 

DSC08418

Ok so there are a ton of projects here that you may want to try out yourself.  So here is a concise list of each one.  If they are missing links – stay tuned – I have a tutorial coming soon.  Just make sure you subscribe in email, Google Friend Connect, or a reader so you don’t miss one you are interested in!

- Custom Nursery Name Art

- How to Strip and Restain a Dresser

- How to Make a Crib Skirt

- How to Make a Crib Bumper

- Nightstand Makeover

- Making Nursery Accents match your Color Scheme

- How to Make Your Own Custom Graphic Prints

- How to Make Floating Book Shelves

- Making Tissue Poms (link to Martha Stewart for great directions!)

I hope you have enjoyed the room tour as much as I enjoyed putting it together.  It has been a labor of love over the last 4 months – and I adore how it came out.  Now that the nursery is all together I am ok with the Lil Man showing up whenever he would like!  Which since we are almost under 2 weeks to go is about perfect timing!!  :)

So – what do you think?  Have a favorite element?  Want to know about something that I didn’t detail in the post?  Lemme know your thoughts and questions!  I will do my best to answer them!

Linking this up to

Metamorphosis Monday with Susan @ Between Naps on the Porch
Get Your Craft On with Kim @ Today’s Creative Blog
Tutorials and Tips with Beth @ Home Stories A2Z
Transformation Thursday with Gina @ The Shabby Chic Cottage
Show and Share Day with Chris @ Just a Girl
Weekend Wrap Up Party with Jen @ Tatertots and Jello
Saturday Night Special with Donna @ Funky Junk Interiors
Before and After Party with Sarah @ Thrifty Decor Chic

[ | Posted in | Add Comment | ]

Update: The Nursery is finally finished!  Hop over and check out the full reveal!

I am slowly but surely getting all my to-do’s for the nursery done.  And one of those was to get a crib skirt made for our crib.  So here was the before. 

Now – the reason I decided to make a crib skirt was because I couldn’t find any bedding that I liked.  I looked forever trying to find something in my inspiration colors.  And when I couldn’t find anything premade – I started looking at fabric.  Luckily – I found the adorable “Wild and Wooly” fabric at Joann’s and I decided to make some of the bedding myself.  The first thing I started was the crib skirt.  My plan was to just do a simple straight skirt all the way around that way I wouldn’t need a pattern or anything fancy!

For starters – I ironed all the fabric and used just a smidgen of starch to keep it a little crisp.  I find that helps with getting straight even cuts.  Then I cut out plain piece of muslin to the size of our mattress.  Which was really simple because we got the mattress on Amazon – so I just looked up the dimensions there.  Way simpler than measuring it myself!  I added a half an inch on either side to use for my seam.  Next, I measured from the bottom of the mattress to the floor to figure out how long my skirt pieces needed to be (at the highest level – that was 16 inches so I added an additional 1 inch so that when I hemmed either side I had a 1/2 inch seam.  Then I ran into a problem. 

DSC08155

I wanted the stripes to hang vertically – but the fabric was only 43 inches wide.  Which as you can see is just a smidgen too short for my piece of muslin on the long side.  So I decided to stich on some additional fabric on either side and then do pleats to “hide” my seams.  Of course that meant I needed to make it longer than necessary to make the pleats.  I decided to do three pleats – one in the middle and the one on either side.

DSC08147

To do each pleat – I picked a mid-point and and overlapped the fabric by an inch on either side.  Pretty simple – but it works! 

DSC08152

See how it makes a nice pleat?

DSC08153

Once I got all the skirt pieces cut and laid out – I hemmed the three sides that wouldn’t be attached to the base muslin.  Next, I attached them to the muslin.  This is how the final piece looked.

DSC08162

The final product?  Check out the close up below.  I love it!  I will show you the “whole” thing once we get the nursery totally finished!  Right now the whole room looks like a baby shower threw up in there – I have stuff everywhere! 

DSC08172

If you are thinking about making a crib skirt – I would say go for it!  It is pretty simple – the whole thing is just straight seams so it is a really an easy beginner sewing project!  

So what do you think?  Will you try one out on your own?  Are you loving the colors as much as me?  I am sooooo in love with them!

Linking this to

Tutorials and Tips Tuesday with Beth @ Stories of A to Z
All Things Inspired with Robin @ All Things Heart and Home
Make it Yours Day with Carolyn @ My Backyard Eden
Transformation Thursday with Gina @ The Shabby Chic Cottage
Metamorphosis Monday with Susan @ Between Naps on the Porch
Tip Me Tuesday with Laurie @ Tip Junkie

Get Your Craft On with Kim @ Today’s Creative Blog

[ | Posted in | Add Comment | ]

Update: The Nursery is finally finished!  Hop over and check out the full reveal!

Thanks for letting me vent the other day!  I appreciate your support and don’t worry – I will still be around!  I just don’t know how to stay away!!  I know you guys are probably looking forward to seeing some of the progress that we are making on the nursery!  Well – we haven’t gotten a whole lot finished but we do have a basic shell together that I wanted to share with you guys as a “before” and show you what I was planning! 

So without further ado – here is what the nursery looks like now!   As you can see it is pretty basic.  And pretty small! 

DSC08055

Yep so – basically – all that is going to fit in this room is a crib, my cushy comfy rocking chair and ottoman and a dresser.  You can see my pile of kids books I have started collecting in the floor there.

DSC08059

The way I look at it – if the Lil Man showed up today – we would have a place to put him!  However – I am planning on getting a few things done over the next 10 weeks before he is supposed to officially arrive!  Wanna see my to do list?  Check it out!

DSC08056

And on this side of the room….

DSC08060

So the hubby is already in the process of stripping the dresser down and restaining it darker to match the crib.  We are also going to install the wall shelves so I can create the book wall of my dream nursery over on the wall next to the window.  In hindsight – getting my heart set on that look was brilliant since there is so little room in the room. 

And yes … the chair is technically too big.  But I don’t care!  I love that thing and I already spend a lot of time there resting and reading to the Lil Man.  It is awesome it glides and swivels – so we can easily spin it to get in and out of the closet.  I am not too worried about it blocking anything. 

DSC08063

So stay tuned over the next couple weeks to see how this unfolds!!  I am looking forward to sharing the progress with you guys!


[ | Posted in | Add Comment | ]

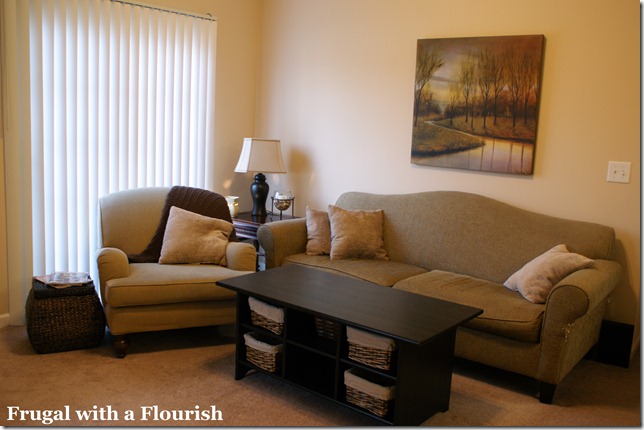
My long time followers may remember when I first posted my living room to do list back last June.  Well, I started with a new coffee table, got a new lamp and added some art.

Here was my most recent update after adding some new baskets for our coffee table.  The only thing left on the list was to find a replacement for my ugly vertical blinds!  Blech!

Well I have to say the solution for these ugly blinds has been a long time coming.  I first came up with an idea last summer.  And then I bought everything for it in November.  And then I got into the first trimester and the holidays – so nothing got done then.  And then I thought I lost some pieces.  And then I found everything and by then it was March!  So I hope you guys are finally ready to see the result!  Behold my new sliding fabric panel solution! 

DSC08017

Ack!!  I love it!  The pictures really don’t do it justice!  The fabric is a different color than the walls – I promise!! 

This was set up using Ikea’s Kvartal system and I chose their triple rail system.  My reasons?  One – I wanted to have a solution that allowed light in but also keep up the privacy.  Our sliding glass door faces our neighbor’s sliding glass door so privacy is important!  Two – I wanted something that we could still slide to one side to access the sliding glass door as well. 

DSC08032

The Kvartal system offered all of that.  But I just wasn’t falling in love with the fabric options that they had at Ikea.  So that is when I decided to get really creative.  I cut up a set of cheapo Wilma panels and used those to make my “back layer” of sheers.  You can see there are three of them back there.  Just enough to let in plenty of light during the day but keep the privacy! 

DSC08020

Then I made my front panels out of a blogger’s best friend – a drop cloth!  I can spread out both layers of the front panels to cover the window completely and they are pretty opaque at night.  

DSC08024

Here is a close up of the fabric!  I really am loving the drop cloth!  It gives it that perfect (and cheap) linen look. 

DSC08035

So while the fabrics are fairly traditional – the application and structure of the drapes and the hardware is a little modern.  It totally fits my “little bit modern and a little bit traditional” vibe! 

DSC08014

Now – cause I can’t leave well enough alone – I am thinking about adding a subtle embellishment on the drop cloth panels.  What do you guys think about a faux nail head treatment?  Or some sort of trim?  I am back and forth on it myself so I would love for you guys to weigh in! 

Linking this up to

Show and Tell with Becca @ Blue Cricket Designs
Whatever Goes Wednesday with Michelle @ Someday Crafts
Make it Yours Day with Carolyn @ My Backyard Eden
Hooking up with HOH with Allison @ House of Hepworths
Transformation Thursday with Gina @ The Shabby Chic Cottage
Metamorphosis Monday with Susan @ Between Naps on the Porch
Get Your Craft On with Kim @ Today’s Creative Blog

Tutorials & Tips Tuesday with Beth @ Stories of A to Z


Related Posts with Thumbnails