Welcome to Frugal with a Flourish!

Enjoy your time here! Don't miss a post by getting email updates any time there is something new. You can also get updates through Google Friend Connect or follow me on Facebook or Twitter to get the latest info and see all the things that inspire me!

Showing posts with label Organization Tips. Show all posts
[ | Posted in | Add Comment | ]

Do you guys have a room in your house where “stuff” just accumulates?  For us – that happens to be our office/craft room.  Now this is a problem as I need to get this room cleaned out for a couple of reasons.

1.  We are going to consolidate the office/craft room into the guest room to make room for the baby.

2.  I have to be able to get to my couch so I can sell it on Craig’s List.

3.  My sanity is being tested by the piles of mess.

So how bad was it…. well.  Take look.

DSC07628

Oh isn’t it horrible? Check out the closet.  Yikes!!

DSC07629

So I knew I needed to get it all cleaned up.  I basically locked myself in there this weekend and got it all cleaned up. 

My tips for tackling a space like this?  Well first – I recommend starting on one side of the room and working your way around to the other.  I also recommend having a large trash bag and a donate box handy.  I also think it is good to bring your cleaning supplies with you so you can clean as you go.  For example – I love stuff that smells good.  So being able to dust and clean and have it start smelling fresh keeps me going! 

So how did it turn out? Check it out now. 

DSC07636 

Ahh… so much better!  Now I can take some good pics of the couch to get it on Craig’s List.  (Faith might not be too pleased with me though – she loves to nap on this couch!)   And the closet?

DSC07633

So much more organized!  And I even made some of my storage containers a little spiffier with some nice little labels.  They look much cuter now! 

DSC07635

I am so pleased with the room and feel completely organized to start to all kinds of projects now!  Don’t you just love how a clean and organized room makes you feel! 

So what about you?  Do you feel better when you get a space all put together?  Have any spaces you have cleaned out recently?  I wanna know!


Linking this up to

Organize It Party with Sarah @ Thrifty Decor Chick

[ | Posted in | Add Comment | ]

Are you still on an organizing kick?  Or are you starting to lose steam?  Sometimes I lose my momentum when I get stuck with not having the right storage tools or accessories to get my project area actually organized.  So with that in mind – I went out and found eight great organization basics! 

Love this set of four canisters!  Perfect for the pantry and you can’t beat the price.

Set of 4 Canisters from Crate & Barrel – $12.95

These bright folders will have your papers under control in no time! 

Chelsea Letter File Folders Pk of 6 from The Container Store – $4.99

Love this sleek little basket.  Designed for CD’s but I can see it holding a lot of things!  And the price is right!

Paper Rope CD Basket from Target.com – $5.99

If you are low on cabinet space – cabinet organizers can really change your life.  We used these in our first kitchen apartment when we got married and it was a god send!

3-Piece Dinnerware Organizer from The Container Store – $9.99

Let’s say you need to get your bills under control – this paper organizer might be just the ticket!

Kassett Storage Rack from Ikea – $4.99

Have little stuff that is dragging you down?  Craft stuff?  Jewelry?  This box with storage compartments is the perfect answer.

15 Part Rectangle Box from Crate & Barrel – $7.95

These eco-friendly maize baskets come in a variety of colors – perfect to match whatever room you need them in.

Medium Maize Open Bin from The Container Store – $6.99

Maybe you just need to organize your family – this hanging memo board and station could just be the answer!

Luns Writing/Magnetic Board from Ikea – $14.99

So there you go!  Find anything you needed?  Are you stalled or are you still going strong?  Or perhaps you may already be finished!  Let us know where you are!

Oh and don’t forget – you still have time to enter my giveaway for a $55 CSN gift card!  That would get you a ton of organizing goodies!

[ | Posted in | Add Comment | ]

So with all the organizing and cleaning out we do this time of year it can create a small dilemma for some of us.  How can we display things without it looking cluttered?  I was thinking about this very problem this weekend and decided to go on a hunt for some inspiration of rooms and places where that had been accomplished.  Let’s check them out and see what we can learn.

I love the way the pottery in this room is organized by color.  Nothing cluttered here!

Joni Spear Interior Design traditional living room

Another great example of grouping similar colors together.  The all white look is so classy!

romantic home traditional dining room

Sometimes collections look great when placed up high where they can be observed.  I think the look of this bottle collection is so eclectic and organic – but it is not cluttered!

Sanchez Residence modern kitchen

Another all white collection – I love this one.  Isn’t this room just beautiful! 

Kitchen, Bath and interior design traditional living room

This is a great example of mixing two different types of collections.  One is pottery the other is calligraphy – but they both have an similar feel which keeps the look cohesive.

Displaying art collections contemporary living room

Love this grouping of larger items too and how they are grouped according to size. 

teak wood jars contemporary living room

These plates on the ledge are another great example and a great way to use some of that wasted space above the cabinets.

River House eclectic kitchen

Finally – this last picture has so much.  A great collection of globes, tins, books, and model planes and cars.  All balanced and perfectly uncluttered.  (Although I am not sure about the parrot over there to the left.)

Library traditional family room

So there you go – now what do you think?  What are your tips on how to display collections?  Or what are your fears on how collections can become cluttered?  Let’s all share and see what we can learn!

[ | Posted in | Add Comment | ]

Well I know I always feel like cleaning things out with turn of the New Year.  My closet has been something that has been out of control for awhile.  However, within the last two weeks my belly has popped out and everything that was just kinda tight is now just not even getting over my tummy.  So not only did I need to get it reorganized – I also needed to get everything out of it that just didn’t fit anymore. 

Are you ready to see the “before”?  Brace yourself – it is a little more than messy.

DSC07365

Doesn’t look so bad?  Let’s continue.  This is supposed to be a walk in.  It is more of a lean in right now.

DSC07366

Hmm… oh this is just embarrassing to share but let’s just go there together shall we.

DSC07367

Ok – so obviously we need an intervention here.  So here were my steps for tackling the chaos. 

1.  Went piece by piece and decided if it either a still would work with a pregnant belly or if I wanted to keep it in storage.  Everything that I decided I didn’t care to keep for another 9 months went to a donate pile.  Everything I wanted to keep but just couldn’t wear went into another pile.  Everything that I decided I could keep and still wear (hello my beautiful cardigan collection) was hung separately to be organized on its own.

2.  Cleaned out and refolded everything else.  I also reorganized my shoes and put everything 3 inches and up in the corner and left all my comfy flats and kitten heels closer to my reach.  Put all my scarves in a basket and all my belts in another.

3.  Hung up all the maternity clothes that my sister-in-law loaned me (now that there was actually room to hang things up) .  Added those back into the closet and ended up with something like this.  Ah – looks so much better!

DSC07371 Now if you are looking closely you may notice two things.  One – I am only using white hangers.  (All of the colored ones were banished to the hubby’s closet!)  Two – they are all flipped the wrong way.  This is useful in two ways.  Using hangers that are all similar or the same color helps present a more unified look.  Flipping the hanger the other way is a way to keep yourself honest.   The next time you clean out your closet – if the item is still sitting there flipped around – you know you haven’t worn that in the last however number of months.  You then have a good reason to put that in the donate/yard sale pile. 

DSC07374

Ah!  And look!  You can see the floor.  Not only that, you can actually walk in there!

DSC07376

I am not finished yet. I still want to put some little Command hooks in over top of my little storage unit to hang up some necklaces and makes a jewelry station.  But it is still looking a lot better.  And yes that is a bait box – those things are awesome for storing jewelry and earrings. 

DSC07379

Now for all the clothes I kept – I went out and got the 40 gallon under the bed boxes.  Use these smaller ones instead of the longer (60 gallon) ones on wheels.  The way a lot of bed frames are made now – you can’t get more than two of the long ones under them.  I got four of the 40 gallon ones (which is more storage space than the two long ones) and I still have room to get at least 2 more under my bed! 

So – there you go!  Those are my favorite tips for cleaning out your closet!  Did you learn any new tips?  Have any you want to share?  I would love to hear them!

Linking this to

Metamorphosis Monday with Susan @ Between Naps on the Porch

[ | Posted in | Add Comment | ]

(Note: This is a repost from last year – but since I had like 5 followers at the time, I figure for most of you it will be brand new!)

We are reaching that magical season. It is a season for giving. It is a season for sharing. It is a season of trashing your kitchen to create that perfect meal for family and friends.

Personally, for me the first couple weeks of November has become the time when I start planning for those upcoming holiday parties. One thing that has really become a lifesaver for me over the last several years has been my Hostess Journal.

I know what you are thinking, what is this? This is something that you need to create for your own sanity. I got the idea from an old back issue of Domino (RIP) and it is seriously a lifesaver. (If you are a devotee who also cannot stand parting with any issue, it is in the December 2007/January 2008 issue on page 102. Sniff sniff – I miss it so!)

I use just a basic journal and I make notes before and after any big get together. The purpose of this to let you record an idea of what you wanted the event to be like and what ended up happening. It is also a great way for you to get yourself organized and avoid running into last minute emergencies. If you like most of us and only host a couple of big events every year, it can be hard to remember what went well and what did not. A Hostess Journal solves all of that and gives you a place to perfect your game plan.  You can use it to be as detailed as you want!  I will explain below how I use mine so that you can see one way of doing this – but to each his own!  You have to find a way that works well for you! 

Before the Event

In the before, I write down the number of guests and general theme. Next, I outline a rough menu. This is really an area where you can look at ideas and debate the time and cost of creating it.

Once I have a rough idea of the menu I start a cooking timeline. Here you really want to focus on what you can do the day (or two days before), what can you do the morning of and what has to be done right before. On the right before (since that is where a lot of your cooking and prep time lies) the cooking timeline will help you figure out how to time everything to come out hot and ready at the right time. I like to start with the time I like to eat and work back from there. For example, in the case of Thanksgiving, I would start with dinner at 5:00. The bird needs to set for 30 minutes so it will have to come out of the oven by 4:30. Based on the size of the bird, I can then back it up to when it needs to go in. At that point, you can start planning your sides to make sure that you have time to actually fix everything you want to for the meal within the allotted time.

The next gut check of your plan is to fill in a cooking and serving dish outline. This helps me figure out if I am going to need two things at once so I can potentially rearrange or if I am going to be short a large bowl so I can either improvise or get another. Personally, I like to lay all this out in two columns. One column that breaks down the cooking timeline and the other will keep me straight with the cooking and serving dish required.

By the time you actually draw up your timeline and dish needs, you will have narrowed your menu down to what is achievable based on your timeframe and resources.  It is always a time, money and drama saver to understand what is ACTUALLY possible given your allotted time.   From here, you can use this to build your shopping list.  If you plan this out far enough in advance, you can shop for your pantry type items well in advance of the holiday rush to make sure you get the best price. 

I also like to use the journal to write down my decoration needs (do I need to iron the linens prior?), music ideas, and any other random thoughts. This will at least get you up and ready to go for the day of your party.

After the Event

I like to sit down the morning after, with a cup of coffee, and go over how the plan actually worked. Did I estimate the right amount of time it would take to peel and cut up that pile of potatoes? Do I need to adjust my expectations on how many sides I needed or how big they need to be to serve the number of people at the meal? Did we run out of anything? Was there one dish that everyone picked at and one that people all took seconds on?

This is also a great time to note anything you needed that you didn’t have! Did you run out of plates, forks, glasses?  Did anyone break anything?  Were your short napkins or storage containers? (Note: I did not anticipate the number of storage containers I would need after  Thanksgiving a couple of years ago!  Something to consider this year - especially if it is your first time.)

The after takes much less time, but it really lets you evaluate and make changes for next time. The first time you do this it will seem time consuming and pain in the you-know-what. But I am telling you, the next time you need to plan a big get together, having your notes from the last time will save you all manner of drama!

I also use this when we just have people over for watch football or have a movie night.  Obviously – it is not as detailed for a smaller event – but it helps me remember if I had too much or too little of something which can save major dollars on your next party!

I hope this was helpful! Do you currently do something like this? Is this a new idea you think you could use? Or does it just overly obsessive?  Please share your thoughts!


[ | Posted in | Add Comment | ]

If you are like most people it is hard to have both storage and cars in a standard two car garage.  Since we have moved in all our stuff from our old house we are short on space in our garage right now for our cars.  Well – I am a firm believer in two things.  One – you always should capitalize on wasted space.  Two – where there is a will there is a way.  So, I challenged the hubby to think outside the box and figure out a way to customize a storage solution for the garage that gave us storage without sacrificing car space. 

Here is what he thought up!  Brilliant right?  Ok – so let me take you through how he did this for about $50. 

DSC06776

Materials List

3 - 2’x4’x8’ boards
2 - 1/2” 2’x4’ precut plywood sheets (could substitute a 4’x8’ piece and cut it down)
3 - 3/8” Steel Threaded 3 foot rods
3 - 3/8” hanger bolts (they look like this)
3 - 3/8” rod coupling nut (also called threaded sleeves – will be in specialty section)
3 - 3/8” fender washers
6 - 3/8'” nuts
6 – 3” lag screws
3” decking screws

1.  Measure frame to create a box.  Use one 2’x4’x8’ for each side and then cut down the last one into 4 pieces to create the sides and support beams for the frame.

DSC06274

2.  Use a nail gun to tack frame into place and then use 3” decking screws to secure into place.

DSC06276

3.  Screw plywood sheets into frame.  Frame is now complete.

Now I have to interject here that I was not available to take pictures when the hubby and a friend actually installed the shelf into the wall.  So I hope the instructions I provide will be detailed enough.  If you have any questions feel free to email me.  It is honestly just threading screws and nuts together and sliding the shelf up onto those and securing it! 

4. To attach shelf to ceiling, use a stud finder to locate rafters. Measure out 23 inches from the wall. Pre drill 3/8” holes into the rafters to insert the hanger bolts. Insert the hanger bolts into the hole.  (Hint – Since there isn’t a head to use to attach a wrench to, instead screw two nuts together on the threaded end and a wrench to install.)  Screw hanger bolts into the ceiling to until you reach the smooth middle section of the bolt.

5.  Put the rod coupling nut onto the screw and then screw the 3” threaded rod into the the coupling nut.  Take the measurement of where rods will be in relation to frame and pre drill holes through the frame to slide rod through. 

6.  For this step you may want to mount a ledger board on the wall at the height you want the bottom of the shelf and make sure it is level.  Using two people, raise frame up and line up holes onto the threaded rods and place onto ledger board.  Take a fender washer and slide onto each threaded rod and secure with nuts.  (Hint: You may want to raise up the front of the shelf at a very slight incline on the rods as to avoid setting things on the shelf and having them roll back off onto your head!  Just adjust to the angle you want and tighten the screws to meet that angle.) 

7.  The lag screws will need to go through the frame into the wall to secure it there.  Find your studs and pre drill into frame and wall stud.  Insert lag screws into holes and tighten.

And now you will have a ceiling mounted shelf!  It is perfect because we can put some other things underneath it – like my massive spray paint collection – and still have room to pull a car in up beside it! 

DSC06784

I am really excited about how it turned out – and all and all – it was actually a pretty simple and cheap project.  So what do you think?  Are you in need of additional storage in your garage?  Think this is something you can tackle?  Have you got other ways of using wasted space in your garage? Please share if you do!

Linking this up to

Metamorphosis Monday with Susan from Between Naps on the Porch
Get Your Craft On with Kim @ Today's Creative Blog 
Show and Tell with Becca @ Blue Cricket Designs  
Penny Pinching Party with Jen @ The Thrifty Home 
Make it Yours Day with Carolyn @ My Backyard Eden 
Transformation Thursday with Gina @ The Shabby Chic Cottage 
Thrifty Thursday with Leigh @ Tales from Bloggeritaville 
We’re Organized Wednesday with Leanne from Organize Your Stuff Now
Show and Share Day with Chris from Just a Girl

[ | Posted in | Add Comment | ]

I am getting ready to have a massive garage sale at the end of next month.  I have two great girlfriends and we have decided to do joint garage sales twice a year.  One has a neighborhood sale in the spring, the other in the fall!  Works out perfectly.  When we did it this spring - we kinda just threw it together at the last minute, but we had a good sale considering it rained buckets.  This time - we are taking a little more planning and our leanings from our spring sale to really knock it out of the park!  I thought I would pass along some of our tips and tricks for putting on a good garage sale.

Pricing
First, your prep work is the most important part.  And the most cumbersome portion of that prep work is pricing everything.  Give yourself plenty of time to sort through all your stuff and price it.  I highly recommend getting the round sale stickers with prices already on them.  You can find them online or in just about any store in the office supply section.  Another great option is to think about doing bulk pricing.  For example, if you have a bunch of kids clothes in a bin you can just make a sign that says all pieces $1 or everything you can fit in a grocery bag is $5!   That can help save a lot of time.
Photo by Hawkins

If you’re not sure what to price things – hop over to your local Goodwill, do a spin around the store and take some notes. You shouldn’t price anything higher than what you see there, unless it is really nice or brand new.  I would stroll thru with an idea of what you have for sale and make some general notes. For instance, if you have books see what price they have on paperbacks and hardbacks. Normally it is a consistent price.  Once you have your shopping intel, I would go slightly under the prices you saw there. Remember people who yard sale know when something is over priced.  Of course they will also often will always bargain, so put a little fluff in but not too much.  I find that I will spend more money and purchase more items at a yard sale where things are priced low than if they price high.  And your goal here needs to be to move volume and get rid of junk!  
Photo by Bob n Renee

Change
Before the sale – make sure to stop by the bank and get some change. You will want to have at least $80 in change available (I get 4-$10s, 4-$5s, 15-$1s and $5 in quarters) or more if you have bigger higher priced items.  I normally grab our penny jar for dimes and nickels and pennies. But if you don’t have one of those it is probably good to get a roll of nickels too.

Setting Up Shop
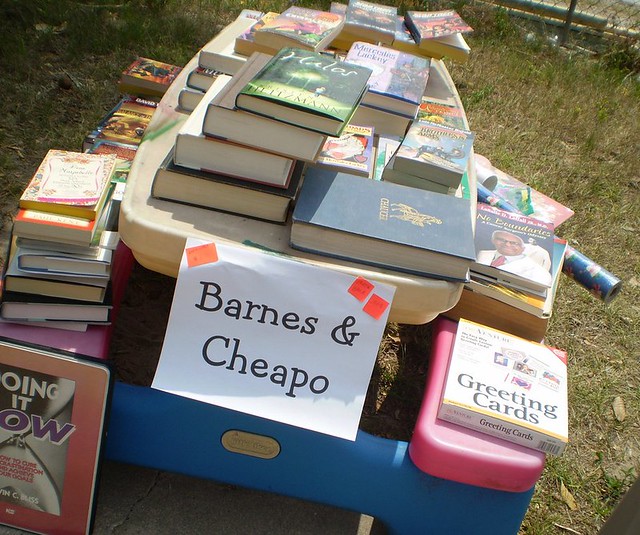
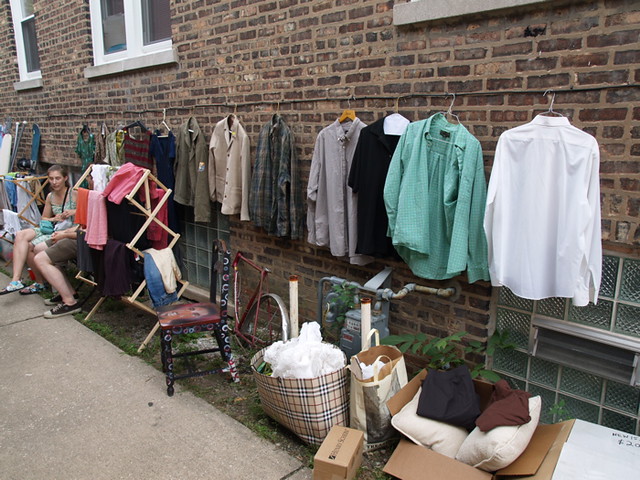
Think like a store – you want to have things “merchandised” if you will.  Organize by category (kitchen stuff, books, clothing and decorative things) and try to get as much stuff up on tables as possible.  If you have a local senior center, church or community center stop by and ask if you can borrow some tables if you don’t have enough. For clothes, the more stuff you can hang up – the better it will sell – so if you can run a clothesline or have a shower curtain rod you can suspend somewhere that will be great.  I love the idea below of creating great tongue in cheek signs!  Remember, people love to browse and if you give them a reason to check out each section they might be more likely to buy!
Photo by EvelynGiggles

Advertising
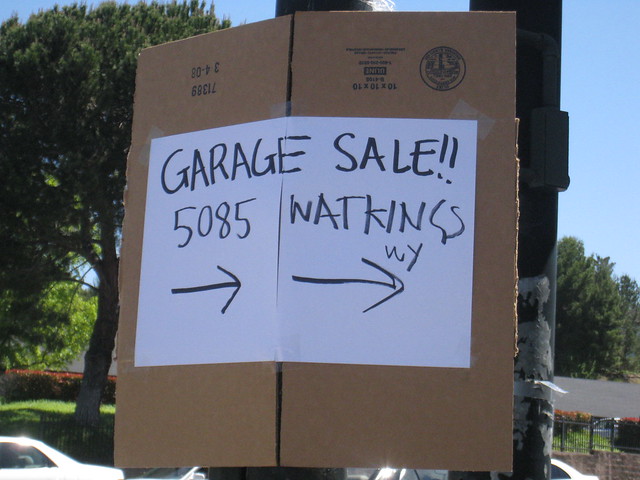
Make sure list your sale on Craigslist.com.  If you have some really good stuff, take some pictures to post with your Craigslist ad.  You also need to make sure you put signs out directing people to your home.  Your signs need to be bright, list the date, the address and lead people from a main road to your home with a sign or arrow at each intersection they come to.  I hate getting to a neighborhood, turning in and having NO idea where to go from there!  Even if you put the address on the sign, it is hard to read that from a moving car.  People will be more likely to arrive at your sale if you give them a path to follow!  The Yardsale Queen did a great post on how not to do garage sale signs.  
Photo by Allan Chatto

Day Of
Finally, on the day of get ready for people to be out early!  And by early I mean like 7am.  Be friendly and have a checkout area set up.  I like to have a box for the change, a calculator, and a pile of grocery shopping bags that you can hand out to people who have a lot of stuff!
Photo by EvelynGiggles

By the time you get to 10:30-11:00 am consider putting up a sign in front of your house that says “Everything is 50% off!” since that is the time that traffic dies down and you will need to move it then or risk losing the sale!  Better to get 50 cents for something than just take it to donation after that.   Plus, if you do that, lots of people will buy more stuff, so you end up making just as much money and getting rid of more stuff. 

I hope these tips were helpful - but I am sure I have left some out!  What are your best tips for a successful yard sale?  If you are a regular yard sale attendee, what are your likes and dislikes?  I wanna know!
 

[ | Posted in | Add Comment | ]

For most of us, there is one room in the house that could use a little more usable storage instead of just being a junk pile.  That room is the garage.  Right now - we have managed to keep ours to the point that we can at least still get both cars in there.  However, that precious space is being threatened by an incoming flow of stuff and projects!

So we are getting ready to do a clean up and organization of the area which had me online looking for storage ideas.  Of course - I feel an obligation to share with you guys!  Here are eight great garage storage accessories that you can use in your own home to get some of that clutter off the floor and into a proper place!
For starters - I know my spray paint can collection that I am starting would be a lot more functional stored in something like this.
Racor Can Rack - Ace Hardware - $14.99

We need something more functional for keeping our recycling in.  I really like these stackable bins from Ikea.
Recycling Bin with Lid - Ikea - $12.99

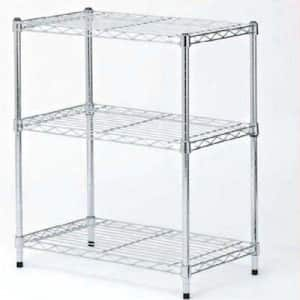
We also really need some shelving.  I am digging this set that is low enough to go under our bike mounts.
3 Shelf Unit - Home Depot - $19.99

Speaking of bike storage I like this one!  it folds up flat to the wall when you aren't using it and has a little shelf for accessories!
Folding Bike Rack - Ace Hardware - $12.99

Always need a place for those garden tools rather than just having them piled up in a corner or leaning against the wall.  I also love that it has a removable basket so you can tote it around with you while you work in the yard!
Garden Tool Rack - Home Depot - $24.95

I like this lockable hook for hanging heavy duty tools like weedwackers.  Keeps them from being "lifted" from your garage or the kids getting into them.
Lockable Utility Hanger - Ace Hardware - $5.79

You will need a place for sports equipment too!  This wall mounted Ball Rack could be a key player in your organization strategy.  (Yep - that was corny but I am going to leave it.  You all need to accept the fact I may tell bad jokes or puns every now and then!) 
Sports Gear Organizer - Home Depot - $24.95

And this is just brilliant.  It is a magnetic bin!  Keeps all those little screws and nails in place!  And it is portable so you can tote it around with you for all your projects.  Love it!
Magnetic Parts Bin - Ace Hardware - $10.49

So what about you, is your garage in need of organization?  Have any garage organization tips to share?  Lemme know!


Related Posts with Thumbnails