Welcome to Frugal with a Flourish!

Enjoy your time here! Don't miss a post by getting email updates any time there is something new. You can also get updates through Google Friend Connect or follow me on Facebook or Twitter to get the latest info and see all the things that inspire me!

[ | Posted in | Add Comment | ]

Today I have another great blogger to share with you guys!  Madigan from Madigan Made is with us today and she is a sweetie!
Madigan is full of great ideas and easy DIY crafts and ideas.  Some of my favorites?  Well I loved this DIY Cornice Project.
And then there is the beachy printable she made!  Love it.  And she left it for you to download and use on your own!
And right now she has a series going on called Summer Loving with NO Oven that features all kinds of yummy summer recipes that you don’t have to go near a hot stove to enjoy!   Loving these Caprese bites!  Delish!
So without any further ado – here is Madigan!
~~~~~~~~~~~~~~~~~~~~~~~~~~~~~~~~~~~~~~~~~~~~~~~~~~~~~~~~~~~
Hi there! I'm Madigan, the writer behind Madigan Made. I'm excited Jess invited me here today!
madigan button
If you are interested in simple crafts, recipes and home decor, then you may enjoy visiting me over at Madigan Made. I love easy and chic ideas and love to share them. (Oh, and I also love my hubby and puppy... and a little dark chocolate and coffee!)

Today I want to share an idea for wall art that involves sports tickets.


I'm a huge fan of personalized art for my home.
Anyone can pick up a print from a home store. I prefer to make it "mine". 

Well, this art project is very personal to  my husband. It is for our sports-themed basement.

Ever since I have known my husband, he saved all his golf score cards and any ticket to a sporting event. He knew that some day he would want to display them, maybe in a media room or basement. I came up with these frames as a way to meet that wish.

These tickets just prove that you can frame anything and it could be art. (if that is what you want to call this!)

Want to make one of these yourself? Well, first you will need:
  • A sports fanatic husband (who loves to golf and is often invited to sporting events by friends and family)
  • Many, many, many sports tickets and golf score cards (Mr. Madigan collected them for 10+ years.)
  • Adhesive (scrapbook glue dots/tabs would work well)
  • Large empty picture frames (I like the ones from IKEA. They are large and come with mats already.)
  • Poster board
First, cut your poster board to about the size of the glass.
Open the frame and using a pencil, draw an outline of the mat opening onto the poster board. Use that line as a guide for laying out your tickets.
You could lay out your pattern before adhering anything. But I just start in one corner and work my way across. Use the adhesive to secure the corners of the ticket to the poster board.
Try to alternate the type and look of each ticket and avoid too many of one kind next to each other. Carefully overlap the tickets when needed. You may need to trim off some of the tickets (I also trimmed down some of the golf score cards, too).
After you've covered the entire mat area, pop it in the frame. Could not be easier!
I love this project because once Mr. Madigan collects enough tickets to fill another one, I can just go and buy another frame at IKEA.
I slowly made these displays over the past several years.  I made six total frames for our basement.
Here are four more of them below.

I bet you could do this with other types of tickets...
For your music lover: Concert tickets?
For your theater or movie buff: show tickets?
For your roller coaster fanatic: Amusement park tickets?
It really is a great way to save and display a memory.
If you like this project, come visit me over at Madigan Made! You can also find me on Facebook, Pinterest, Twitter or StumbleUpon. I enjoy sharing 'behind the scenes' info and other great ideas I find.


Thanks, Jess, for letting me share this project!
(Hope you are enjoying your time with your little one!)

~~~~~~~~~~~~~~~~~~~~~~~~~~~~~~~~~~~~~~~~~~~~~~~~~~~~~~~~~~~~~

Thanks again Madigan for helping out and stopping by!   Didn’t you just love that project?   What a great way to keep mementos.  I think it would be a fun way to organize summer vacay memories too!   What would you make out of it?  I wanna know!

[ | Posted in | Add Comment | ]

Hey guys!  I am back again with another great guest post for you guys from one of my dear bloggy friends Colleen who blogs at Mural Maker & More. 

Colleen is a fantastic artist and painter who creates the most beautiful murals! Here are some of her works!  Love this trey ceiling!

And this beautiful nursery!

But she is also into DIY and decorating too!  Like this outdoor tray table!  So cute! 

So without any further ado – here is Colleen with some great ideas for decorating a room with paint.

~~~~~~~~~~~~~~~~~~~~~~~~~~~~~~~~~~~~~~~~~~~~~~~~~~~~~~~~~~~~

Hi! My name’s Colleen and I’m so excited to be here at Frugal with a Flourish while Jess’ ‘lil man’ enjoys his Welcome Home party. My blog is called Mural Maker & More. ‘Mural Maker’ because that’s what I do - I make murals. And ‘More’ because I love all things DIY and decorating.


I paint murals for any room, but my all-time favorite are babies rooms. Girls or boys, it doesn’t matter. Or sometimes both!


Safari Mural for baby boy


Here’s the thing - people think murals are really expensive. And they can get pricey, especially when the family is expanding. So I found some decorating ideas so you don’t have to hire an artist!


I know, I know - a lot of you are probably saying, “I can’t even draw a stick figure”! No worries! A little bit of creativity and thinking ‘outside the box’ and you’ll have a dream nursery you painted yourself!


Baby Boy Decorating


How about a graphic alphabet wall mural painted in subtle shades of the wall color? Looks a little tricky, doesn’t it? I’ll tell you how I’d paint this if someone hired me. I’d print off letters, maybe in different fonts, take them to a printer that prints oversized copies (like a blueprinter). Then I’d transfer some letters, paint them all in one color, then transfer some more, and paint them in another color.


No freehanding required! Now, you could also cut stencils if you wanted but, to me, that’s a lot of extra work. There are a lot of straight lines where you could just use good ol’ painter’s tape after you’ve marked your transfer.


BabiesBassinets.com

Here’s an idea - forget painting the walls and paint the ceiling! How fun is this?!? Then you’d have all of your wall space available to change as you please.


BabyBedding.com


Or maybe paint just the corners of the room.


KronBaby2


Ok, maybe your theme isn’t jungle animals, but you could still paint a trio of silhouettes and create an awesome focal area. These could be painted on canvas and hung, but I wouldn’t hang them over the crib then.


These are just a few ideas to spark your creativity. The cool thing about paint is, if you don’t like it, just paint over it! Not to mention, paint is really affordable. (I paint my murals with good ol’ craft paint - the 99 cent variety!)


I want to thank Jess for letting me hang out with all of you today. Jess was one of my very first blogging friends and has been incredibly supportive so I’m just thrilled to pitch in while she enjoys some Mommy & Me time.

~~~~~~~~~~~~~~~~~~~~~~~~~~~~~~~~~~~~~~~~~~~~~~~~~~~~~~~~~~

Great ideas!!!  Thanks so much Colleen for giving us some ideas!  And make sure you hop over and check out Colleen’s blog and give her some love – and if you ever wanted to learn how to paint anything – you have to make sure you check out her step by step painting tutorials! 

[ | Posted in | Add Comment | ]

Ok today I have another great blogger back today to share some great ideas with you guys!   Brittany from Pretty Handy Girl is an amazing blogger, incredibly talented handy gal, and a great friend!  She has been incredibly supportive for me and I just love her to death!  I got to meet her in person this year at Blissdom and she is just as incredibly friendly and helpful in person as she is on her blog!  Please make sure you head over and check her out if you haven’t already!  

I think you guys will love the project she has up for us today.  Super easy and a great way to customize your own fun party plates!  Enjoy!

~~~~~~~~~~~~~~~~~~~~~~~~~~~~~~~~~~~~~~~~~~~~~~~~~~~~~~~~~~

Congratulations to Jess and her husband! The photos of her little man are sooo sweet! I couldn't be more excited for them both.

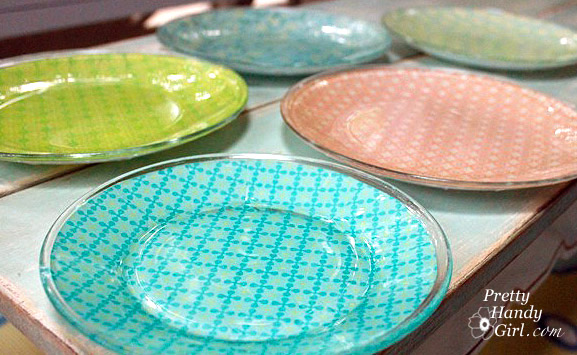
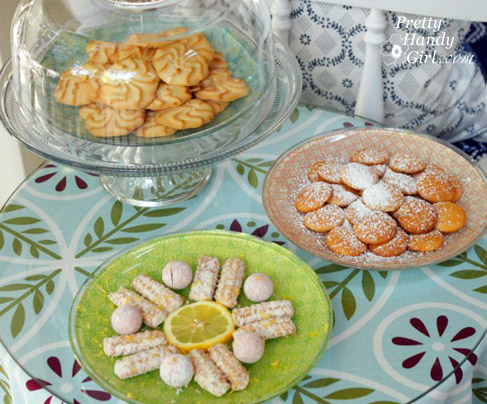
I want to thank Jess for inviting me over today to share with you an easy craft tutorial. I call these my citrus themed glass plates.

First let me take a minute to introduce myself. I'm Brittany, aka Pretty Handy Girl. I write a blog called, what else: Pretty Handy Girl! I'm on a mission to empower people to take on their own DIY project.

Some of my projects have been pretty:

Some of them have been ugly:

Some are fanciful:

And others are adventurous:

Regardless the project, I always provide detailed directions and pictures to help empower you to build it, craft it, sew it, or fix it yourself! I hope you will stop by soon and say "hi!"

Before my 4oth birthday party, I had been scouring the stores for some pretty citrus colored plates to serve sweets on. I was coming up empty-handed, was running out of time, and was concerned about my budget. I happened to stumble upon some glass plates I bought at Goodwill awhile ago. And then the idea hit me! Why not make my own decorative plates! 

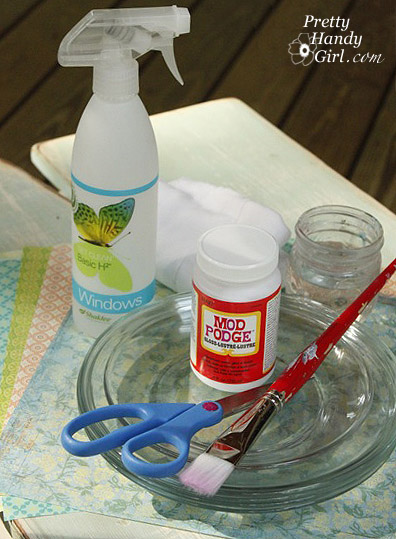
Materials:

  • Mod Podge Glossy
  • Paint Brush
  • Jar of Water
  • Glass Cleaner
  • Paper Towels
  • Scrapbook Paper (thin works better)
  • Glass Plates
  • Recycled Jar or Cans to Dry Plates on
  • Scissors
  • Pencil

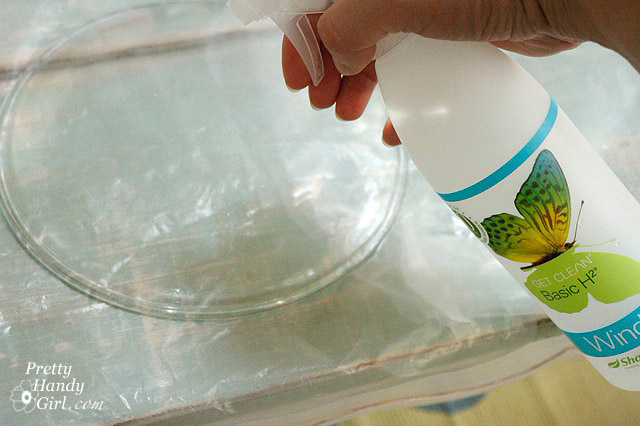
Instructions: 1. Clean the bottom of the glass plates with glass cleaner.

2. Trace around the plate on the scrapbook paper.

3. Cut out the circle.

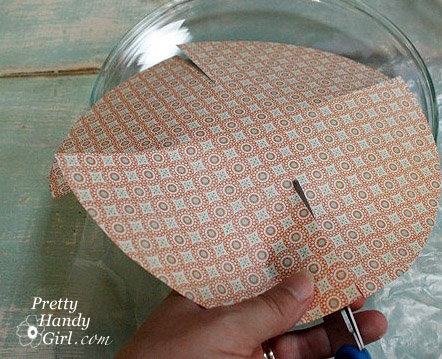
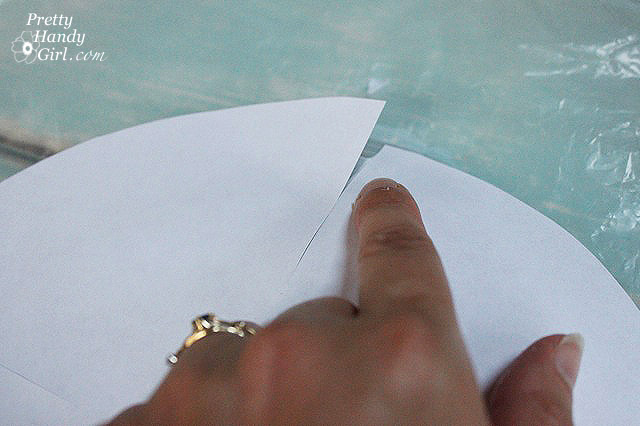
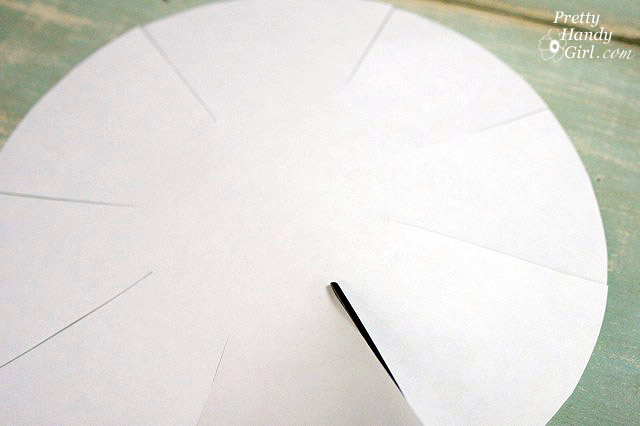
4. Snip four slits into the circle but NOT all the way to the center.

5. Snip four more slits centered between the first set of slits. You should end up with eight cuts equally spaced.

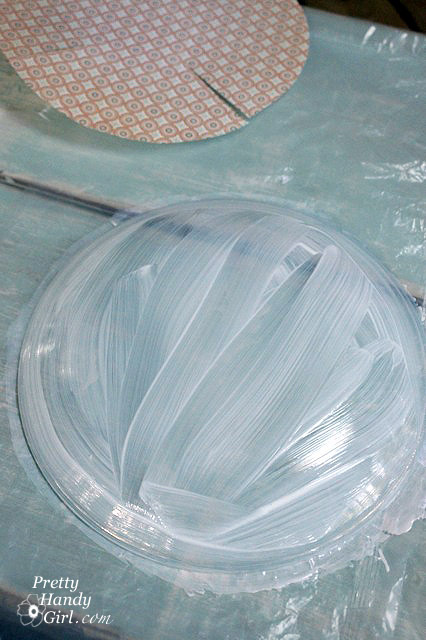
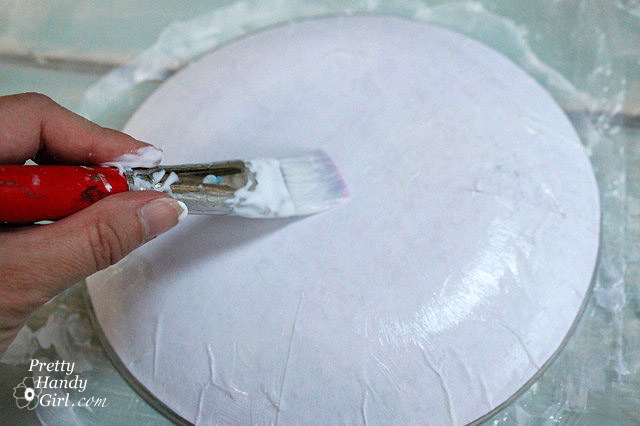
6. Cover the bottom of your glass plate with mod podge.

7. Center the cutout circle onto the bottom of the plate, pattern side down. Gently press the paper onto the plate allowing the paper to overlap slightly at each slit.

8. Liberally apply mod podge over the scrapbook paper.

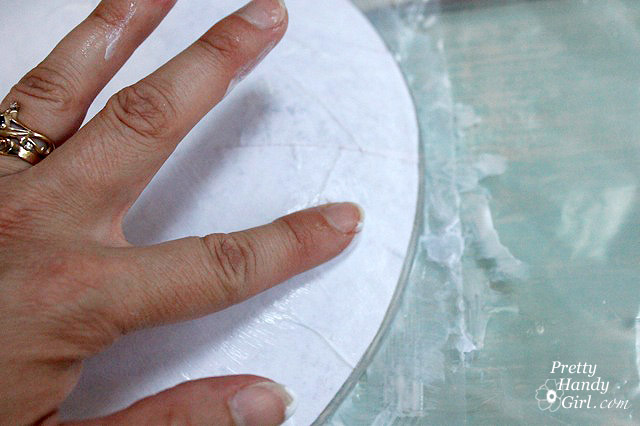
9. Use your finger to smooth out the wrinkles in the paper. But, be gentle or the paper will tear.

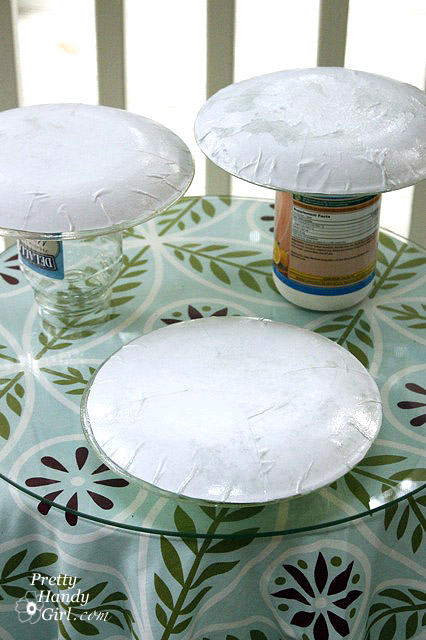
10. Lay the plates upside down on the jars and cans until dry. Add more mod podge if needed to seal the scrapbook paper and glue it down.

Turn them over and enjoy your unique decorative plates. Note: Do not fully submerse the plates in water, wipe them off and wash the tops so as not to mess up the paper side. Stack them with a paper towel in between so they don't stick together.


Load them up with some light citrus sweets and they will be the hit of the party!

 The possibilities are endless with these plates. Think about personalizing them with photos or monograms. What are your ideas for making your own plates?

~~~~~~~~~~~~~~~~~~~~~~~~~~~~~~~~~~~~~~~~~~~~~~~~~~~~~~~

I LOVE this!  Can’t you think how quick and easy this would be to do for holidays or themed birthday parties?  How cute would these be to give Christmas Cookies on over the season?  Oh my brain is spinning with possibilities!  How would you customize yours?  I wanna know!


Related Posts with Thumbnails