Welcome to Frugal with a Flourish!

Enjoy your time here! Don't miss a post by getting email updates any time there is something new. You can also get updates through Google Friend Connect or follow me on Facebook or Twitter to get the latest info and see all the things that inspire me!

[ | Posted in | Add Comment | ]

So for today – I have a tutorial on how to make a Tricycle Diaper Cake.  However, let me start by saying this isn’t something that I made.  This is something that was given to me at one of my showers.  But it was so amazing that I took it apart piece by piece to make sure I would 1.) be able to replicate it and 2.) share it with you guys! 

DSC08186

So here is what you will need as far as ingredients go! 

  • Diapers – at least two jumbo packs
  • Lots of big rubber bands
  • 1 1/2 inch ribbon
  • 1 paper towel tube
  • 2 napkins
  • 1 receiving blanket
  • 1 pair of baby socks
  • 1 zip tie
  • 1 pacifier
  • 1 bib
  • 1 dishwasher basket
  • 1/4 inch ribbon
  • 1 cute cuddly friend (love the giraffe!)

To start – I would make the “tires” first.  Basically – you layer each diaper on top of one another into a tight circle.  One needs to be larger than the other two and the size is something that you might need to judge for yourself based on how big you want the cake.  This one had 25 in the front tire and 18 in the back.

DSC08199

I found it easier when trying to put it back together to get it started like this and get the rubber band around and then shift them into place.  You will need to leave a hole in the center.  Once you get the tire finished you wrap a piece of ribbon around and secure it on the bottom. 

DSC08197

Next you need to make the back axel.  Using the paper towel tube, you need to wrap a napkin around the end of the tube and then put a diaper around the middle.  Then you use a couple of rubber bands and secure the dishwasher basket around the axel. Slide your two back tires on and you are done with that portion of the trike.

axel

Next you have to make the handlebars.  Straighten a hanger and then bend it into a u-shape.  Bend the ends down and tape them down so there are no pokey ends.  Wrap the receiving blanket and secure both the bottom of U and the ends with rubber bands.  Slide socks over the ends.  You can secure the socks with rubber bands and then roll up the ends to cuff.

handle bars -1

Next – thread the hanger through the front tire and overlap the handlebars.  Secure with a zip tie.   Once secured, use a rubber band to secure a pacifier and ribbon on the front.  Tie a bow to hide any evidence of rubber bands.

handlebar

Lay a bib down as your “seat and wrap around the handlebars. 

DSC08187

To connect your front and back pieces – you need to thread a ribbon through the back and front tires.  Get it pretty tight to ensure it doesn’t fall apart or the front wheel doesn’t fall over.  Set your fuzzy friend on top and you are ready to go!

DSC08186

Again – I can’t get over how adorable this was and it was such a great gift.  The other great thing to do for the mom-to-be is to include a little note in the card that tells the size of the diapers and the type of pacifier. 

So what do you think?  Isn’t this just adorable!  I love it!  Would you make it for a shower?  I wanna know!

Linking this up to

Metamorphosis Monday with Susan @ Between Naps on the Porch
Tip Me Tuesday with Laurie @ Tip Junkie
Get Your Craft On with Kim @ Today’s Creative Blog
Tips and Tutorials Tuesday with Beth @ Home Stories A2Z
Transformation Thursday with Gina @ Shabby Chic Cottage
Hookin up with HOH with Allison @ House of Hepworths

[ | Posted in | Add Comment | ]

Well with Memorial Day weekend kicking off the outdoor party season this past weekend I thought I would toss together some party prep ideas that you can use for your own festivities this summer! 

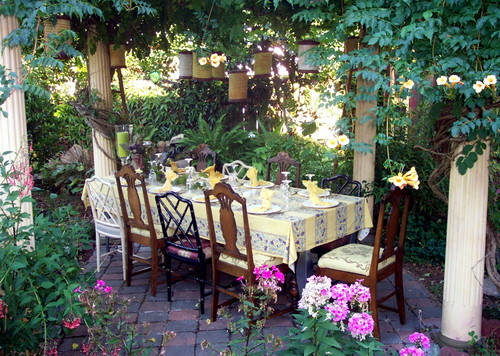
1.  Don’t be afraid to use mismatched regular wood dining chairs as part of your set up

As this picture clearly shows – mismatched wood dining chairs can look eclectic and chic for your next al fresco dinner party.  And let’s face it – you would feel way more like saying “al fresco” with these chairs than you would with some folding plastic ones! 

jary ralston eclectic patio

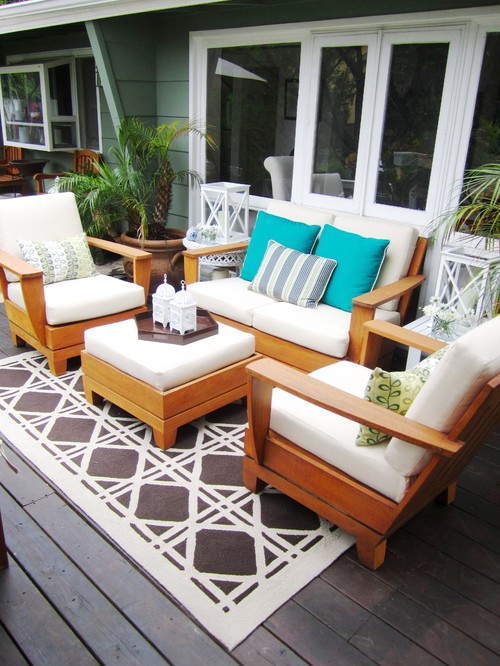
2.  Create conversation spaces

Parties thrive on conversation and good company!  So make sure you set up areas at your party that facilitate that fact.  This seating area provides you all the key components – a comfy place to sit, a seating arrangement that let’s people face on another and a table to set food or drinks on. 

COCOCOZY IN THE HOLLYWOOD HILLS contemporary patio

3.  Make it feel like a vacation

Nothing makes a party feel more like an escape from the real world than giving it a little island vibe!  I love these painted patio chairs.  They create a fun, bright atmosphere without a whole lot of effort!  Throw in some colorful pillows and towels and you are set for an island attitude on your local latitude!

Photo via Better Homes and Gardens

4.  Light up your night

Nothing keeps a party going like a little light!  Let’s face it – it is hard to talk in the dark.  But don’t think you have to get all expensive with your lighting.  This is still one of my favorite ideas – terracotta pots, a little sand and a bunch of plain white candles.  Bonus points if a couple of them are citronella to keep away the bugs!

Photo via Southern Living

5.  Don’t be afraid to use your “fine” china

If it is a small get together – you can really make it feel more homey and inviting by using your regular dishes or even something a little nicer.  Just remember your audience and know when to go all out and when to break out just the Chinet.

WYboy Ranch contemporary patio

6.  Have a “signature” drink

It doesn’t matter if it is a pitcher of sangria or just something colorful like the picture below – but having a signature drink for your get-together can be one of those special touches that makes people anticipate coming! 

Photo via Better Homes and Gardens

7.  Make some shade

If you are entertaining during the daytime – it is advisable to have a shady spot where the fair skinned and overheated can gather.   Umbrellas or canopies can be a great way to set up some shade that is also portable.

New Garden design for country house mediterranean patio

There you go – those are my seven tips for Outdoor Entertaining!  Now what about you?  Do you have a great tip that you would love to share?  I wanna hear it!

[ | Posted in | Add Comment | ]

Whoa …. how are we already through May?  And how is it that I am supposed to have a baby in 5 weeks?  It blows my mind!  Well – before we get too far into into June I thought I would wrap up my favorites from the past month - both here and from around the web! 

DIY and Crafty Goodness

Since we are in the home stretch for getting the Lil Man here I worked on a lot of projects for the nursery!  For starters – I made some custom name art for his room.  And yep I did two versions – one for the blog and one with his real name.  Because I am crazy like that! 

Next I made a custom crib skirt for our crib.  I love the bright colors we have going on in the nursery!

Finally – we got our dresser refinished!  I still can’t believe the before and after on this one!  I am so in love with with new hardware!

before and after

Inspirational Ideas

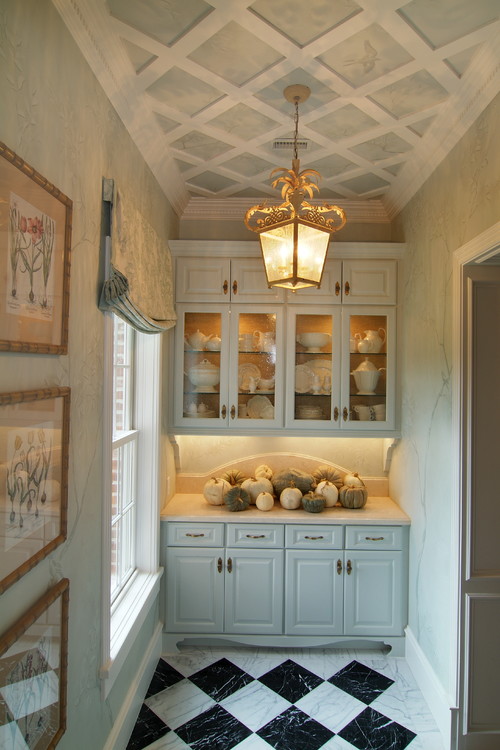
I shared some great ideas with you guys on how to make sure you won’t miss out on decorating up for your ceiling.  I love this idea for using a little molding on the ceiling.

From Around the Web

I love this monogram pillow tutorial from Jen @ Scissors and Spatulas!  No fancy cutting machines here – just a little old fashioned freezer paper!  You are going to love this one!

Photo via Scissors and Spatulas

This was too cool – “paint” your own vintage blue mason jars!  I have one of the vintage ones and I am always on the look out for more while I am thrifting.  But these are a great way to reproduce the look for a fraction of the price and with out all the hunting!  Celeste @ My Greenbrae Cottage was responsible for coming up with this great idea!

Photo via My Greenbrae Cottage

This one is another great idea that totally made my day!  Vivienne @ The V Spot shows us how to spray paint tissue paper!  Brilliant!

Photo via The V Spot

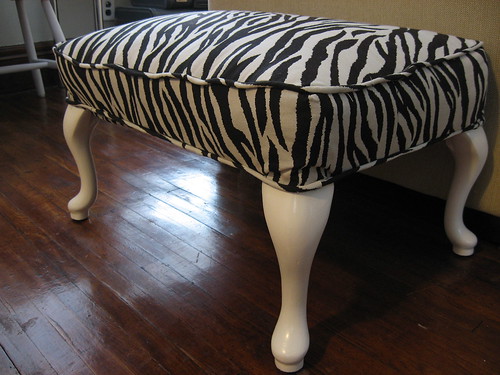
And finally – if you ever wanted to know how to reupholster an ottoman Jessica @ Decor Adventures will show you how to do it!  This is a fantastic tutorial!

Photo via Decor Adventures

So there you go!  Those are my favorites from the past month!  What about you?  Have a favorite you want to share?  Feel free to post it on my Facebook page – I love seeing all your great ideas and favorites there! 


Related Posts with Thumbnails