Welcome to Frugal with a Flourish!

Enjoy your time here! Don't miss a post by getting email updates any time there is something new. You can also get updates through Google Friend Connect or follow me on Facebook or Twitter to get the latest info and see all the things that inspire me!

Showing posts with label Craft Ideas. Show all posts
[ | Posted in | Add Comment | ]

Whoa …. how are we already through May?  And how is it that I am supposed to have a baby in 5 weeks?  It blows my mind!  Well – before we get too far into into June I thought I would wrap up my favorites from the past month - both here and from around the web! 

DIY and Crafty Goodness

Since we are in the home stretch for getting the Lil Man here I worked on a lot of projects for the nursery!  For starters – I made some custom name art for his room.  And yep I did two versions – one for the blog and one with his real name.  Because I am crazy like that! 

Next I made a custom crib skirt for our crib.  I love the bright colors we have going on in the nursery!

Finally – we got our dresser refinished!  I still can’t believe the before and after on this one!  I am so in love with with new hardware!

before and after

Inspirational Ideas

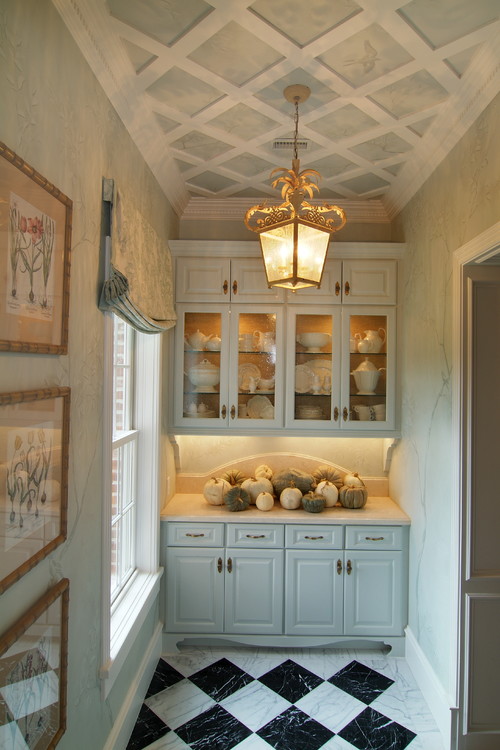
I shared some great ideas with you guys on how to make sure you won’t miss out on decorating up for your ceiling.  I love this idea for using a little molding on the ceiling.
From Around the Web

I love this monogram pillow tutorial from Jen @ Scissors and Spatulas!  No fancy cutting machines here – just a little old fashioned freezer paper!  You are going to love this one!

Photo via Scissors and Spatulas

This was too cool – “paint” your own vintage blue mason jars!  I have one of the vintage ones and I am always on the look out for more while I am thrifting.  But these are a great way to reproduce the look for a fraction of the price and with out all the hunting!  Celeste @ My Greenbrae Cottage was responsible for coming up with this great idea!

Photo via My Greenbrae Cottage

This one is another great idea that totally made my day!  Vivienne @ The V Spot shows us how to spray paint tissue paper!  Brilliant!

Photo via The V Spot

And finally – if you ever wanted to know how to reupholster an ottoman Jessica @ Decor Adventures will show you how to do it!  This is a fantastic tutorial!
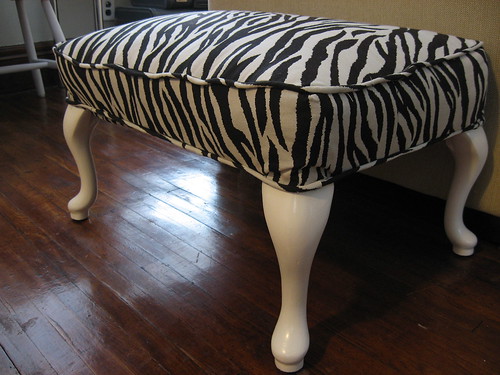
Photo via Decor Adventures

So there you go!  Those are my favorites from the past month!  What about you?  Have a favorite you want to share?  Feel free to post it on my Facebook page – I love seeing all your great ideas and favorites there! 

[ | Posted in | Add Comment | ]

I love hydrangeas!  And for some reason I have had them on the brain.  So I decided I wanted to do a quick wreath with some this weekend.  Here is what I came up with – the rest of the post is how I got there! 

DSC08235

Full lush faux hydrangea stems are normally pretty pricy.  Never fear – I just picked up a couple cheap less fluffy stems at the dollar store and cut them apart with some wire trimmers.

DSC08211

Next I took a couple of them and bunched them together to get that big full look that I love.  Isn’t that a better?!?

DSC08214

Then I added in a little bit of the greenery to give it some more texture and covered a cardboard initial with a little moss!  I love the way it came out!

DSC08232

It makes me smile!  Ah – what I wouldn’t give for a big ole bush of these outside my door!

DSC08234

One more and then I will stop I promise!

DSC08239

So what about you – is there a flower you would just love to have at your house?  Or perhaps you are lucky and you already have that flower in your garden? I wanna know!

Linking this to

Metamorphosis Monday with Susan @ Between Naps on the Porch
Tutorials and Tips Tuesday with Beth @ Stories of A to Z 
Tip Me Tuesday with Laurie @ Tip Junkie
Get Your Craft On with Kim @ Today’s Creative Blog
Hooking up with HOH with Allison @ House of Hepworths


[ | Posted in | Add Comment | ]

Update: The Nursery is finally finished!  Hop over and check out the full reveal!

I am slowly but surely getting all my to-do’s for the nursery done.  And one of those was to get a crib skirt made for our crib.  So here was the before. 

Now – the reason I decided to make a crib skirt was because I couldn’t find any bedding that I liked.  I looked forever trying to find something in my inspiration colors.  And when I couldn’t find anything premade – I started looking at fabric.  Luckily – I found the adorable “Wild and Wooly” fabric at Joann’s and I decided to make some of the bedding myself.  The first thing I started was the crib skirt.  My plan was to just do a simple straight skirt all the way around that way I wouldn’t need a pattern or anything fancy!

For starters – I ironed all the fabric and used just a smidgen of starch to keep it a little crisp.  I find that helps with getting straight even cuts.  Then I cut out plain piece of muslin to the size of our mattress.  Which was really simple because we got the mattress on Amazon – so I just looked up the dimensions there.  Way simpler than measuring it myself!  I added a half an inch on either side to use for my seam.  Next, I measured from the bottom of the mattress to the floor to figure out how long my skirt pieces needed to be (at the highest level – that was 16 inches so I added an additional 1 inch so that when I hemmed either side I had a 1/2 inch seam.  Then I ran into a problem. 

DSC08155

I wanted the stripes to hang vertically – but the fabric was only 43 inches wide.  Which as you can see is just a smidgen too short for my piece of muslin on the long side.  So I decided to stich on some additional fabric on either side and then do pleats to “hide” my seams.  Of course that meant I needed to make it longer than necessary to make the pleats.  I decided to do three pleats – one in the middle and the one on either side.

DSC08147

To do each pleat – I picked a mid-point and and overlapped the fabric by an inch on either side.  Pretty simple – but it works! 

DSC08152

See how it makes a nice pleat?

DSC08153

Once I got all the skirt pieces cut and laid out – I hemmed the three sides that wouldn’t be attached to the base muslin.  Next, I attached them to the muslin.  This is how the final piece looked.

DSC08162

The final product?  Check out the close up below.  I love it!  I will show you the “whole” thing once we get the nursery totally finished!  Right now the whole room looks like a baby shower threw up in there – I have stuff everywhere! 

DSC08172

If you are thinking about making a crib skirt – I would say go for it!  It is pretty simple – the whole thing is just straight seams so it is a really an easy beginner sewing project!  

So what do you think?  Will you try one out on your own?  Are you loving the colors as much as me?  I am sooooo in love with them!

Linking this to

Tutorials and Tips Tuesday with Beth @ Stories of A to Z
All Things Inspired with Robin @ All Things Heart and Home
Make it Yours Day with Carolyn @ My Backyard Eden
Transformation Thursday with Gina @ The Shabby Chic Cottage
Metamorphosis Monday with Susan @ Between Naps on the Porch
Tip Me Tuesday with Laurie @ Tip Junkie

Get Your Craft On with Kim @ Today’s Creative Blog

[ | Posted in | Add Comment | ]

Update: The Nursery is finally finished!  Hop over and check out the full reveal!

So way back in when I went thrifting with some other mid-Tennessee bloggers in March – I found the cutest little name plaque at Goodwill.  Of course – it was a little girly – but I figured for $3.50 I could work with that!  And it had the right number of letters for our Lil Man’s name – which was even better.

goodwill sign

I had an idea of what I wanted to do with it – and the first step was to change out that mat from pink to a different color.  Ever wondered if you can spray paint one of those?  Well the answer is Yes!

spray painted mat

I still had a little of my Bahama Sea Blue spray paint from Krylon and that blue went well with the other colors in the nursery.  So I sprayed away and got a nice even color going on it!  I think the blue looks much better than the pink! 

Next I picked out some cardstock in my nursery colors from Hobby Lobby.  I decided to use a base chocolate color and then “layer” on the bright colors on top of that.  After I picked out a font I liked (Georgia if you are wondering), I cut the letters out with my Silhouette machine.  Then I decoupaged them on to some plain white cardstock.

Word art 1

Once I got the base letter color on, I added the brighter color on top – creating a shadow look.  I really like how it gives it a little depth.

Word art 2

Ha!  Thought I was going to slip and revel our Lil Man’s name?  Nope – I actually made a blog version and a “real” version!  Sorry guys – but that one is going to stay private!  I will just switch them out for when I post pics of the Lil Man’s room!  :)

So anyways – here it is all together!  I love the way it looks!

Nursery Art Final 2

And yep we are using the crib for storage of clothes and blankets!  That is cause hubby is working on getting that dresser refinished!  Hoping to have that to show to you guys soon!

Nursery Art Final 1

I am going to hang it back behind the crib!  Should be the perfect addition for back there!  Stay tuned for more updates soon!  Did you work on anything fun this weekend?  Lemme know!
Linking this to

Metamorphosis Monday with Susan @ Between Naps on the Porch
Thrifty Treasures with Rhoda @ Southern Hospitality
Get Your Craft On with Kim @ Today’s Creative Blog
Tip Me Tuesday with Laurie @ Tip Junkie
Show and Share Day with Chris @ Just a Girl
Tips and Tutorials with Beth @ Stories of A to Z
Creative Collage with Denise @ The Cottage Chick

Spray Paint Party with Sarah @ Thrifty Decor Chick

[ | Posted in | Add Comment | ]

Can you guys believe tomorrow will be May?  Isn’t that just a wee bit scary?  The year will be halfway over before we know it!  I also can’t believe that there is only another 10 weeks until my lil man is supposed to be here.  Crazy!  Well – before we get into May, I thought I would share with you guys some of my favorite posts from this past month both here and around the web!  Let’s go!

DIY and Crafty Goodness

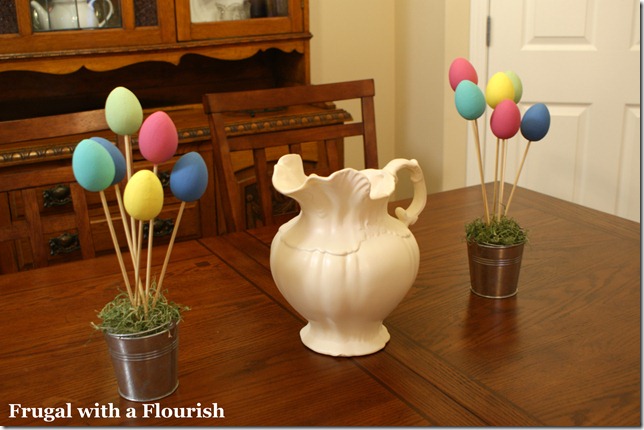
For starters – I made some Simple Easter Centerpieces for our dining room table.  I find it totally strange that I decorated for Easter this year – but I just felt possessed to do so.  Has to be all those maternal hormones running around!

I also finally replaced my ugly vertical blinds with a sliding panel solution!  I  love these things – and I may gussy them up at some point with a little trim or something.  In the meantime – I am just glad to have something that lets in the light without letting out too much of our privacy!

Around the House

Another thing that has been on my to do list for forever was to do a little gallery wall in my hallway.  So I got this little collection of silver frames all set up!  (Love silver spray paint!)  The hubby really loves it too – says it makes his day to get to see all our family everyday! 

I also updated my mantel.  Ok – it is a speaker shelf – but I call it a mantel!  I added some more spring colors and textures.  I really like how it plays off the white accents around the TV!

Inspirational Ideas

I ran through some great blue and white combos – starting from really light blue and going all the way to deep dark navy!  I loved getting to see your comments on what shades you guys preferred!  Feel free to hop over and add your two cents if you missed out on that little conversation!   I think one of my favorites was this blue bedroom overlooking a blue sea!  Ah …. I wanna go hang out there! 

I also did a spring take on my “Fall is … Cozy” post and did a “Spring is … Fresh!” post!  I loved sharing with you guys they way I find fresh in design and decor!  My favorite – this picture with all the flowering branches!  Swoon!

Tips and Tricks

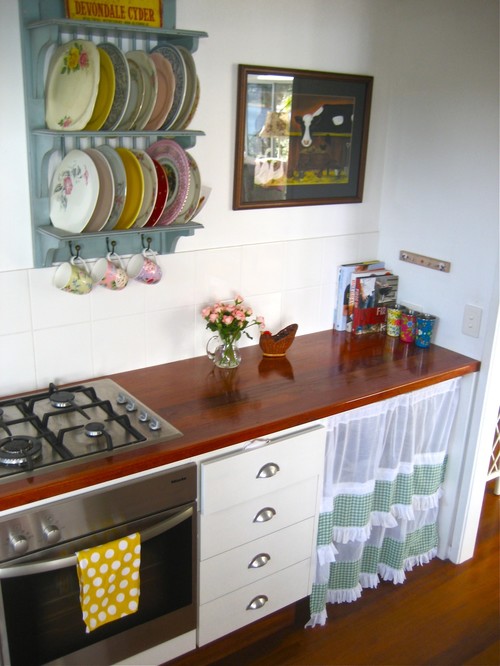
I think my favorite post on tips from the month was the one I just posted this week on 10 Ways to Display Dishes!  Dishes are a super affordable and fun way to infuse all kinds of color and texture into your home.  I think this little vintage plate rack was the favorite based on the comments! 


Other Posts and Ideas from Around the Web

So those of you that follow me on Facebook have probably already seen these!  That is where I share all the great ideas I have found while running around online!  There were a ton of great projects that I featured this month – but these were my favorites!
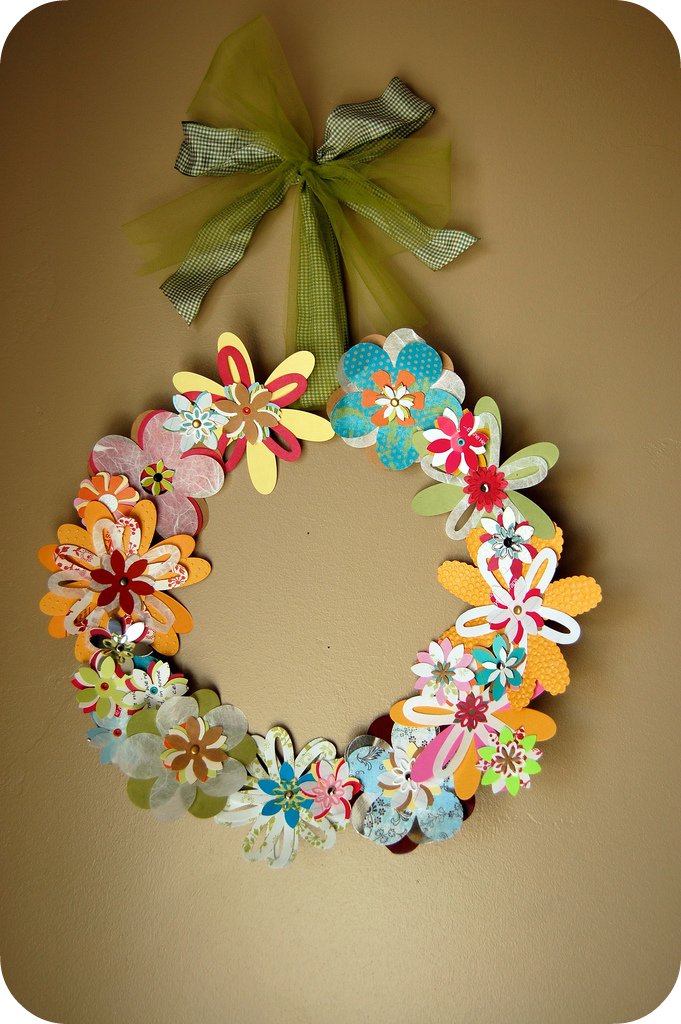
First off – I am in love with this paper flower wreath from Kami @ No Biggie.  Isn’t this just adorable and amazing!  And a great way to get through some of your scrapbook paper stash! 

Photo via No Biggie

Next up, I was seriously debating changing my whole Living Room wall decor when I saw these amazing Ballard knockoff mirrors that Alicia @ Thrifty and Chic made.  I am in love with these!  Would you believe she made them for a mere $15?  Ah-maz-ing!

Photo via Thrifty and Chic

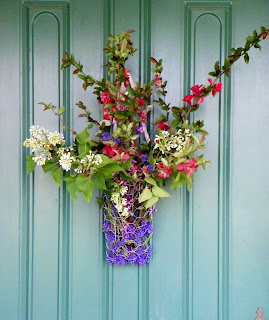
Next – my friend Erin over at Peony Wire Works makes the most beautiful things out of Chicken Wire.  But nothing she has made has been as beautiful as this gorgeous spring bouquet.  Love it!

Photo via Peony Wire Works

So there you go!  Those are all my favorites of the month!  Have a favorite post you want to share?  Yours, mine, someone else’s?  I would love to see it!  Post it in the comments or on my FB page!!  :) 

[ | Posted in | Add Comment | ]

I know we are coming up on Easter and if you are like me you might be interested in adding a few touches to your home!  I added mine through my Hidden Egg Wreath and Easter Egg Topiaries.

But if you are looking for something a little different – I have found a bunch of fun projects for you to tackle or put on your wish list!  Here we go!

If you want a little bling in your life – you could make some glittery eggs like my friend Karen @ Strictly Simple Style made!  Love these!

Photo via Strictly Simple Style

Aren’t these paper hydrangea eggs from Anne @ Copy Craft adorable!  She made these using just a hydrangea paper punch and some plastic eggs!   So creative!

  Photo via Copy Craft

I have been trying not to inundate you guys with all the cute baby stuff I have been finding – but these just can’t be ignored.  Isn’t this onesie so precious?  Amanda @ Handprint and Footprint Art made this adorable onesie with fingerprints!  Ack!  So cute!

Photo via Handprint and Footprint Art

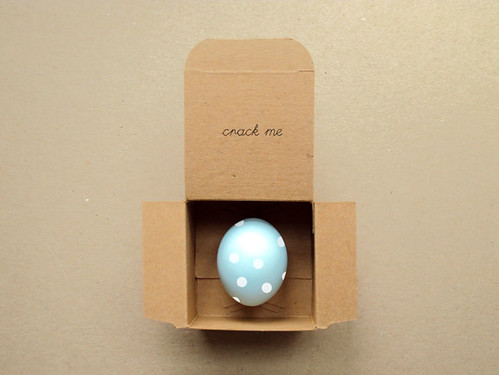
This fortune cookie egg is so adorable!  This was featured at Poppytalk and I love the idea – you crack the egg to read your “fortune” inside! 

Photo via Poppycock

Something about Jellybean topiaries is decidedly Easter – but these could be cute at parties year round!  Abbi @ My Garden of Eden is responsible for these lil cuties!

Photo via My Garden of Eden

I love the idea of making personalized Easter pails – aren’t these just adorable!  Kierste @ Brown Paper Packages made these with her Silhouette!

Photo via Brown Paper Packages

Finally to round us all out, I found these pearl egg topiaries from Patrice @ Lemon Tree Creations.  I actually have some pearl strands like those and this has already got me thinking!

Photo via Lemon Tree Creations

So there you go – some great Easter craft ideas to get your going!  Have a favorite?  Have you got an Easter project that your working on?  I wanna know!


Related Posts with Thumbnails