Welcome to Frugal with a Flourish!

Enjoy your time here! Don't miss a post by getting email updates any time there is something new. You can also get updates through Google Friend Connect or follow me on Facebook or Twitter to get the latest info and see all the things that inspire me!

[ | Posted in | Add Comment | ]

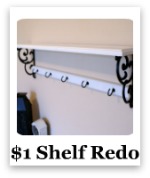
I hope you all had a great holiday weekend! Ours was fantastic - my mom and lil bro came down and we had a great weekend and ate way too much food. They took off this morning and I got to work on the shelf I got for a $1 at the Rt. 52 Yard Sale last weekend. Check it out below. (Yeah - I know it says $2 but I talked em down to a $1!  I have mad negotiating skills!)


I knew as soon as I saw it - I wanted to redo it and hang it above my sewing desk I just refinished.  So approximately 5 minutes after the fam took off this morning, I was changed into my painting clothes and was in the garage dismantling the hardware from the wood.  First, I did some spray painting.  To get an even coverage around the hooks and the screws, I stabbed them into a piece of cork board.  

So easy to get even coverage that way!  See!  I also got a first coat on the side scroll pieces.


Next, I did two coats of Zinnser's Bulls Eye Water Based Primer and then two coats of Valspar Ultra Premium High Gloss Paint in Woodlawn Bedroom White.


I don't know if I can stay enough about how much I love the Satin Finish Rust-oleum in Black.  (No endorsments here - but man I love the finish!)  Doesn't it look fantastic!

So here it is - the finished project!  Oh I love it! 

See how nice it matches with the sewing table!  And I love that it only took me a half a day to finish and get it up on the wall!

Oh and let's do one more close up!  Man I love that Satin finish!

I think this is the best $1 I ever spent!  Totally love how it turned out!  Next up - I am going up the wall!  I am going to make a Gallery Wall above the shelf.  So how high do you think that should go?  All the way to the ceiling or to a foot or so from the top?


Linking this up to 


Visit thecsiproject.com

[ | Posted in | Add Comment | ]

I did get the guest bedroom cleaned out last weekend.  It is coming together but I kinda left one thing out when I was thinking about it last week.  See it is a guest bedroom maybe 2% of the time.  The rest of the time it is my craft room.  So I need some inspiration of what I should add to the room to complement my sewing desk to make it a functional work space.  Here are some spaces that have got me thinking!

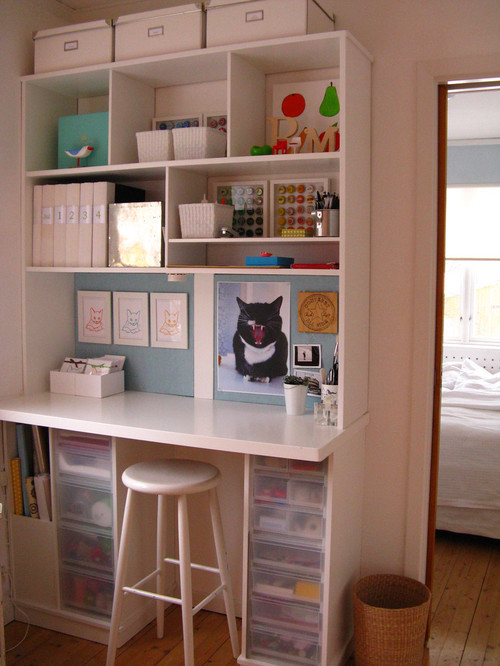
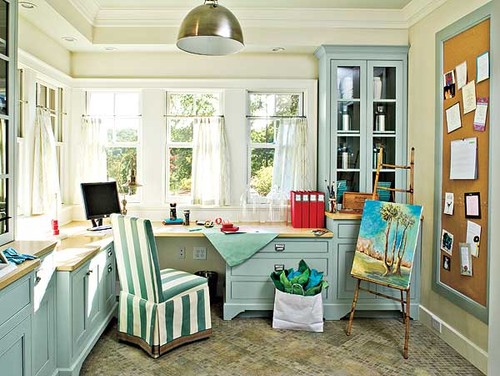
I love how compact but functional this space is with all the built ins.


Chez Larsson- craft space

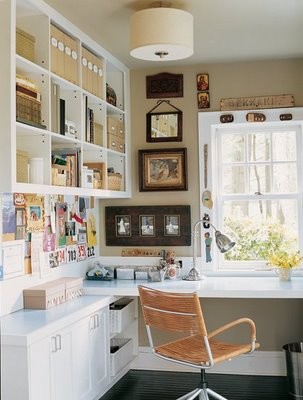
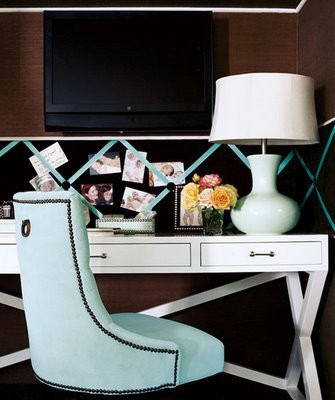
Hmm - again more built ins.  But also cute frames and a place to post things.

More This eclectic home office

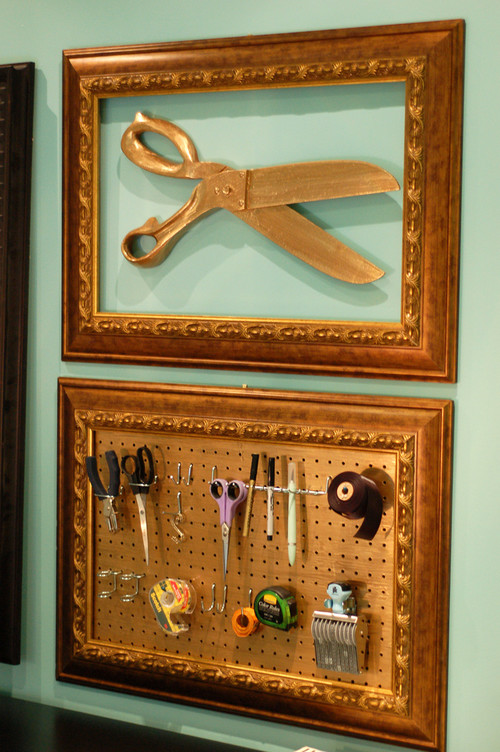
Ok - so this is fantastic!  A place to hold things you need plus something decorative.
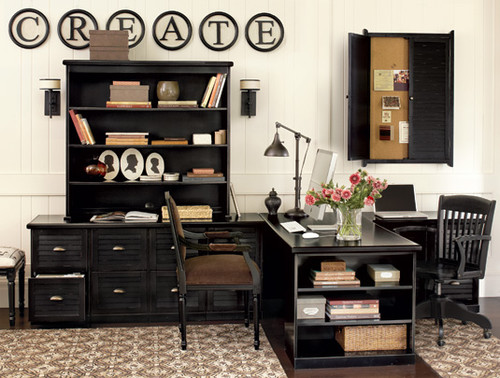
Ballard is always on their game.  I love the way this workspace is laid out.


Home Office Designs | Home Office Decor | - Ballard Designs modern home office

Oh what I could do with a wall sized cork board. 


Home Office Inspiration traditional home office

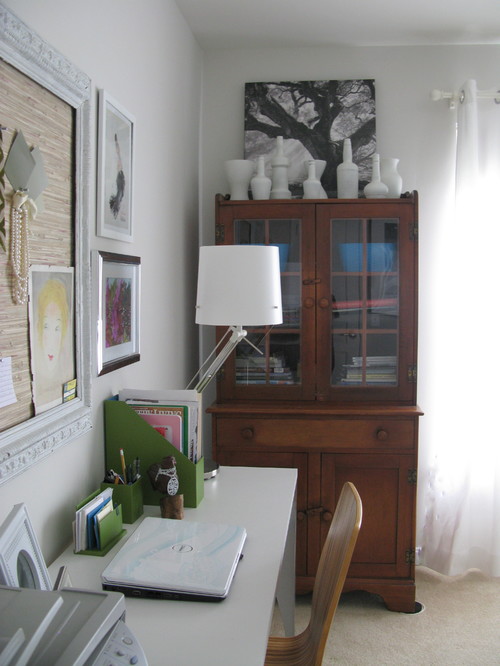
Hmmm - again more cork boards.  And a beautiful collection of white vases.


Shoshana modern home office

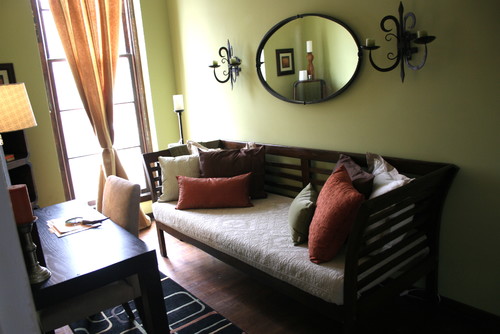
Ok - so this is more of a bed shot than a workspace shot, but it shows how both can exist in the same place.


3XX Queen Street eclectic home office

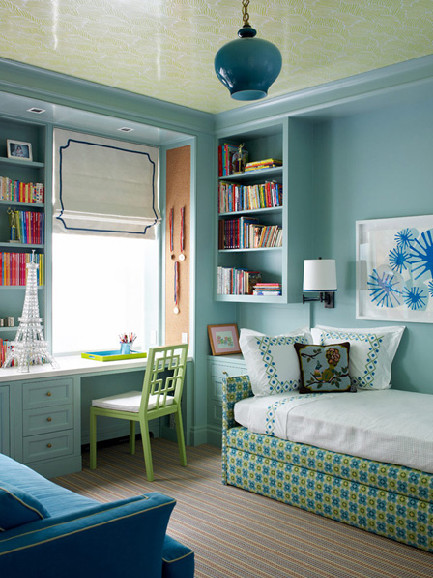
What is there not to like about this room?  Fantastic roman shade, great color on the walls, and beautiful bedding.


Home Office Inspiration traditional home office

How adorable is this!  I love french memo board treatment on the wall.


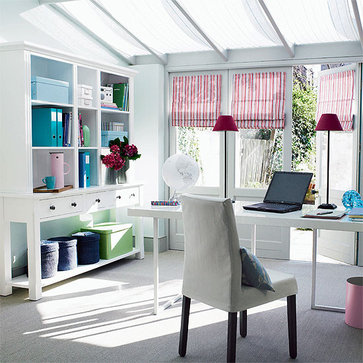
Home office inspiration contemporary home office

So crisp - so organized!  And I love those lamps!


white office modern home office

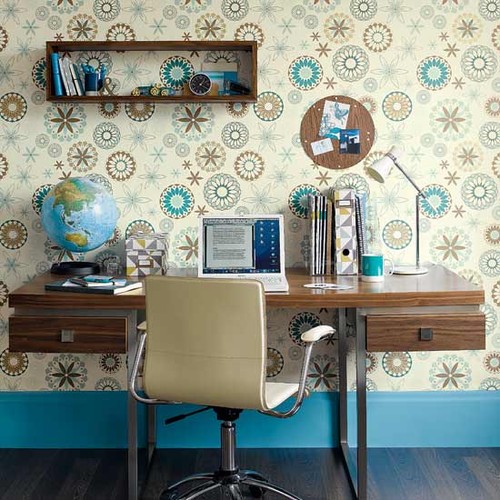
Isn't this wallpaper amazing!  Love how they incorporated the wall decor in with the colors and shapes.


idealhomemag- contemporary home office contemporary home office

So there we go!  Which one is your favorite?  What things are a must for your work and craft space?


Linking this up with Melissa's Inspired By Party!  Hop over and get inspired too!

[ | Posted in | Add Comment | ]

I wanted to show you guys how to build one of my lattice planters from my Patio Book Nook.  Now - this is the first thing I have ever built.  Period.  I also didn't have any instructions.  I had emailed the person who built my inspiration pieces on HGTV Rate my Space - but was impatient and by the time they emailed me back, I already had one of them built. (Whoops! Oh well - mine are a little different anyways!)

So let's get into this shall we.  First, this is what you will need
- 1/2 inch treated plywood (I used 3 - 2x4 sheets that would fit in the car, if you have access to a truck you can get just one 4x8 sheet)
- Fence Pickets (I used 5 of the 5/8x5.5x6 that normally around $1.38 a piece)
- 1x2x8 Boards (I used about 8 of these)
- 2x8 Lattice Panels (One of these will make a box)
- Some 1.25" Treated Deck Screws
- Some 1.25" and 1.5" brad nails for your nail gun. 

Tool wise you will need
- A Saw of some sort that you can make straight cuts with (I used a jig saw cause that is what we have)
- A Drill
- A Nailgun
- A miter box and saw or a miter saw

Ok.  How much of the lumber you use will be directly related to how big you make your boxes.  I will give you what I used to make a 44 inch box but I made a smaller one too (33 inches) so email me if that is more your style.  To start, take your fence boards and cut them down into 4 - 18 inch pieces.  These are 5.5 inches wide so I used that to determine the length and width of my box.  

Once you get your fence pickets cut, lay them out and measure what they actually amount to since there is some variation in the width of the boards.  Figure out a happy medium with both sides and then go ahead and cut out the sides and edges of your boxes.  Mine was 44 inches long by 18 inches high by 11.25 inches wide. 


I nailed the box to get it set up and squared and then drilled some wood screws in to get it nice and sturdy. 

Oh and don't forget to flip it over and drill some draining holes in the bottom.

Then you just need to line up and nail on your fence board trim.  Don't worry about the dog eared pieces of your fence board or any uneven edges - we will cover that with the trim!  Oh and the nails will go all the way through the boards and leave some sharp edges.  I just bent them down and hammered them flat against the inside of the board. 

Now you will want to cut your trim pieces out from your 1x2s using the miter box or miter saw.  You only need to add trim to the front and sides of the box.

I did a vertical piece used as a trim around the top and bottom.  Then to make the top of the box more presentable, I did another piece horizontally laid across the top to finish it off.  (I am sure there is some building term for this - but I don't know what it is!) My long pieces were about 46.5 inches long and my short pieces were around 13.5 inches long. You will want your short pieces to be just long enough to cover to the end of your short side, because your frame will need to attach to the back of your box.

Ta-da!  Now you have a box. Notice that you have a flat back edge that you will mount your lattice frame onto. 

To build the lattice frame you basically make a sandwich with a tasty lattice inside!  I made my frame large enough to accommodate a 42 inch tall piece of lattice.  I wouldn't go much larger than that or it gets wobbly.  For starters, you make one side of your frame and get it squared. 
 
Next, cut your lattice down, square it up and overlap your edges.  Make the other half of your "sandwich" (minus the bottom back of the frame - you will understand below) and then lay over top and nail where the lattice meets the frame on both sides.  I would also pop a couple of nails where your lattice overlaps and just bend them down on the back to keep your two pieces together.

To finalize your lattice frame, you will need to cut two long side pieces that will run all the way from the top of your lattice sandwich down the back side of your board.  Attach those to the sides of your frame and then mount it onto the back of the box.  Put in a few nails into the bottom of the frame and then nail in the legs to the back edge of the box. 

See - you will nail it into the back of the box here. 

Then add a few wood screws to the back to get it real sturdy and secure. 

Now you put your final back frame piece on and your done!  I added some bricks and then some gravel in the bottom of mine to create some good drainage.  This box took me about two and a half of 64 quart potting soil bags to fill.

So there you go.  I realize most of that was as clear as mud - but I am not a carpenter or a designer.  Even if I had to do it over again - I would still muddle my way through it because I LEARNED so much about working with wood.  Sure, I measured things way more than twice and made cuts that afterwards made no sense.  I wasted a little wood - but I learned so much about how what I thought I wanted to do wouldn't be practical when executed.  I would highly encourage you to try it out with as little direction as possible so you can LEARN about your tools, measuring and problem solving a carpentry problem.  Once you can learn that - you can tackle anything! 

So let me know - do you think this is a project you could handle now that I have broken it down or does it still feel to daunting?  Have you ever built something from scratch without plans?  I would love to hear about it!


Linking this to 
Show and Share Day with Chris @ Just a Girl 
Transformation Thursday with Gina @ The Shabby Chic Cottage 
Modern Craftswoman Monday with Rory @ Tools are for Women Too 
DIY Day Outdoor Edition with Kimba @ A Soft Place To Land

Also linking this up to the CSI Project's Hardware Store Challenge because everything in this project came from a Hardware Store!  Go over and join the fun!


Visit thecsiproject.com


[ | Posted in | Add Comment | ]

Anyone else hit up some yard sales this weekend? I did! Saturday was the TN Rt. 52 Yard Sale which is 95 miles long and only 15-20 min from my house! Now I only did about 15 miles of the sale but it was fun and seriously I was beat!  I also got some fantastic treasures I have to share with you guys!  

The fun thing about this yard sale is that people team up to use their friends and family's land along the highway.  There are big wide shoulders off each side of the highway that basically became a small parking lot in front of each of these homes. And because there is team selling going on in most places - you end up with a great selection at each stop!

At one of my first stops I got this fantastic shelf!  The wood is in great shape and those hooks are HUGE.  And I got it for just a dollar!  I can't wait to sand it down and paint it.  It is going above my sewing desk in the guest/craft room and it looks fantastic now that it has been transformed!

Next, I found this group of treasures.  That little mirror's frame is adorable - I love the detail and once it gets a coat of paint it is going to look fantastic!   It too was just a dollar.  The bowl has some great grape detailing on the outside.  It is going to be a part of my white serving wear collection to go on top of the plant ledge in the kitchen, above the bird plates.  It was only 75 cents!  Love it!  And the spice rack set with matching wood lids is also getting a coat of paint and will be used in the craft room as well.  (I will give you three guesses on what I am going to store in the bottles - no spices here!)  It was only three dollars which is a great deal for a full spice jar set.

I also got these two wood frames (sturdy as can be) for 50 cents a piece, an 8x10 mat new in package for 10 cents and a pack of eight decorative balls for $2 bucks!  The frames are "Heirloom" pieces now!

Finally - my score of the weekend was this mirror.  Gorgeous and only $10!!  Perfect for that empty space in the dining room! 

So what about you?  Score any deals this weekend?  Tell me about them and head over to Rhoda's and link em up to her Thrifty Treasures party!

[ | Posted in | Add Comment | ]

Finally - the to-do list and the weather have cooperated and I can show you my patio redo!  So what we started with was this - the world's smallest patio.  And I wanted to turn it into a book nook, since a single chair was almost the only thing that that would fit out there.


And here is what I have done to it!  Check it out!

Ta-da!  I love it!  Here are some more pics!  (I apologize in advance for the pic intensive post!) A view from farther away.  It looks great from the street! (And per the hubby - my neighbors are a lil jealous of it!)

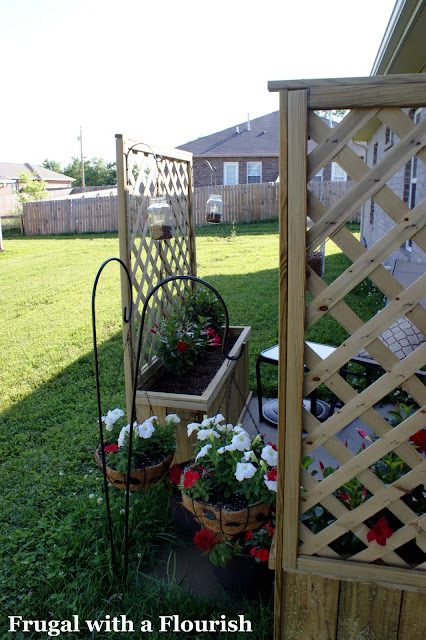
So let's break down the changes I made.  First, I built these fantastic lattice planters.  I was inspired by this project at HGTV Rate my Space.  I am going to do a run down this week on how to build them.   

I hung my PB Knockoff Mason Jar Lanterns on them!  They are sooo cute!

I also added two Shepard's Hooks with hanging baskets and some other planters.  I am loving all the flowers out here!

Speaking of flowers - I am in love with these!  They are called Mandevilla or Brazilian Jasmine.  They have the most gorgeous blooms! 

I am in love with them (I know I already said it once - but I mean it)!  So much so that I am actually going to try to winter them inside once it starts getting cold! 

They are sooo beautiful!  They are supposed to bloom all summer long and can climb a trellis to over 15 feet high!  I love em! I plan on posting so more pics later this summer so I can show you their progress!

And of course - every book nook needs a place to sit and read.  Here is mine.  My chair is a rocker - which I love.  I also have an umbrella for the stand under that table that I can use to shade my fair-skinned self if it is too sunny!  And of course, a comfy pillow!

Ahhh... now if you don't mind, I have a glass of iced tea and a book to get in to!  Anyone got any good summer reads for me this summer? 

**UPDATE - the "how-to" build these beautiful boxes is up!  Check it out!

Linking this up to
Met Monday with Susan @ Between Naps on the Porch
Made it Monday with Jules @ The Persimmon Perch
It's So Very Creative with Cheri @ It's So Very Cheri  
DIY Day with Kimba @ A Soft Place to Land
Trash to Treasure Tuesday with Kimm @ Reinvented
Saturday Night Special with Donna @ Funky Junk Interiors

And because this was my FAVORITE project of the month, I am also linking it up to the Best DIY Projects of May Party with Traci @ Beneath My Heart.  Head over and check out the rest of blogland's favorite projects!


Related Posts with Thumbnails